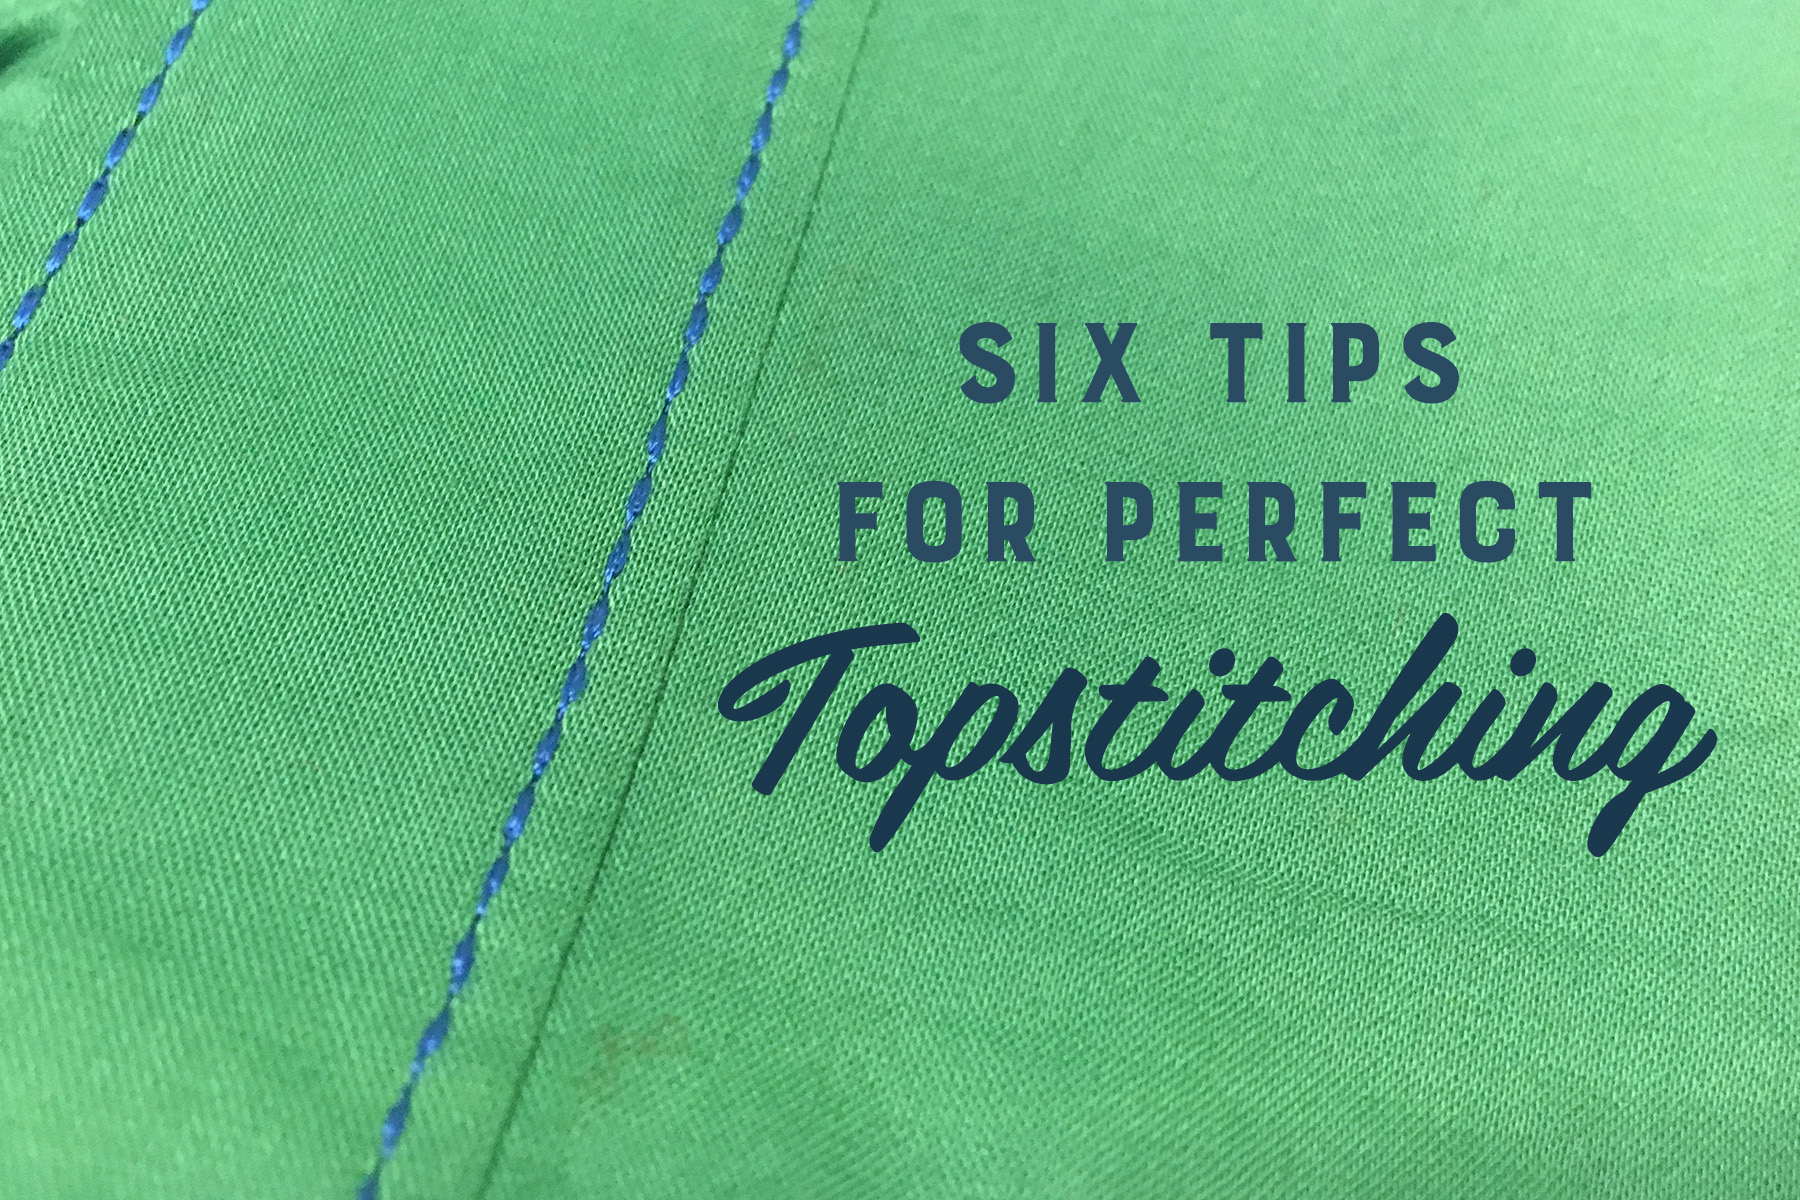
Six Tips for Perfect Topstitching
Good morning, WeAllSew! Today, we’re talking about one of my all time favorite dressmaking techniques: topstitching. Nothing pulls a blouse or shirtdress together quite like beautiful, perfect topstitching. Whether you opt for a pop of color, or the sleek look of tone-on-tone stitching, this is one skill that elevates the finish of any garment.
Of course, it can also be kind of a nightmare for the home sewist. Who hasn’t ripped out wonky lines of stitching or groaned at imperfectly turned corners? I’ve definitely had my share of topstitching headaches, over the years. Luckily, there are some tips that can up your embellishment game. With proper planning and some clever, professional secrets, anyone can have gorgeous topstitching every time!
Tip #1: Plan, Before You Sew
I know, y’all. This first tip seems so obvious, but bear with me. One of the biggest mistakes people make when topstitching garments is forging ahead, without a proper plan. Topstitching is such a visible detail, one that will draw the eye wherever it’s placed, so you’ve got to take care with it.
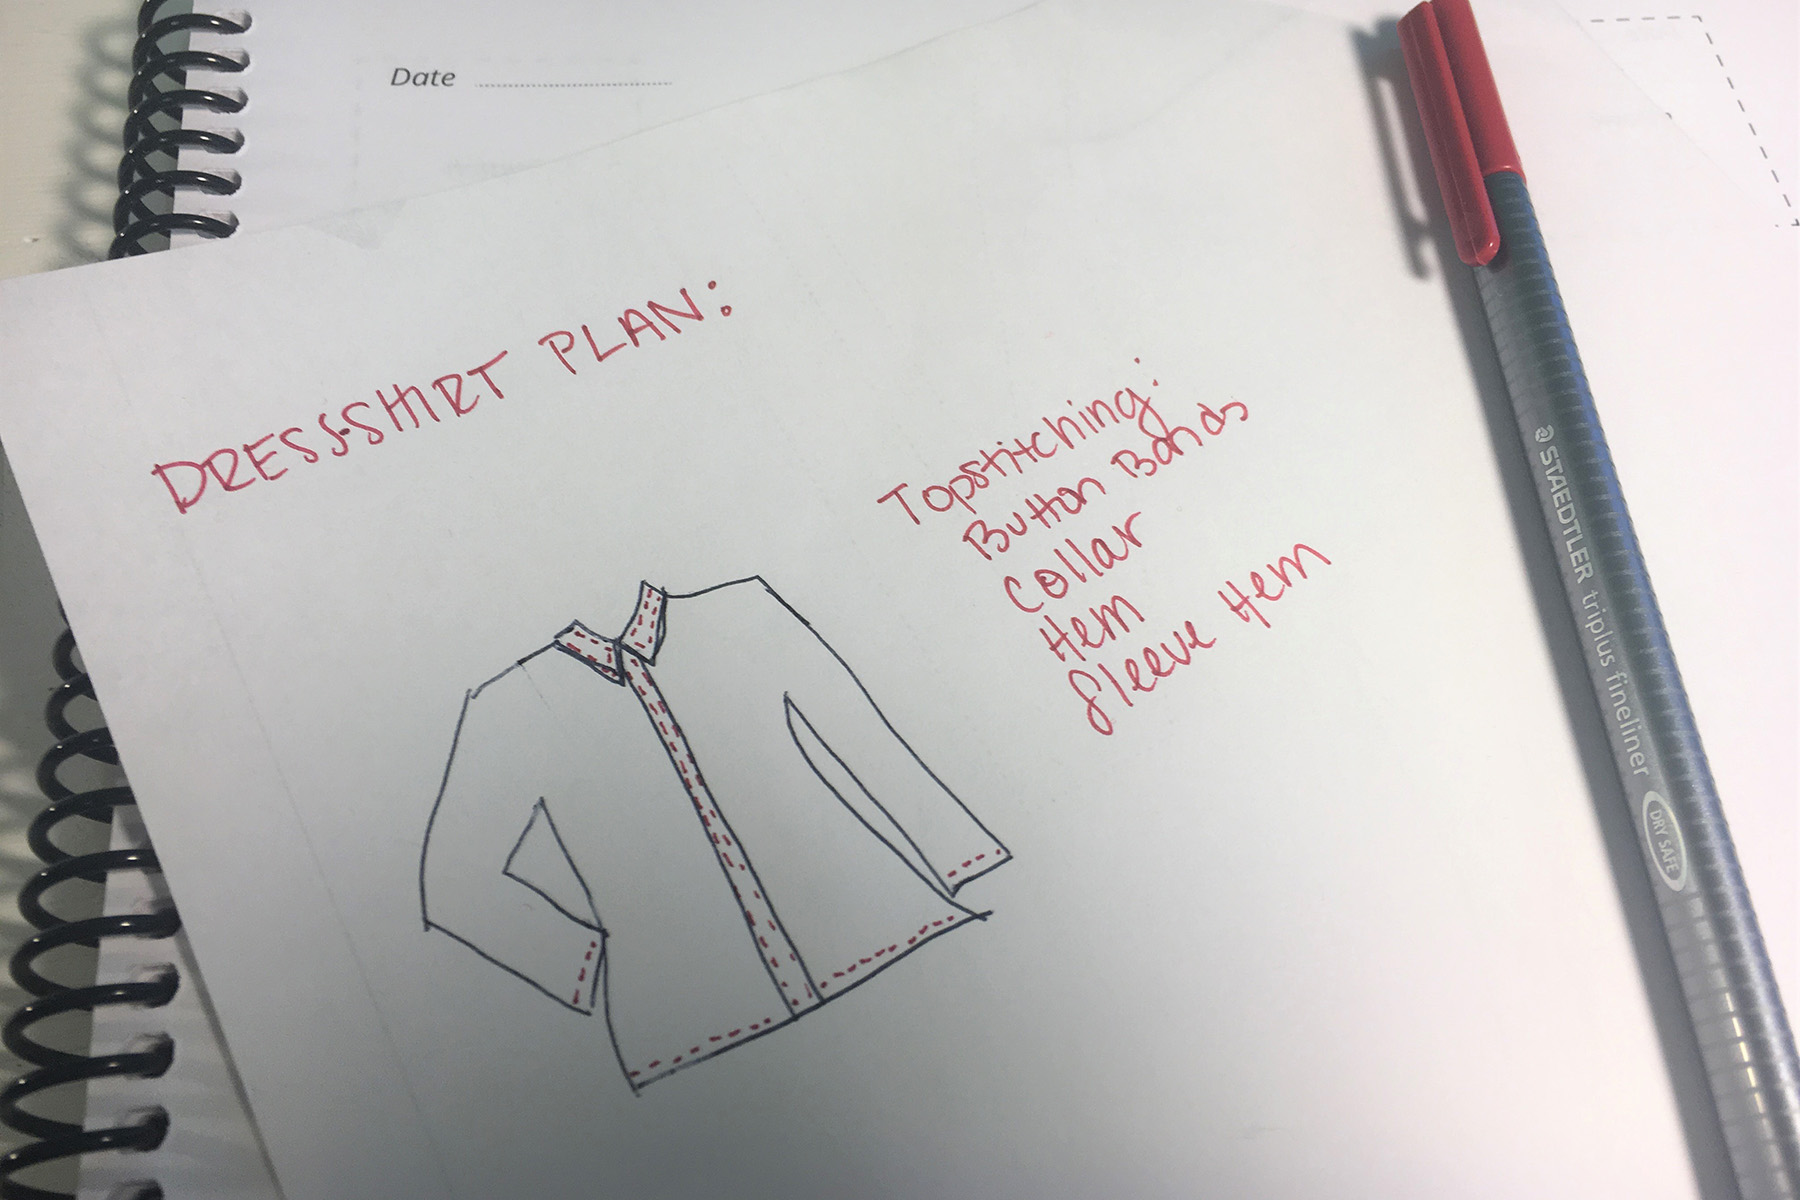
Draw out a rough sketch of your garment, using a croquis if you like or just the line drawing on the pattern envelope, then map out where you want topstitching. Will you add it to the collar and the button-bands? Do you want to use contrasting thread in some places, but tone-on-tone in others? I tend to save contrast topstitching for the details of a project, like cuffs and collars, while any machine-sewn hems are done in a thread that blends well.
Additionally, take a look at your pattern pieces. Note places your topstitching lines might intersect, or corners that you’ll need to deal with. Knowing that you have these complications ahead of time will keep you from having any odd overlaps in lines of stitching or misaligned rows near one another. Mark pivot points and intersections on your garment in chalk, so that you know where they are. For especially difficult areas with lots of pivot points, like collar stands, start in the middle of the piece, instead of at the corners. This will give you more control and keep both sides symmetrical.
If you’re using decorative topstitching, practice on scrap pieces first. Depending on the measurements of your pattern piece, you may not be able to get a complete pattern at the ends of your topstitching. Plan for that! Work from the visible edges toward the seam allowances, so that the shortened end pattern isn’t visible in your final garment. For intersecting lines of decorative stitching, start each line in the corner where they meet, instead of pivoting, so that your pattern isn’t interrupted. You can easily hide small overlaps in less visible areas, such as collar backs, or add a few linking stitches between topstitching patterns that are a bit too short.
Tip #2: Know Your Thread Options
Not all thread is created equal, kittens. Your topstitching thread choice will greatly affect the final look of your garment. Do you want something that will add more texture, blend in beautifully, or provide a bright pop of color and contrast? There are a few options for thread types, but these are the three most common:
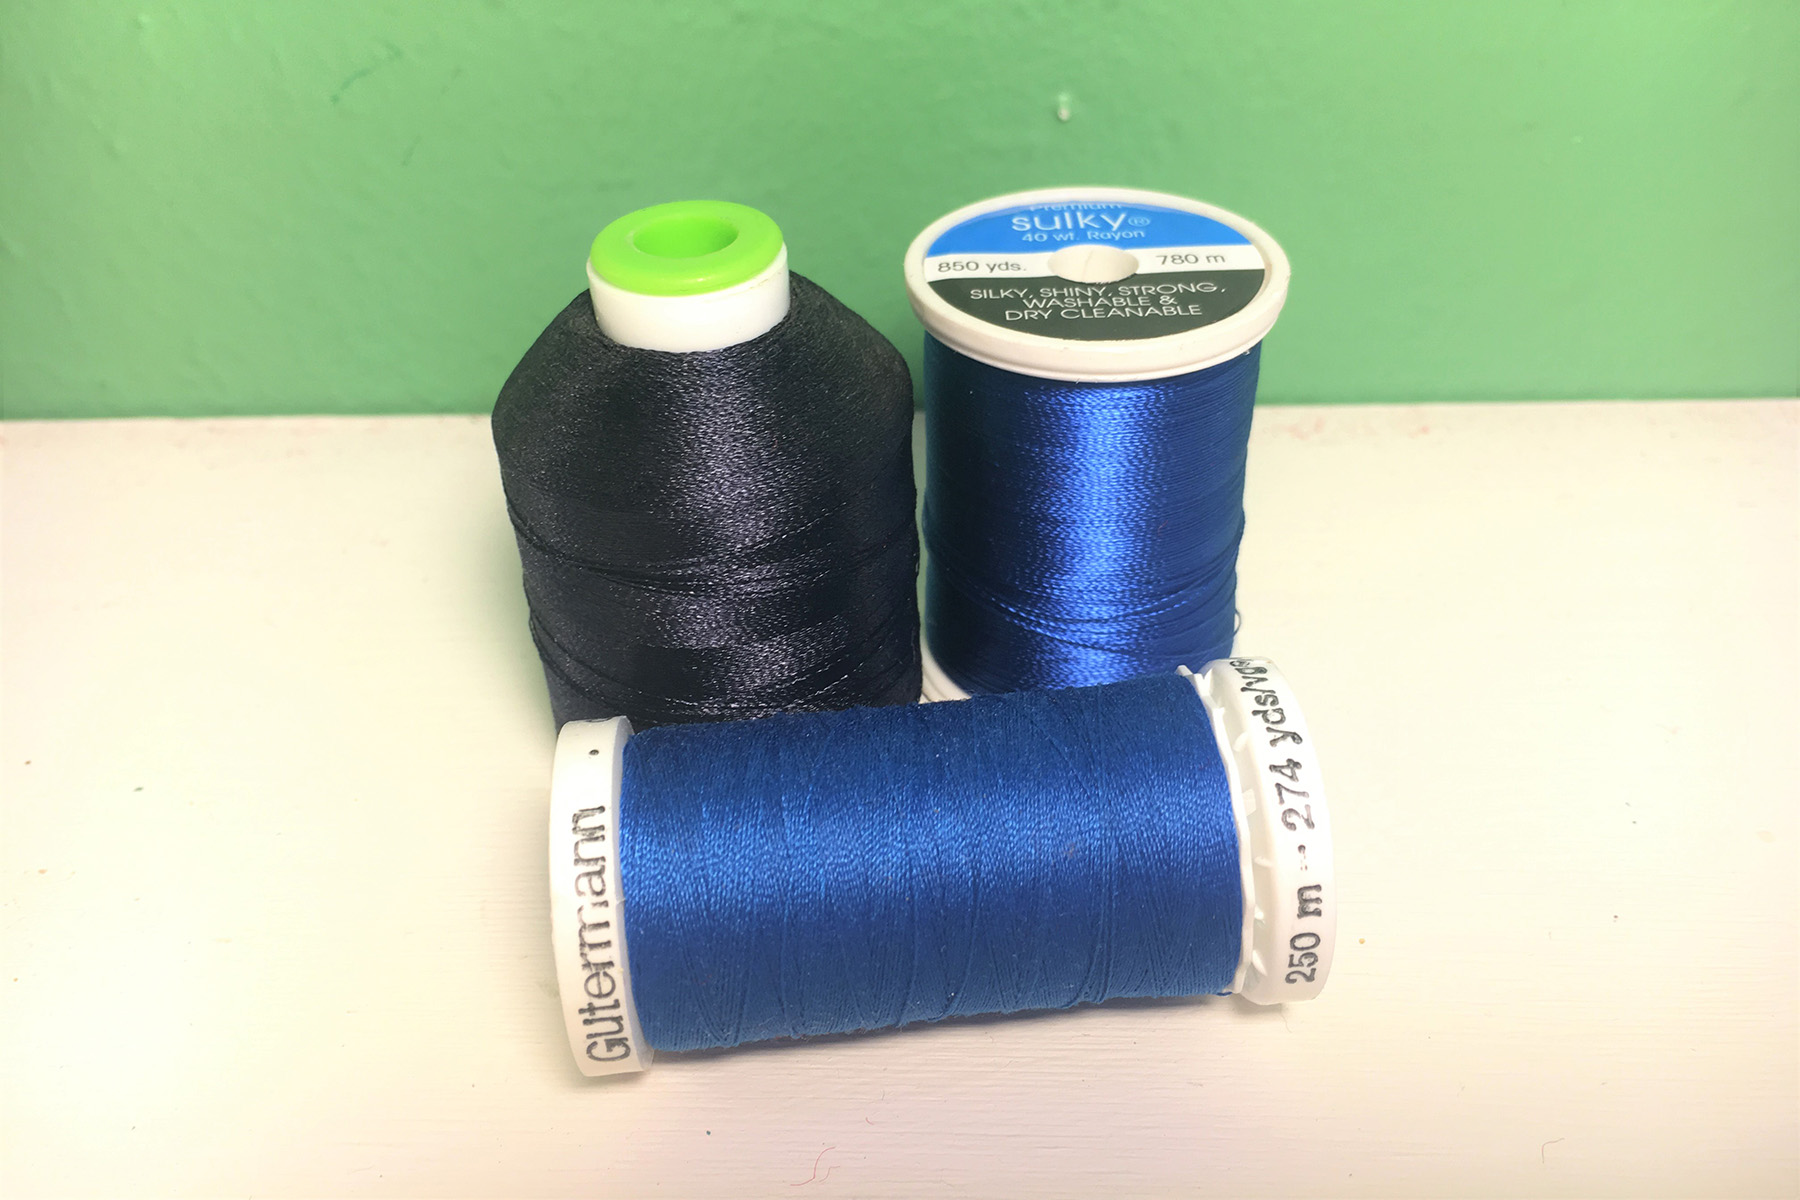
Regular weight — That’s right, your regular sewing thread works for topstitching, as well! If you’re sewing with a lighter weight fabric, or want stitching that blends well into your garment’s design, normal sewing thread does the trick beautifully. It provides a more subtle effect, while still giving a bit of additional oomph to design details. If you want a slightly bolder look, but don’t want to switch over to a specialized thread, you can also double up with two strands of regular weight thread. Use an additional spool pin, but thread the separate threads together through your needle eye. If you don’t have an extra spool around, wind another bobbin and use that as your second spool!
Topstitching thread — Most thread manufacturers also make specialized threads explicitly for topstitching. These are a heavier weight than your normal thread and tend to come in a limited range of colors. If you’re sewing heavy weight fabrics, like denim or wool, these are the best option. They not only give you a beautiful contrast, but lend extra stability to your garment. Regular weight thread is too easily broken or lost to the eye, when working with such sturdy fabrics.
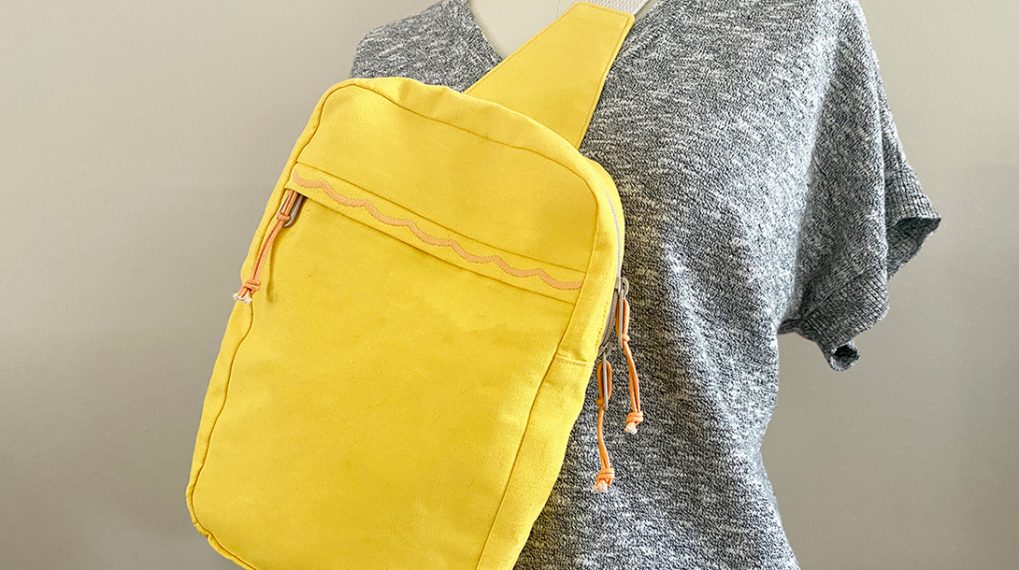
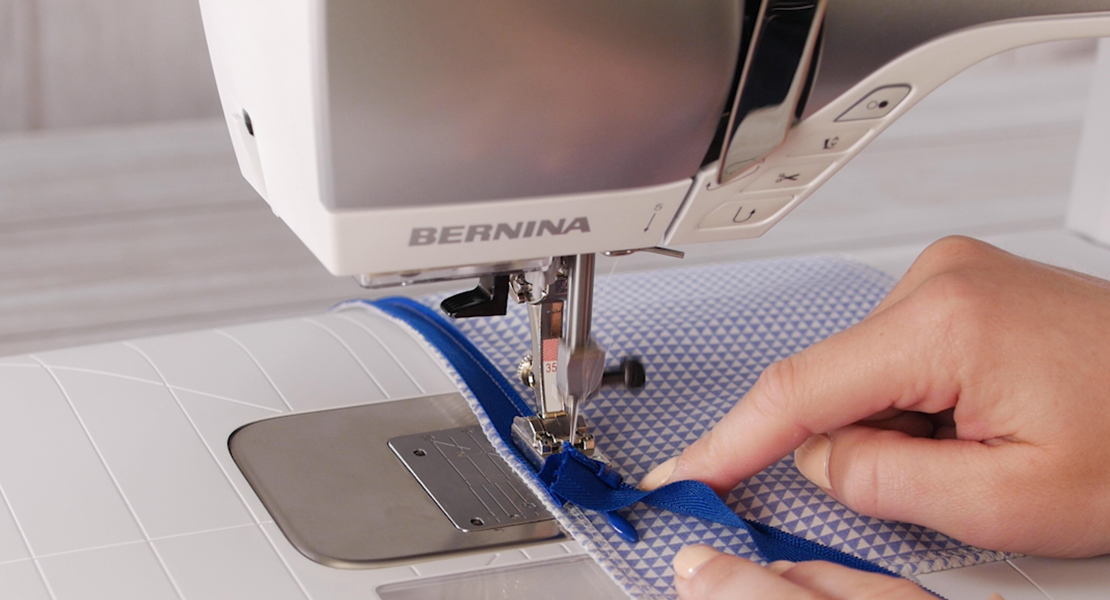
Metallic thread — So, you love contrast. Like, really love it. You want lines of stitching that pop from busy prints, or turn into design details of their very own. Metallic thread is a great choice for you. They might look a little kooky on the spool, but these threads sew up beautifully, come in a gorgeous range of colors, and provide a subtle luminosity to your final project. I actually used metallic blue thread on the blouse in these photos. In my head, I imagined perfect sapphire topstitching against that bright emerald green. While regular weight thread would’ve worked, the metallic thread pops that extra bit, turning this blouse into a truly special piece. Use the same stitch settings with metallic thread that you would for a regular weight spool.
Tip #3: Choose the Right Stitch
You will encounter temptation, lovelies. You’ll plan out your garment, choose a gorgeous thread, and want to start sewing right this second. Trust me, I’ve been there. However, I encourage you to consider one more variable in your topstitching first: your actual stitch. You can absolutely use the old straight stitch stand-by. One line of perfectly straight, beautiful stitching. Bump up the length a little bit for better visibility (I like to be in the 3-3.5 range, personally) and you’re good to go.

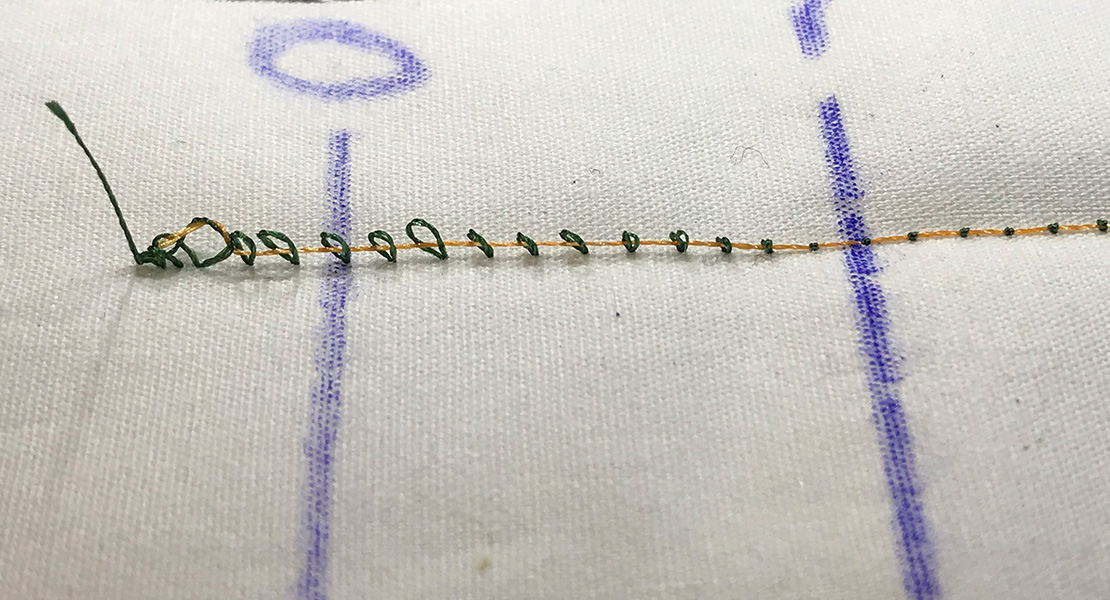
If you want more visibility or interest, though, look to the other stitches on your machine. For straight, but bolder lines of stitching, choose the triple stitch (#6 on my own BERNINA 350 PE). This stitch is a standard straight stitch, but each actual stitch is repeated three times, so the stitching line is both stronger and thicker than a usual line of stitching.
You can also play with decorative stitching for an extra bit of interest on your garment. I love to add decorative topstitching to smaller details of a garment, like the cuffs or collar, so that it doesn’t overwhelm a design. In small amounts, it is just gorgeous. Before you start sewing with decorative stitches, try a few lines of different patterns on an interfaced scrap of your fashion fabric. This allows you to see how each stitch looks against the fabric and figure out the correct tension, before you begin sewing. When sewing corner with decorative stitches, start in the corner on each pass, instead of trying to meet lines of stitching and pivot at the end. This keeps you from interrupting a design and gives you more control over any overlap or gaps that may happen.
Tip #4: Pick a Sharper Needle
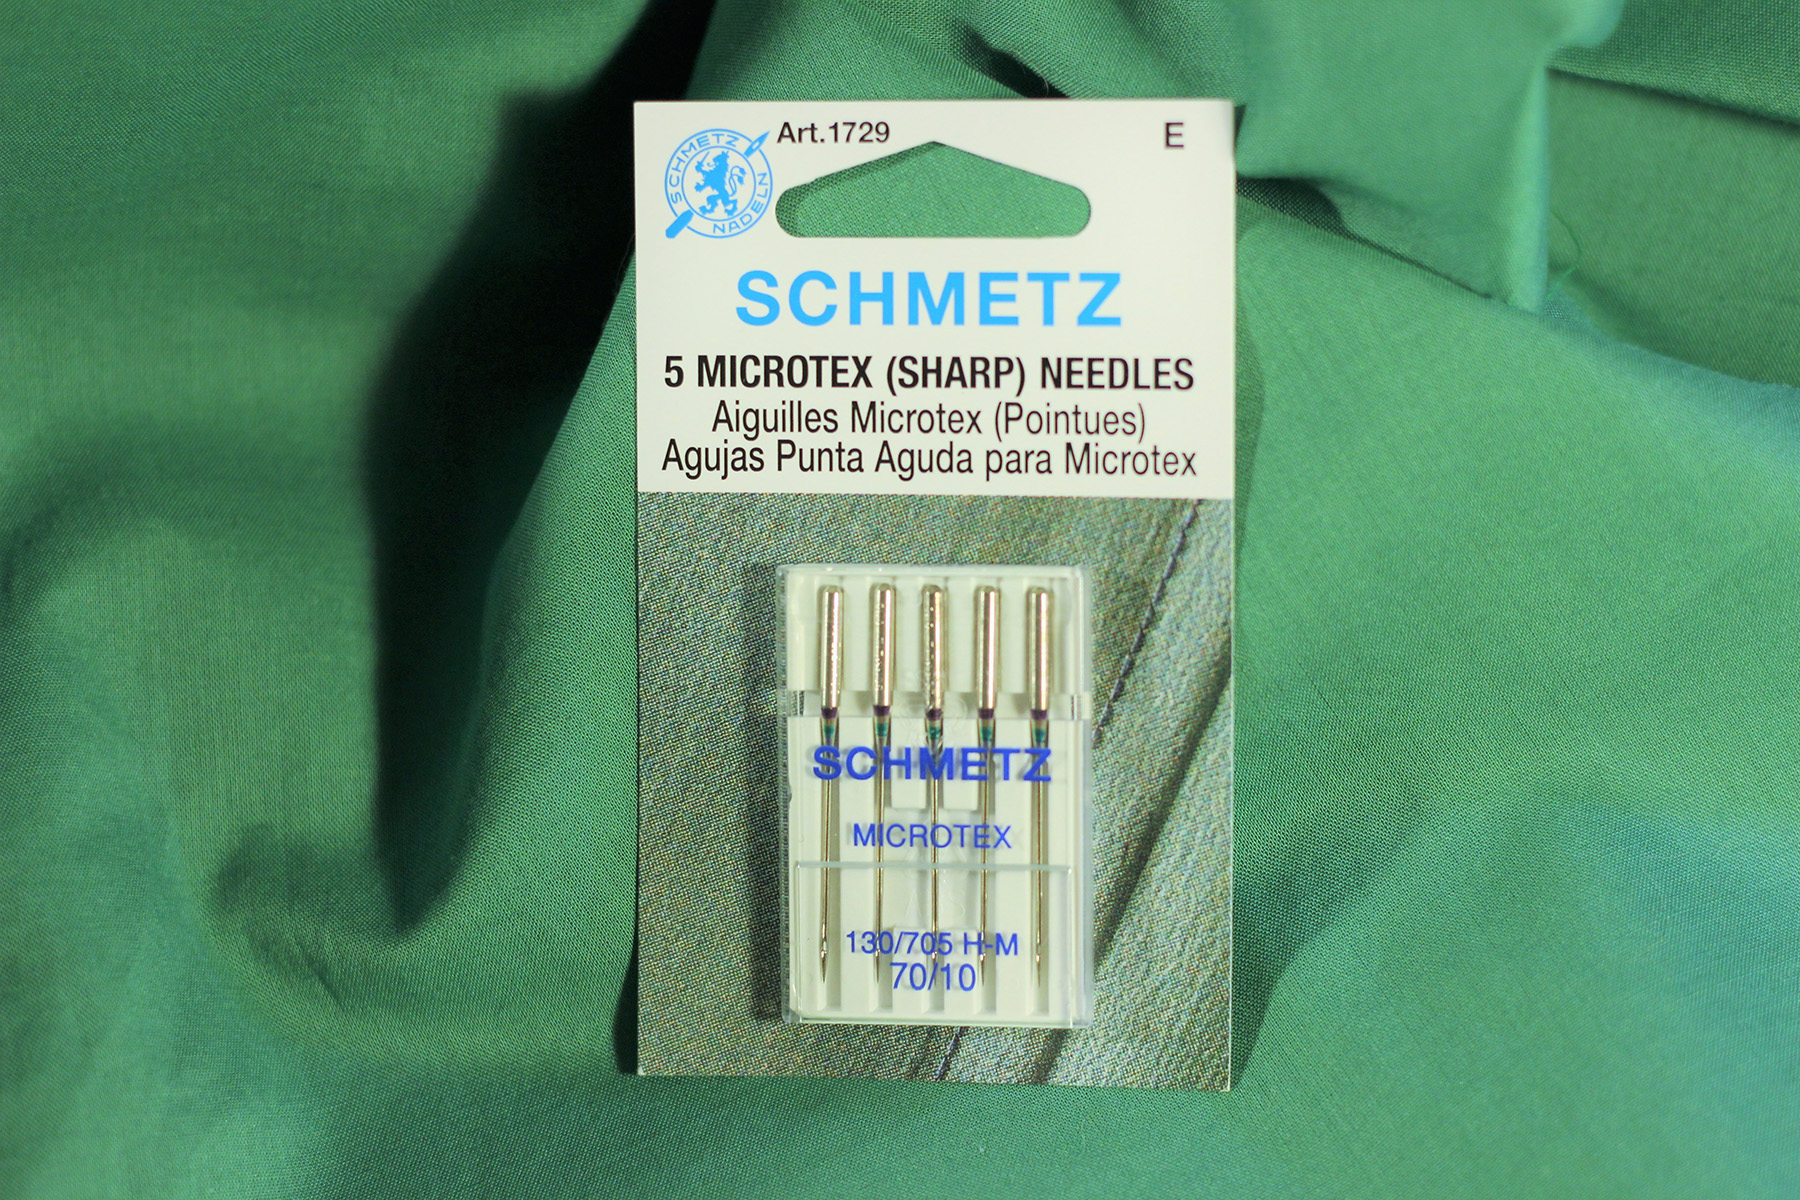
While a universal needle can yield nice results, make your stitches stand out even more with a Microtex or Topstitching needle. These needle varieties are sharper than a standard needle, which will give you crisper stitches and more defined topstitching. Microtex needles have thin, precise points which help them sew through microfiber fabrics or slippery wovens, like polyester, but also make them ideal for accurate topstitching. Meanwhile, Topstitching needles have a sharper point and slightly larger eyes, allowing you to use a heavier weight thread with ease. Either is a great choice when working with wovens, but don’t ever use them on knits. Those sharper needle points that give us such beautiful stitches will also tear holes in delicate, stretchy knit fabrics!
Tip #5: Always Use a Guide
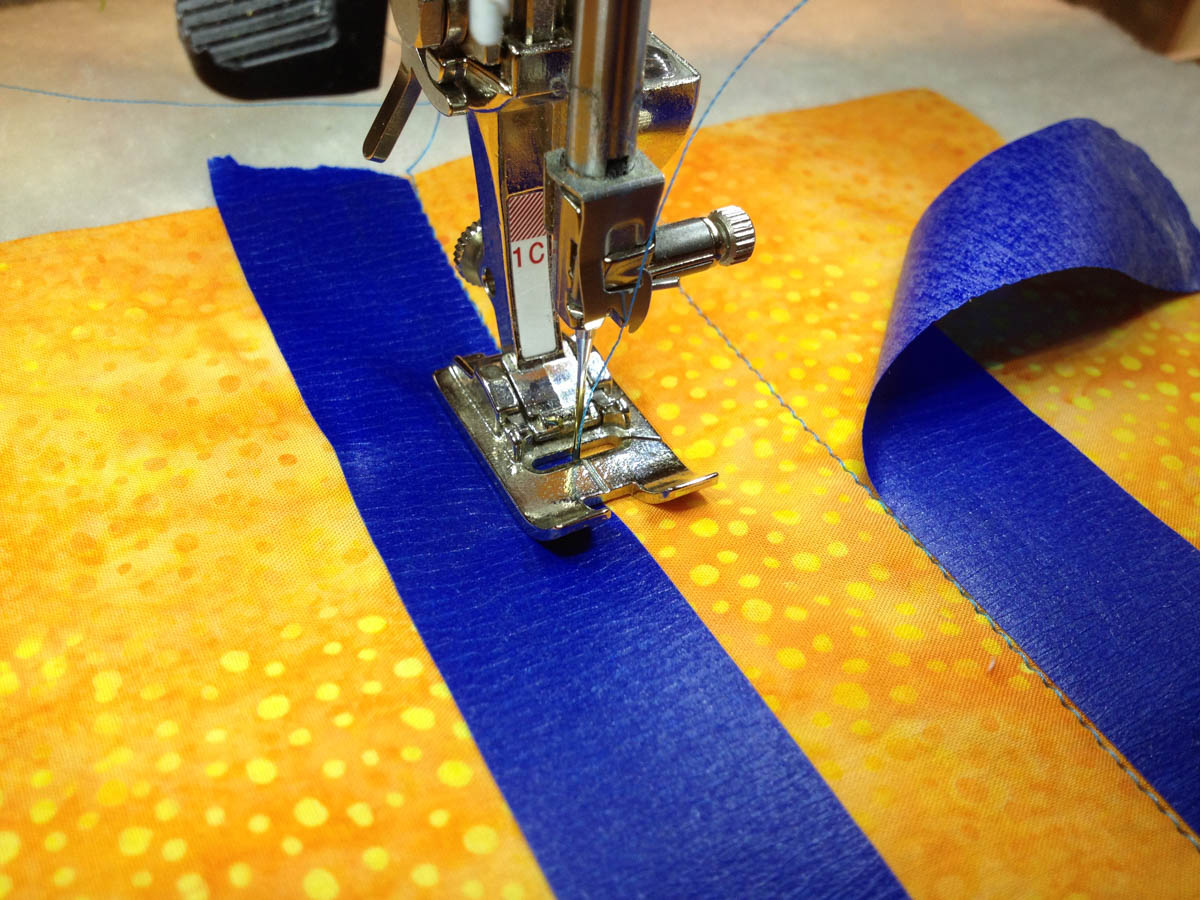
One of the scariest parts of topstitching is keeping your stitching lines on the straight and narrow. Bold threads and defined stitches mean that any mistake—one small bobble or drifting seamline—is impossible to miss, when looking at the garment. Luckily, there’s an easy fix for this! Use a seam guide.
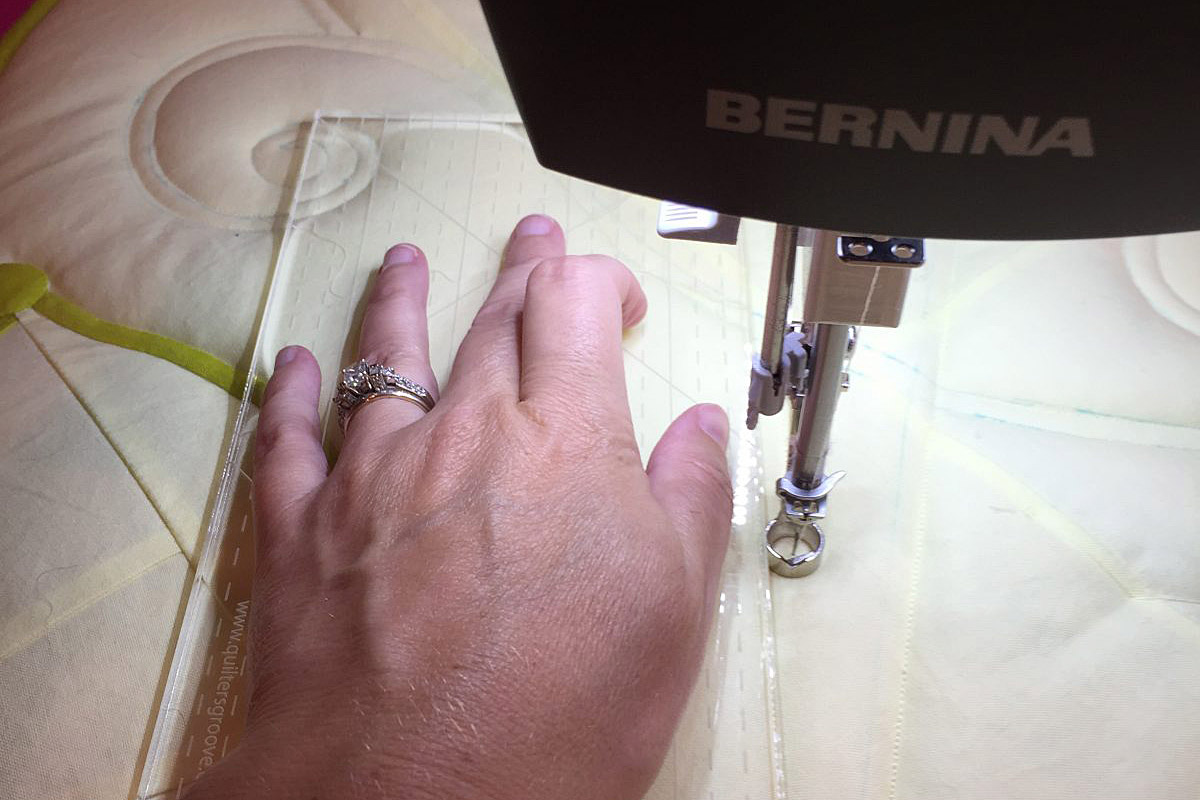
There are magnetic metal seam guides that can be used with your BERNINA, but this can also be as easy as placing a piece of painter’s tape on your machine, lined up with the outer edge of your fabric. Sew very slowly and use the tape as a guideline, so that your stitching stays perfectly straight along an entire pattern piece. Using tape gives you more flexibility than relying on your machine’s built in ruler, so that your topstitching ends up exactly where you want it, whether you’re sewing on the right or left side of your machine.
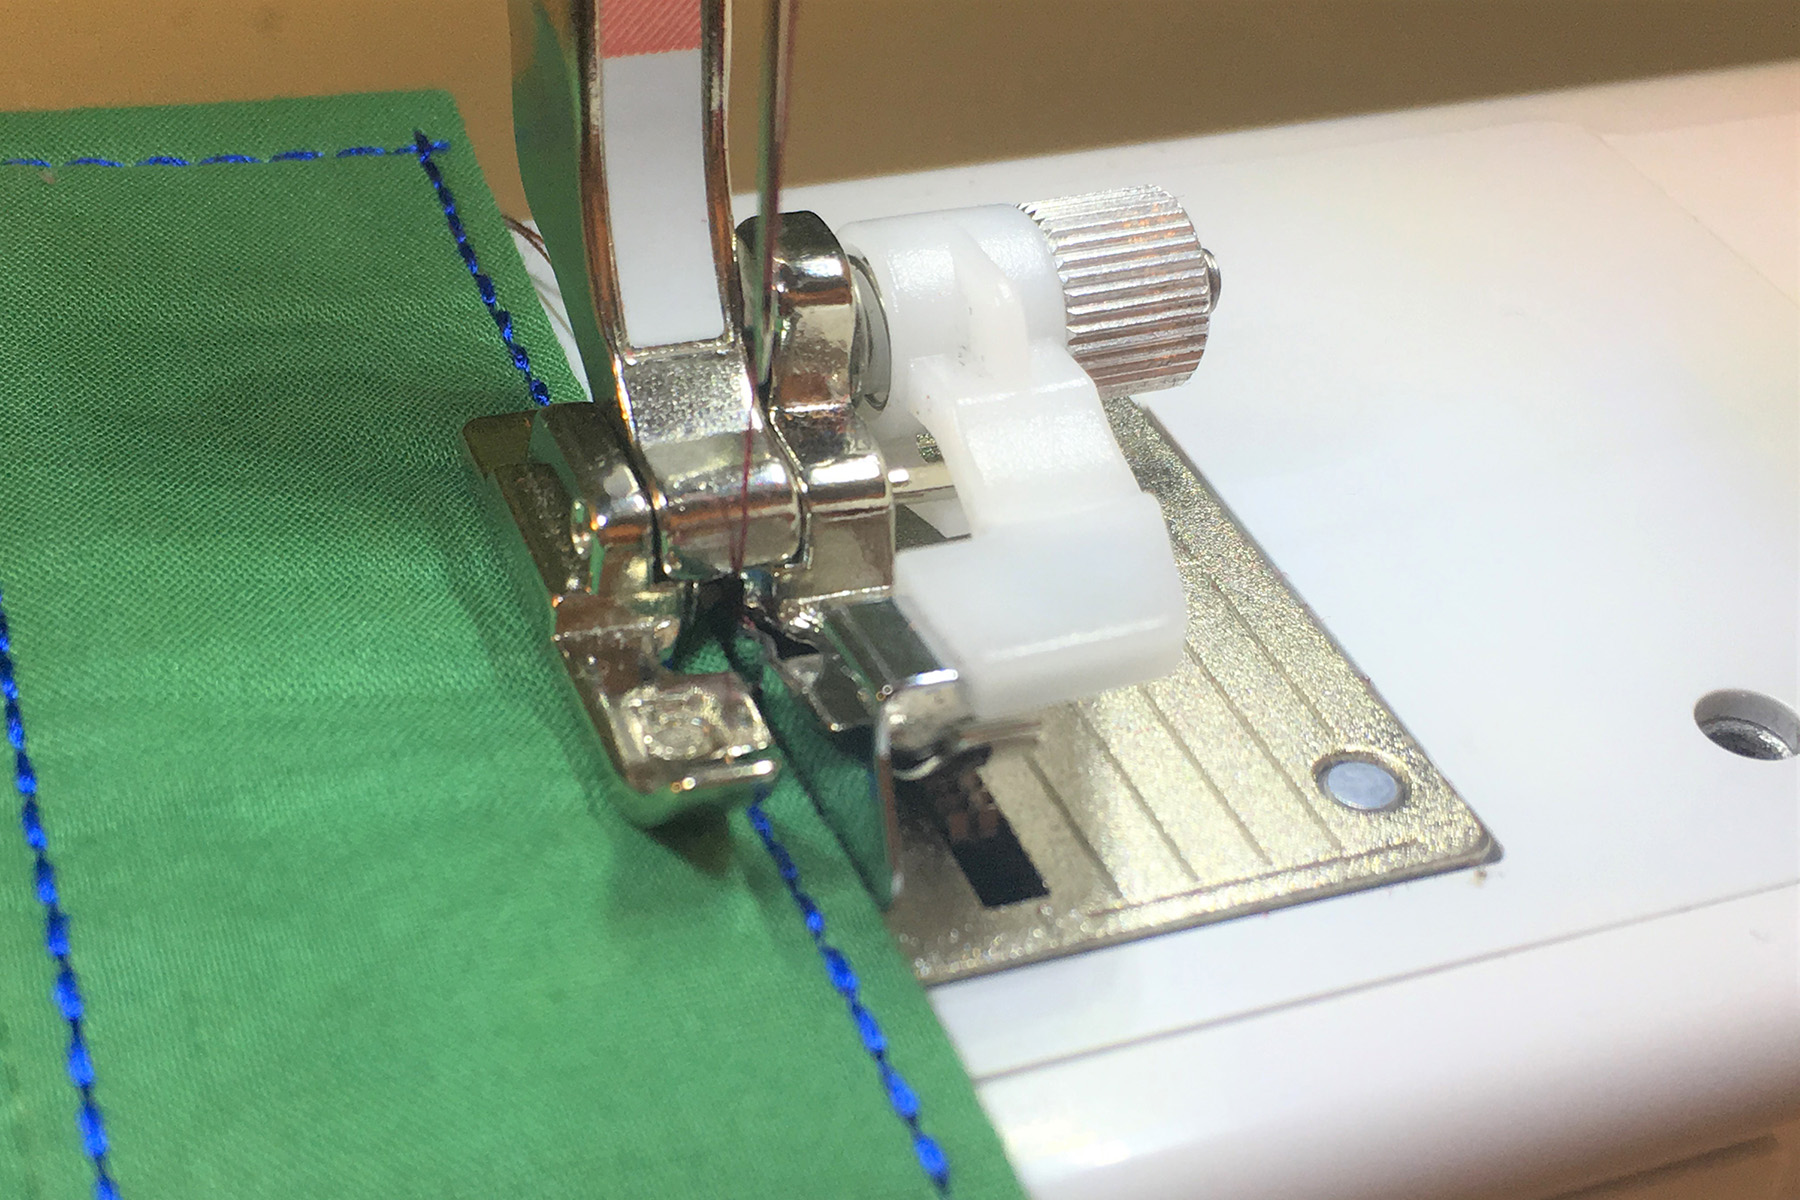
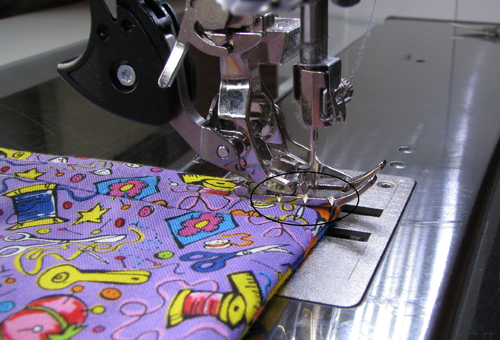
My favorite seam guide, however, is a presser foot. Switching over to the BERNINA Edgestiching Foot #10 gives you a built in channel for your fabric, right there on the side of the presser foot. Simply put it on your machine, move the needle to your desired distance away from center, and start sewing! The foot will guide your fabric, as you sew, keeping everything nice and tidy. No one will never know that your beautiful topstitching is actually beautiful edgestitching.
Tip #6: Fabric Glue is Your Best Friend
No matter how well you press or pin, there is another danger with topstitching: bubbling seams. This happens when you’re sewing too fast with multiple layers of fabric, or your layers are shifting as you topstitch them together. Go slowly, consider switching to a BERNINA Three Sole Walking Foot #50 for difficult fabrics, and use glue.

Yes, my dears, glue. There is no better topstitching weapon than a fabric glue stick! When you’re using topstitching to close a seam—such as finishing button bands or facing a cuff—use a water soluble fabric glue stick to close that seam up first. This gives you complete control on the inside of your garment, even though you’ll be working on the outside. A light adhesive means that your layers won’t shift around, those inside seam allowances won’t slip out, and any pesky lines of previous stitching will actually stay covered. Even better, it will easily wash out of your fabric with a bit of water!
It’s as close as we get to real sewing magic.
Those are my favorite tips for topstitching, but what are yours? Do you have any favorite methods to tackle this tricky task?


What you might also like


6 comments on “Six Tips for Perfect Topstitching”
-
-
Love the idea of the fabric glue stick!!!
-
What was the plastic white piece on the photo. Can I get it from Bernie?
-
Hello dmalone001, this foot you see in the tutorial is the snap-on sole version of the Edgestitch foot #10. It looks a bit different than the other, solid version of the foot, but does the same job. You may already have the Edgestitch foot #10 for your BERNINA. If not, you can purchase one from your local BERNINA store.
-
-
Gutterman makes top stitching thread in all 700 colors in 2 weights. Wawak carries all of them.
-
great info!
Leave a Reply
You must be logged in to post a comment.

Lots of good information here, but what is the white thing attached to the presser foot? I looked in Bernina accessories and it isn’t there that I could see.