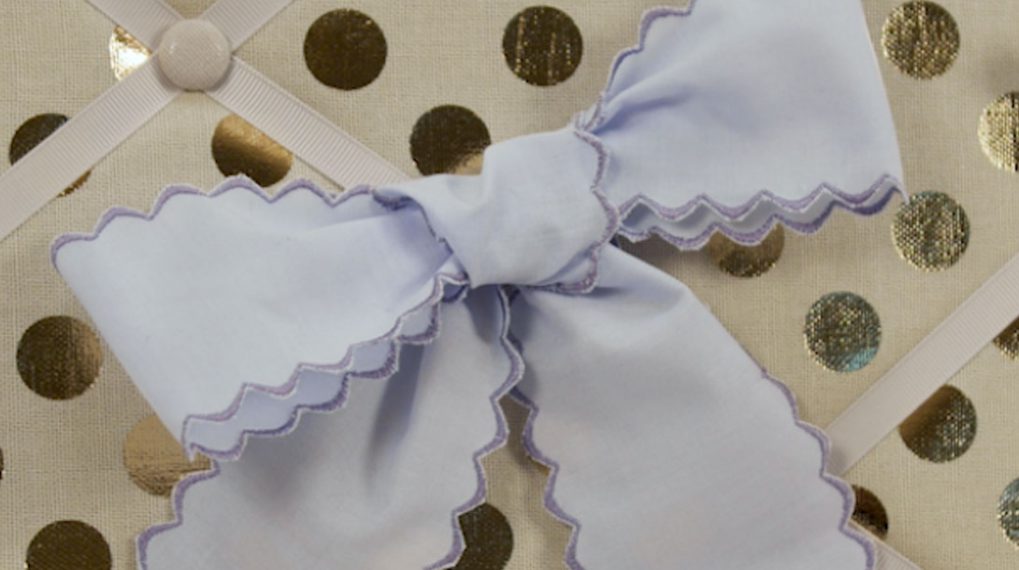
Scalloped Edging Tutorial
Adding a scalloped edge is a feminine and frilly way to zhuzh up a garment. I love adding details to my home-sewn clothes that are inspired by luxury brands. I’d recently seen scalloped details being used in runway garments, especially the Fall 2016 Red Valentino Collection.
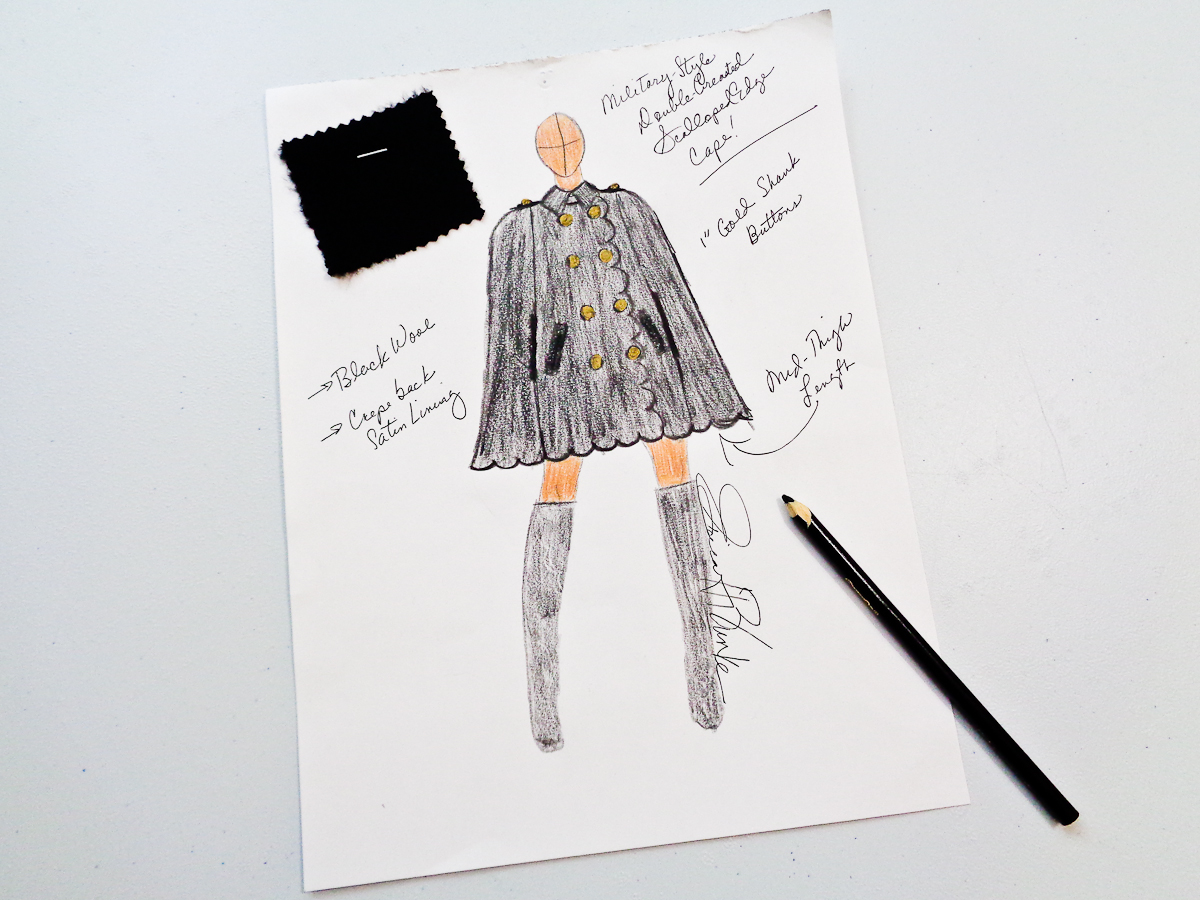
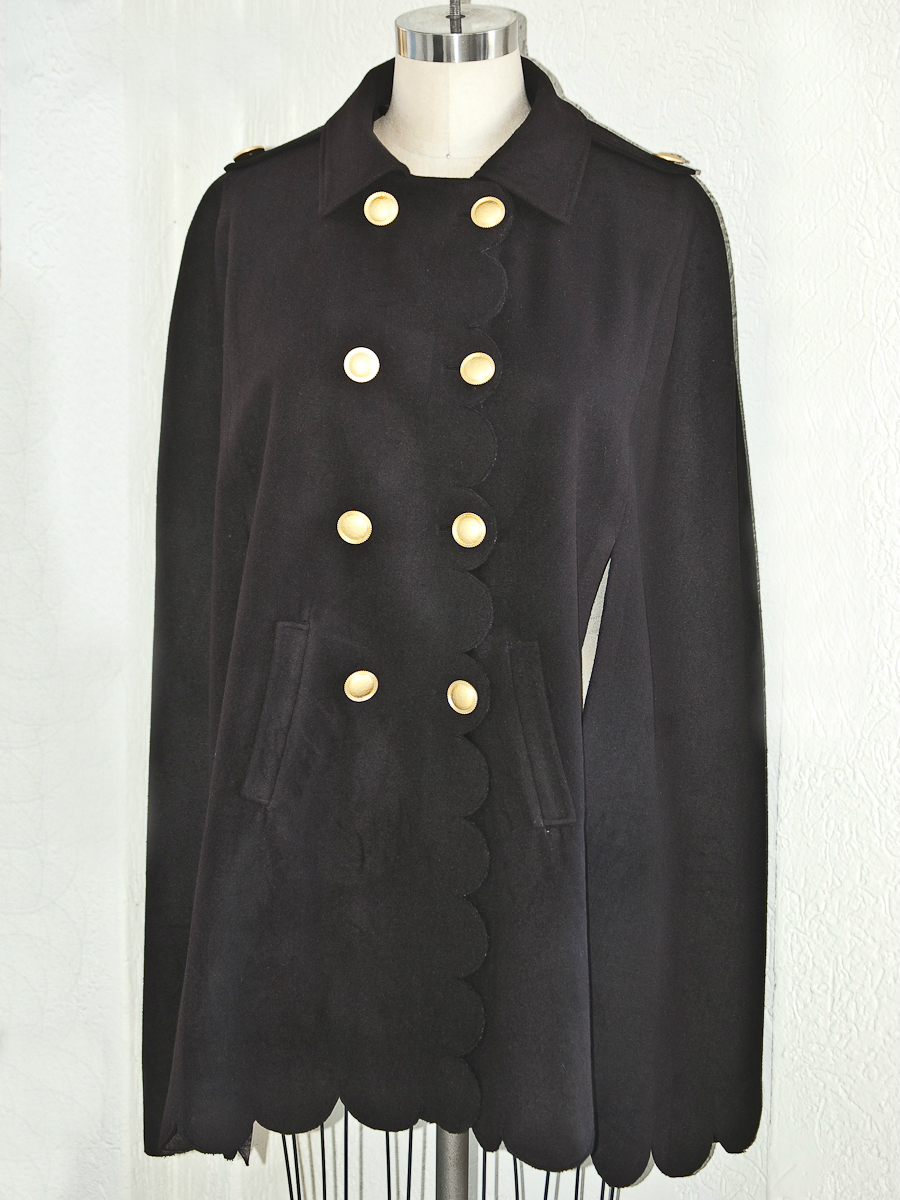
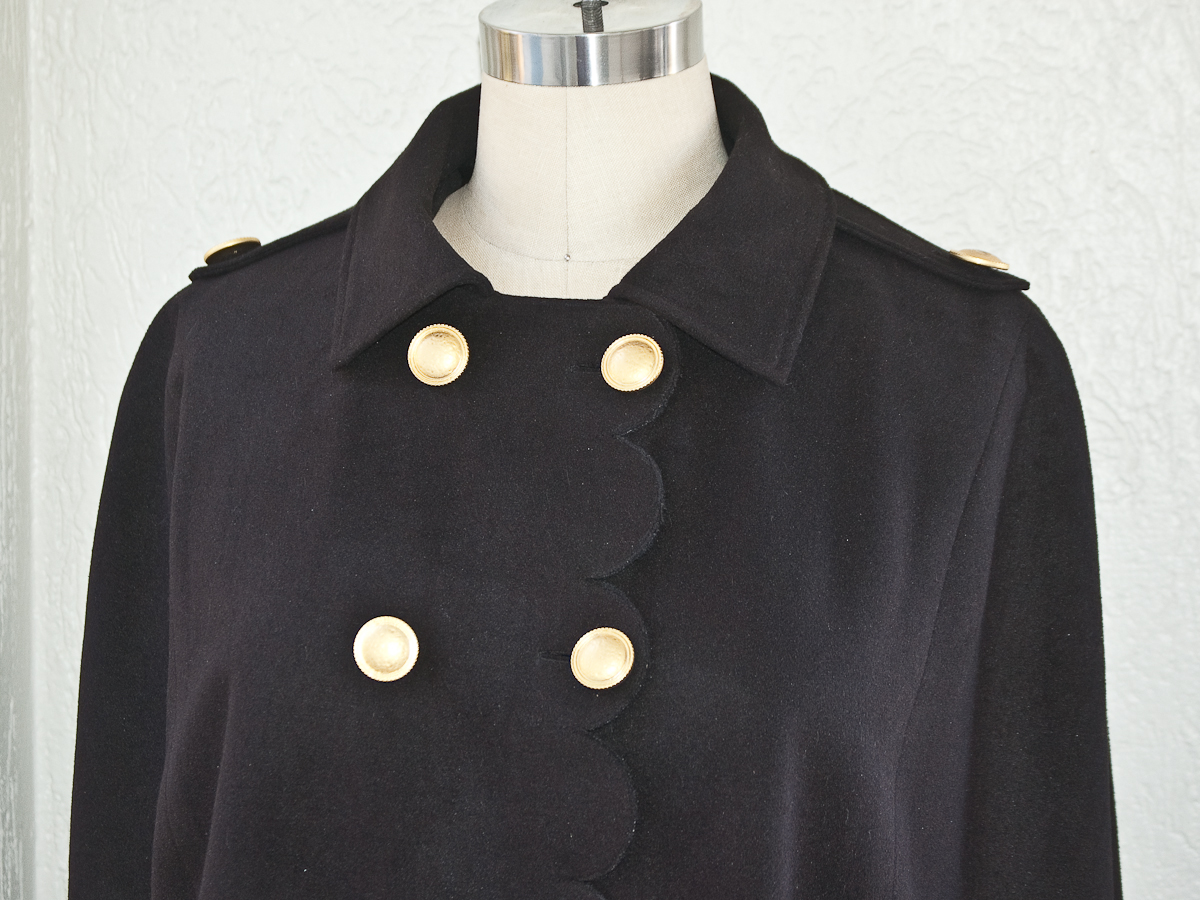
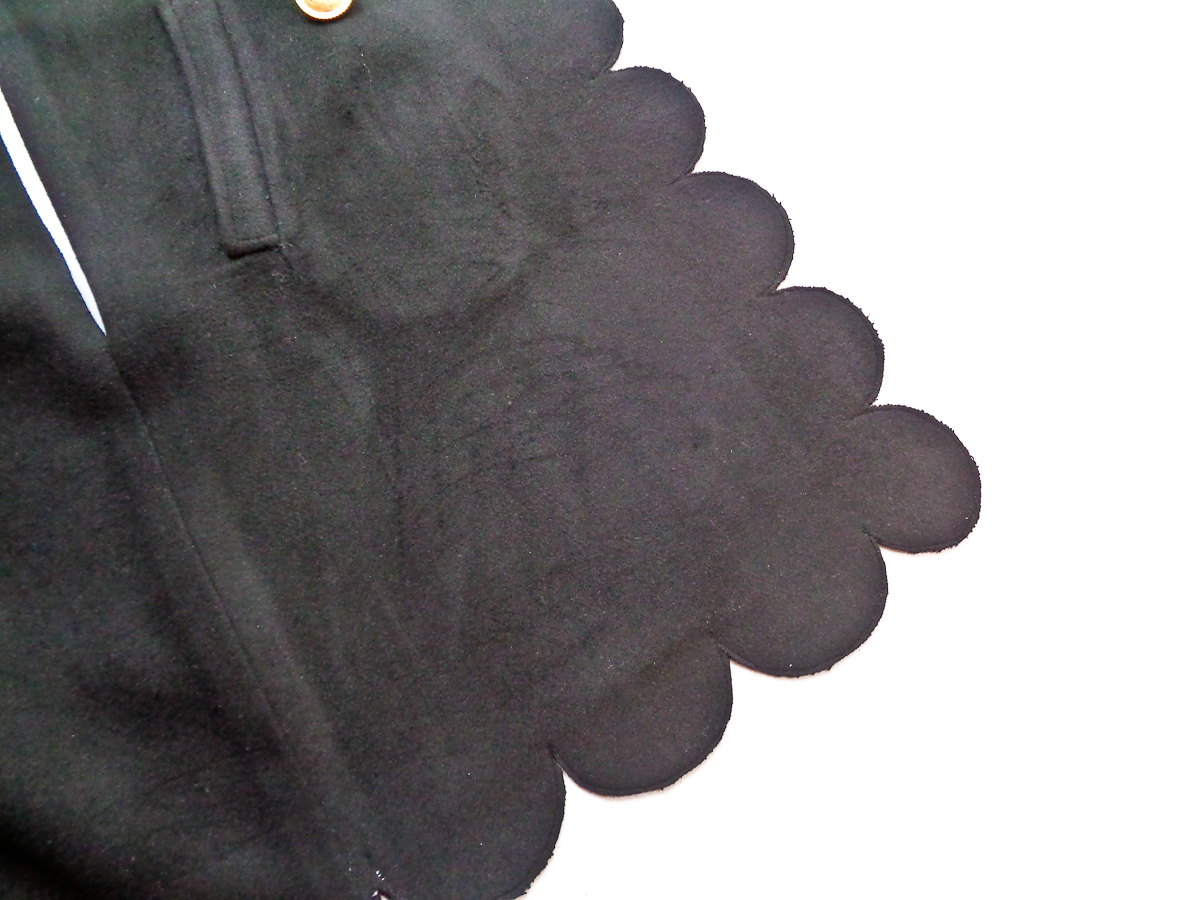
So, I thought that I would use it as a detail in my own design, my Military-style Double-breasted Scalloped Edge Cape. Scallops are not only a beautiful way to finish the hem of a garment, but they also create a fabulous front edge finish as well. In the future, I could see myself using this detail on a neckline.
Materials needed to add Scalloped Edging to a garment
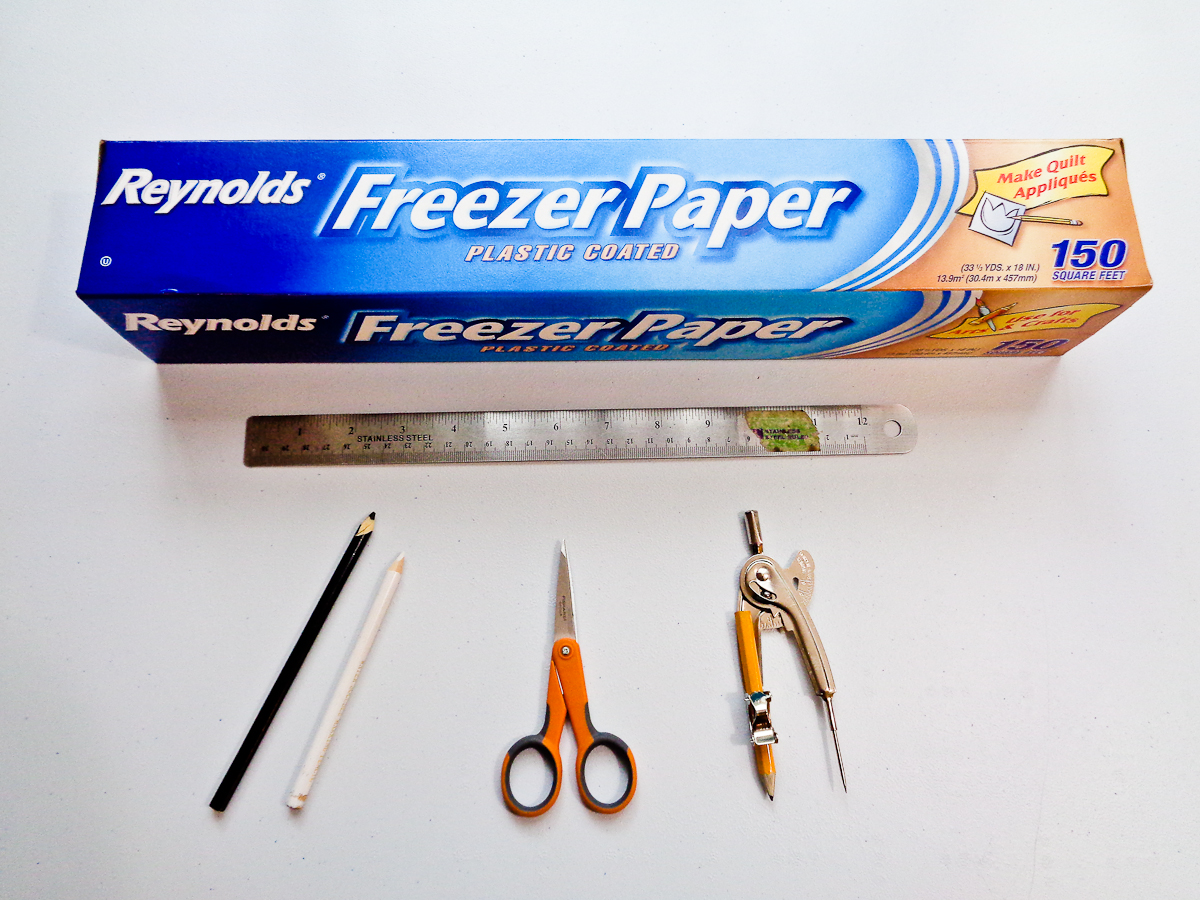
- Freezer paper
- Scissors (sharp, with a micro tip)
- Compass
- Marking tools (chalk, water soluble marking pencil, disappearing ink, etc…)
- Ruler or tape measure
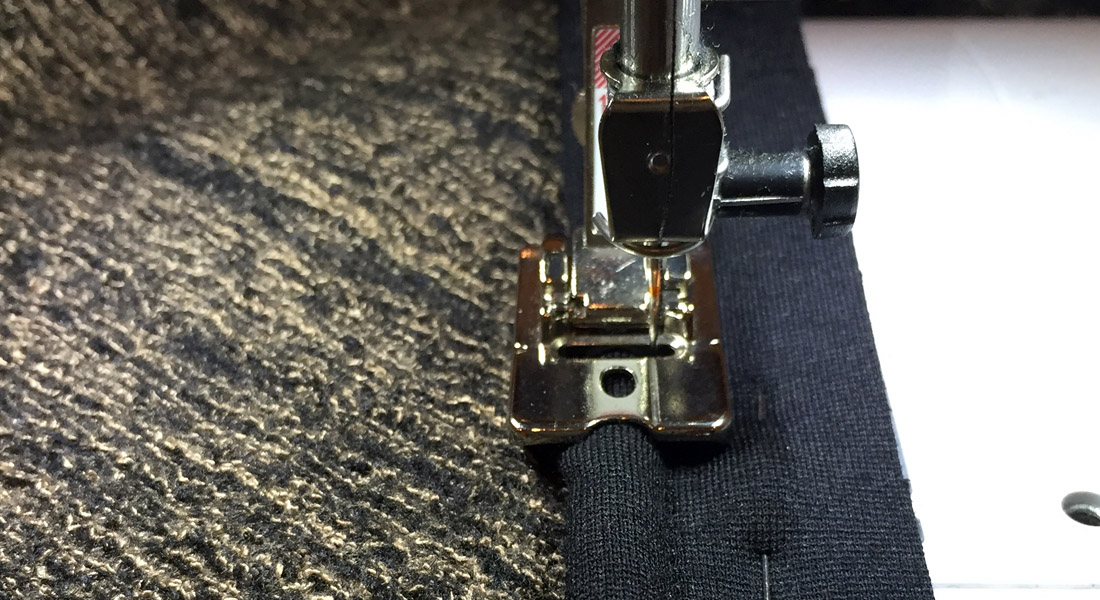
- Sewing machine. I’m using my BERNINA 350 PE.
- Presser foot: Open embroidery foot #20
- Size 90/14 machine needle
Plan Your Project
When deciding that you would like to add a scalloped edge to a garment, it’s best to plan ahead. You want to pick a fabric that will behave with your scallops. You want a fabric that will create well-defined curved edges. Tightly woven natural fibers are the way to go. For my project, I used wool coating. I’ll talk about how I sewed it later.
Some mathematical calculations are involved, and math is always easier with even numbers. I would advise to you to think it through beforehand so that the dimensions of your garment work for your scalloped edge design.
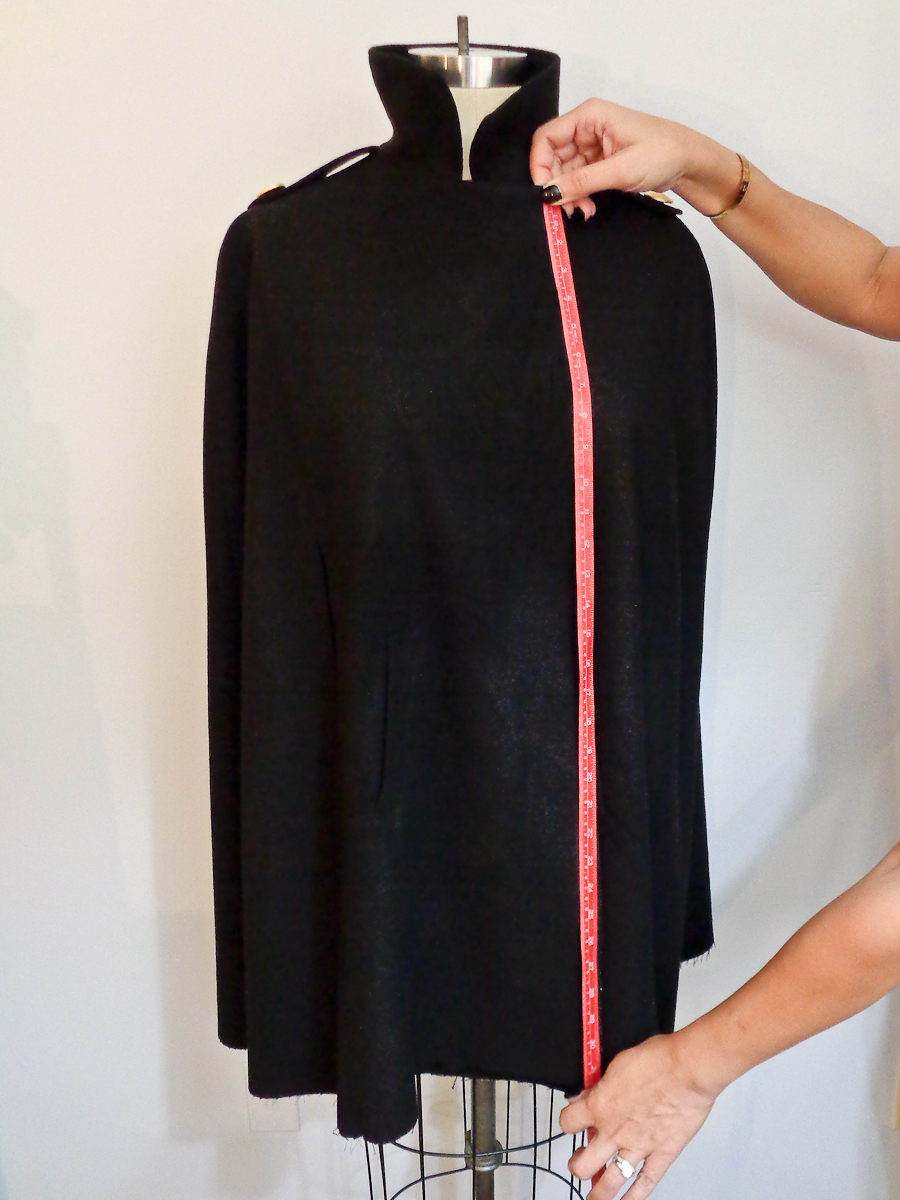
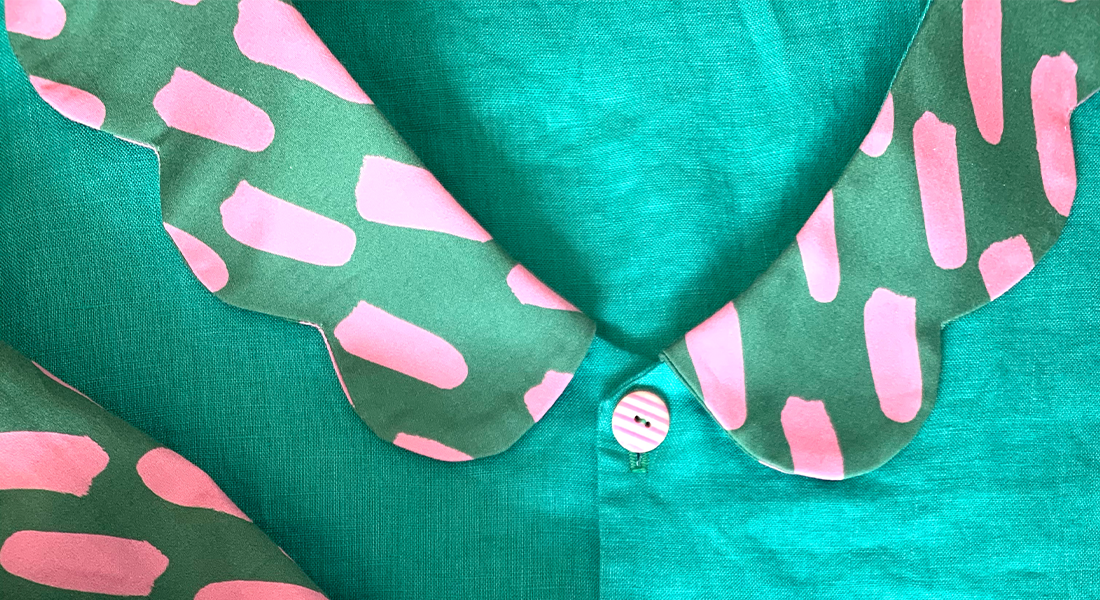
I measured the front edge and the hem of my cape. Normally, I always use inches. But for this instance, it’s a perfect time to use the Metric System. No one wants to have to use fractions in division, so it’s a lot easier to use centimeters. All you have to do is just flip your ruler or tape measure to the other side. In the case of my cape, the front edge is 84 cm, which is divisible by 7 and equals 12. So this means, I’ll have twelve 7 cm scallops along the front edge. You want to have whole scallops from beginning to end, half or partial scallops would be unsightly. So it’s important that you keep your measurements in mind during your planning stages.
How to sew a scalloped edge
Your first step is to create a template. I find this to be the easiest way to go about doing this. You could use a marking tool and do this directly onto your project, but I find it easier to create a template using freezer paper. Then you don’t have to worry about removing leftover markings later.

The first step is to create a baseline the length of your garment’s edge.
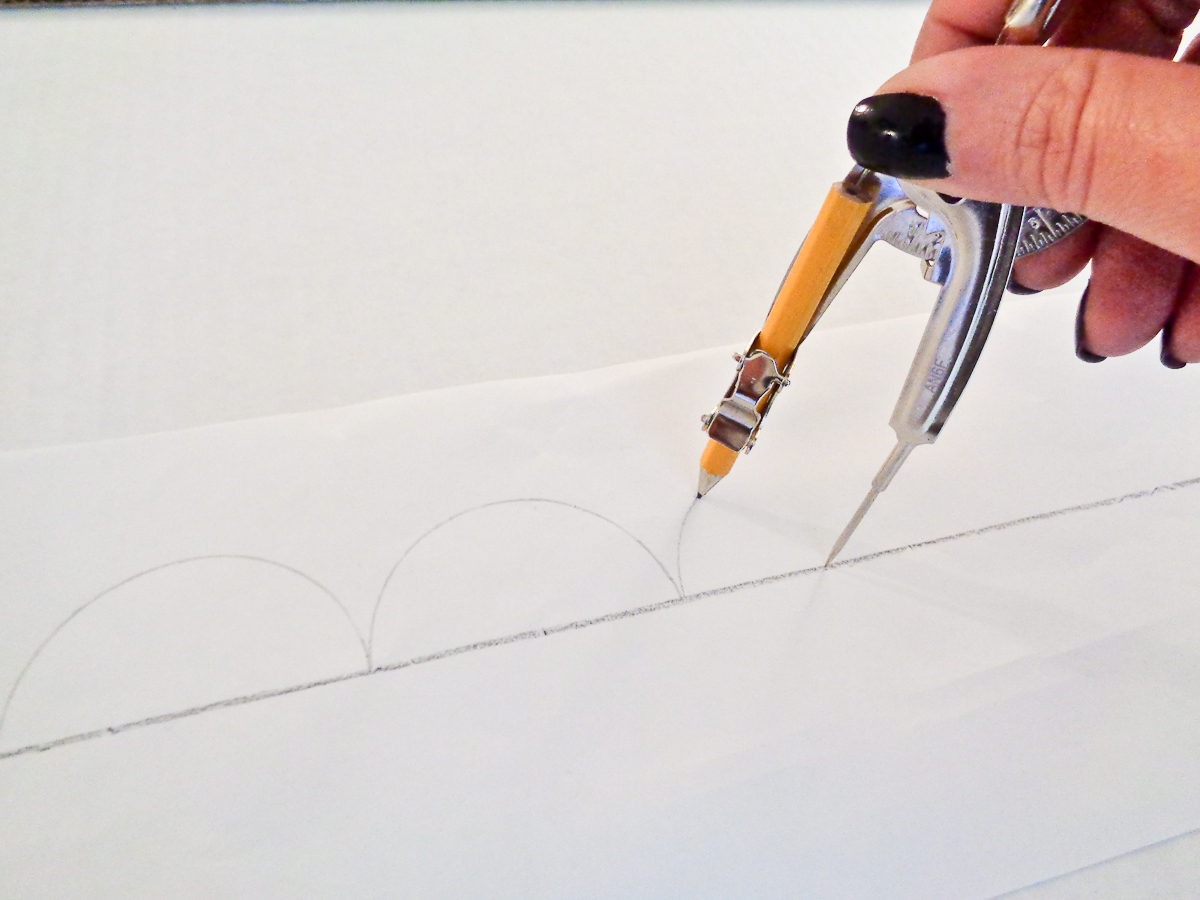
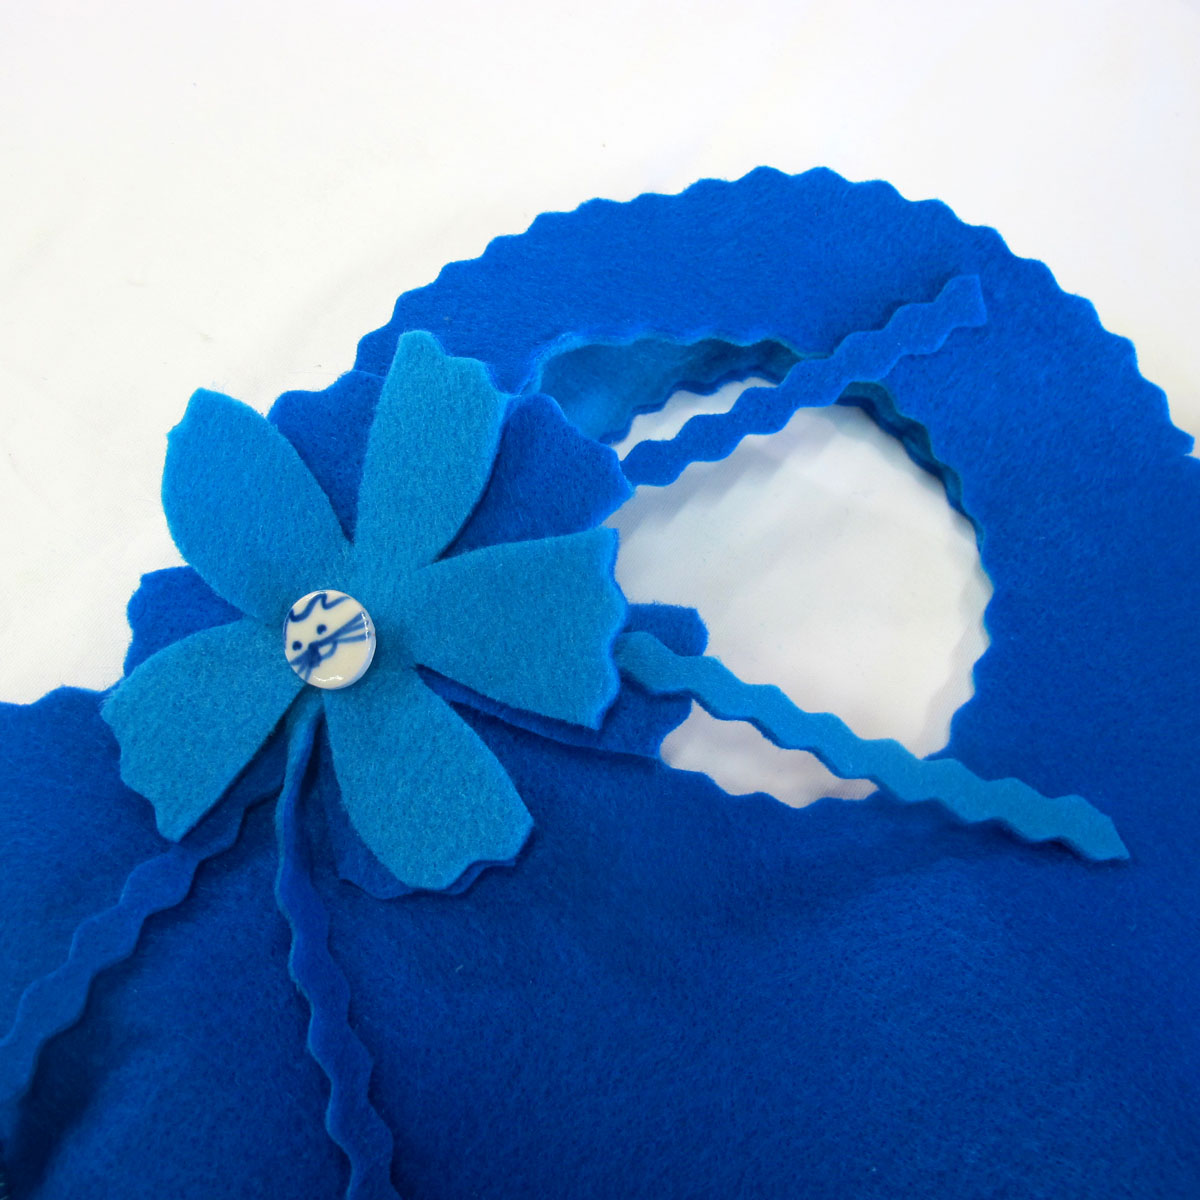
This scallop design is a half circle. If you want to make a circle or anything circular, the best tool you can use is a good old-fashioned compass like we used in school. To create a 7 cm scallop, I set my compass to 3.5 cm. Begin the first apex at the beginning of the baseline and repeat until the end.
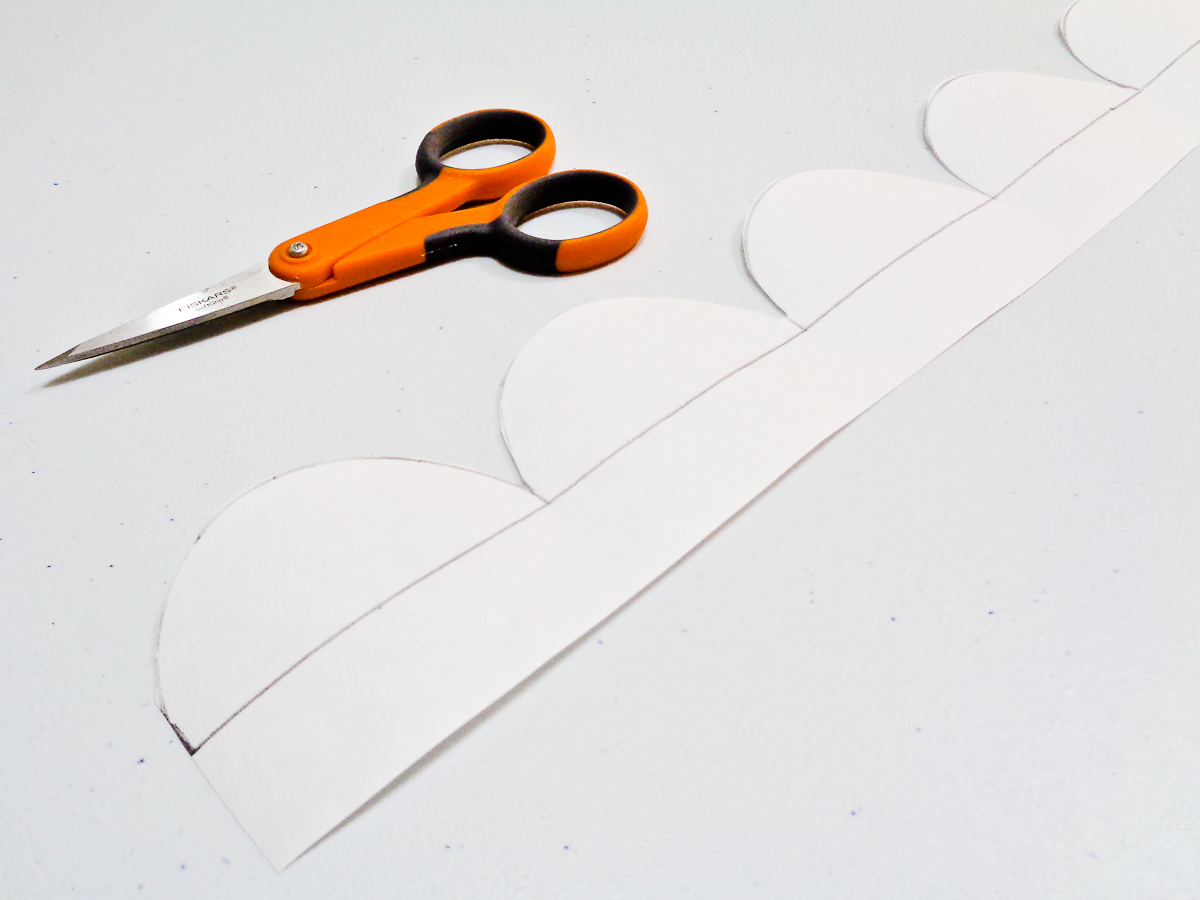
Cut out your template. I like to leave a little room below the baseline just so that I can have something to handle.
Note: Since I’m using a wool coating fabric which is a heavier weight fabric, I’m sewing my scalloped edge wrong sides together (the outer fabric of the cape and the facing. And for the hem, the outer fabric and the lining).
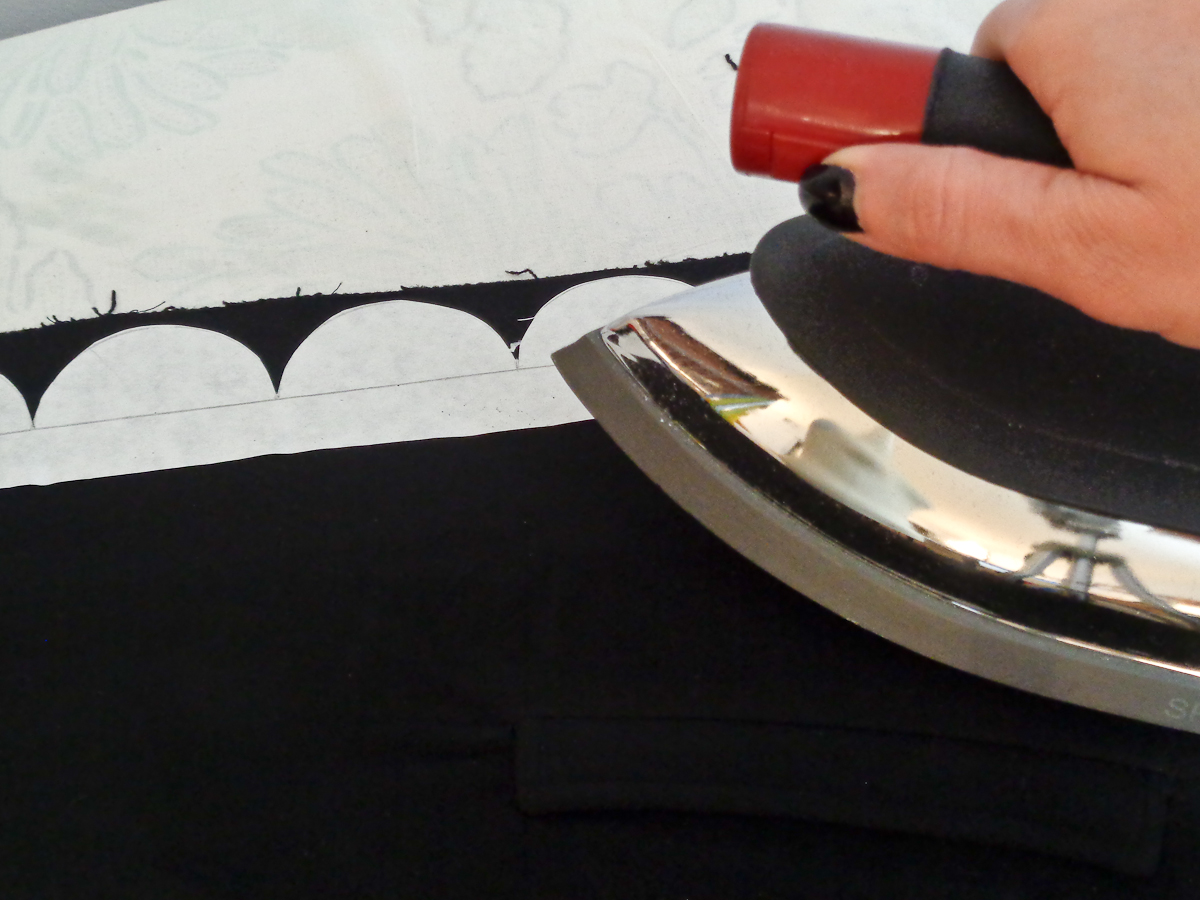
At this point, you can either trace your scallops onto your fabric with a marking tool or iron your freezer paper template onto the edge as shown above.
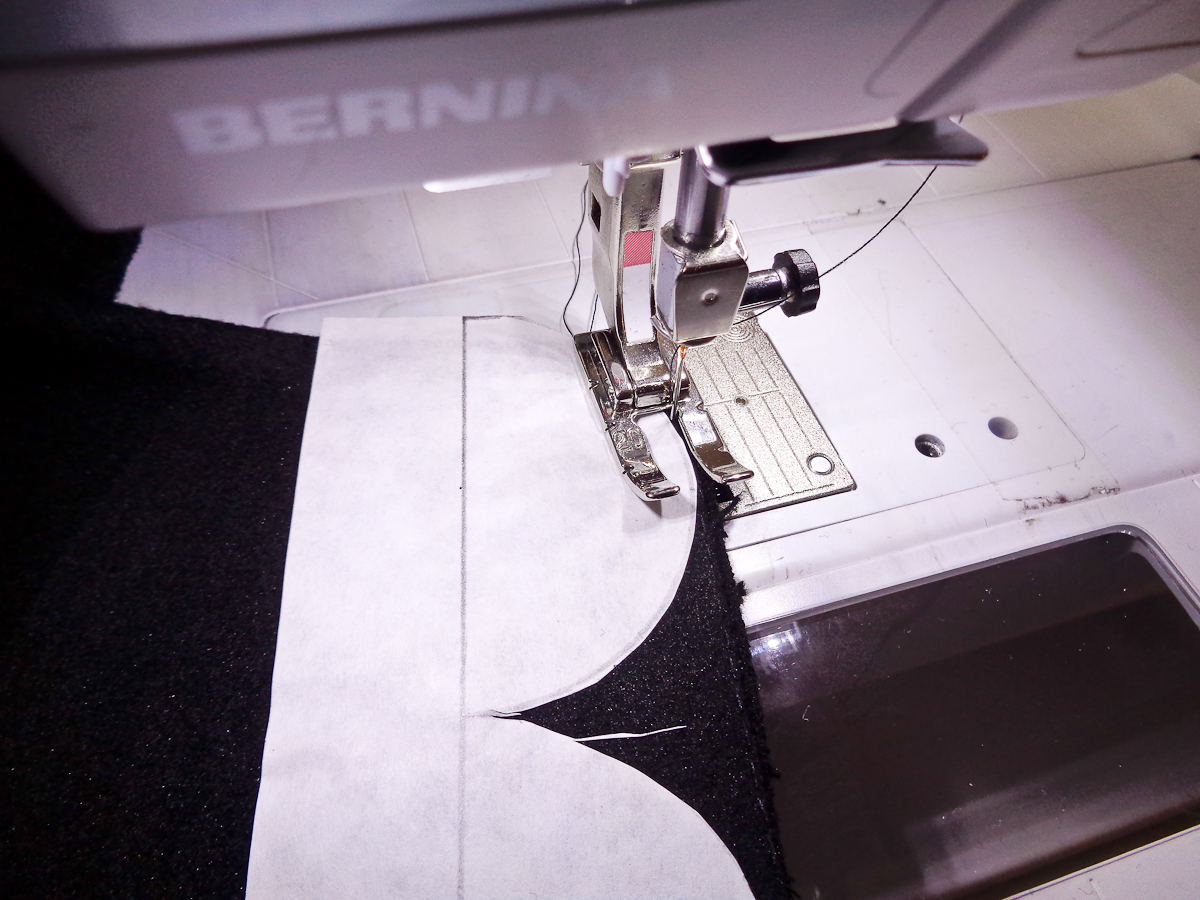
Beginning at the first apex, stitch around your template using an Open embroidery foot #20, using a short stitch length between 1.5 – 2 mm. The smaller your stitch length, the more control you have stitching around the curves.
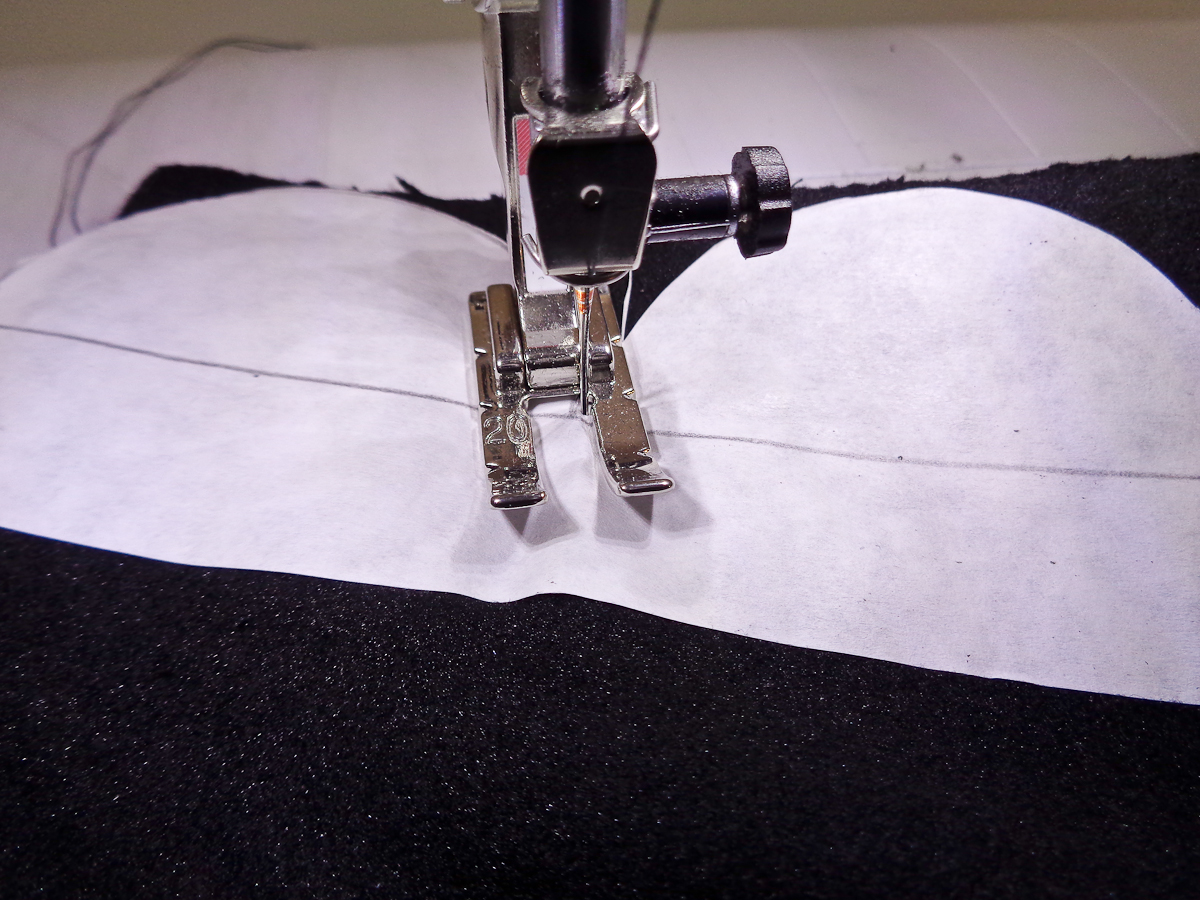
At the end of the scallop, with your needle in the down position, raise your presser foot and pivot.
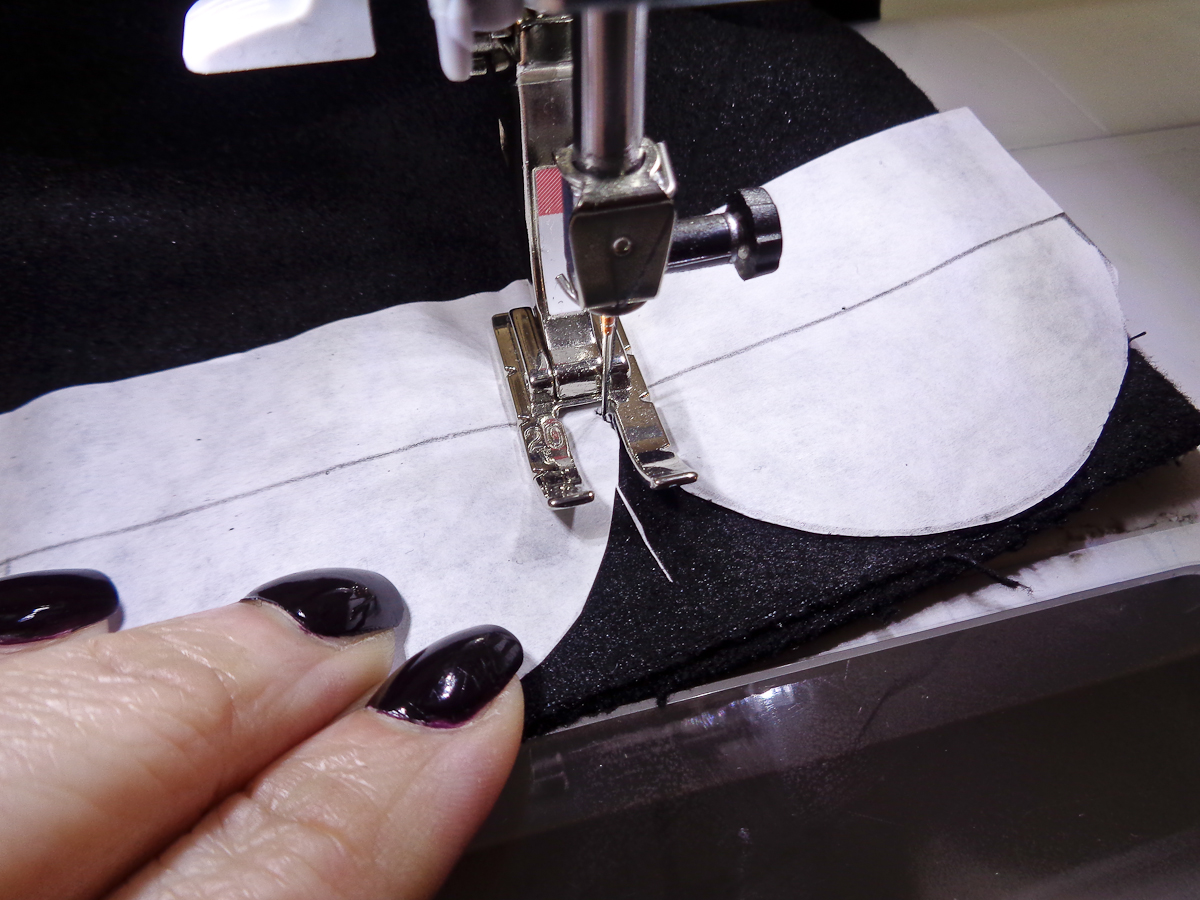
Repeat this until the end.
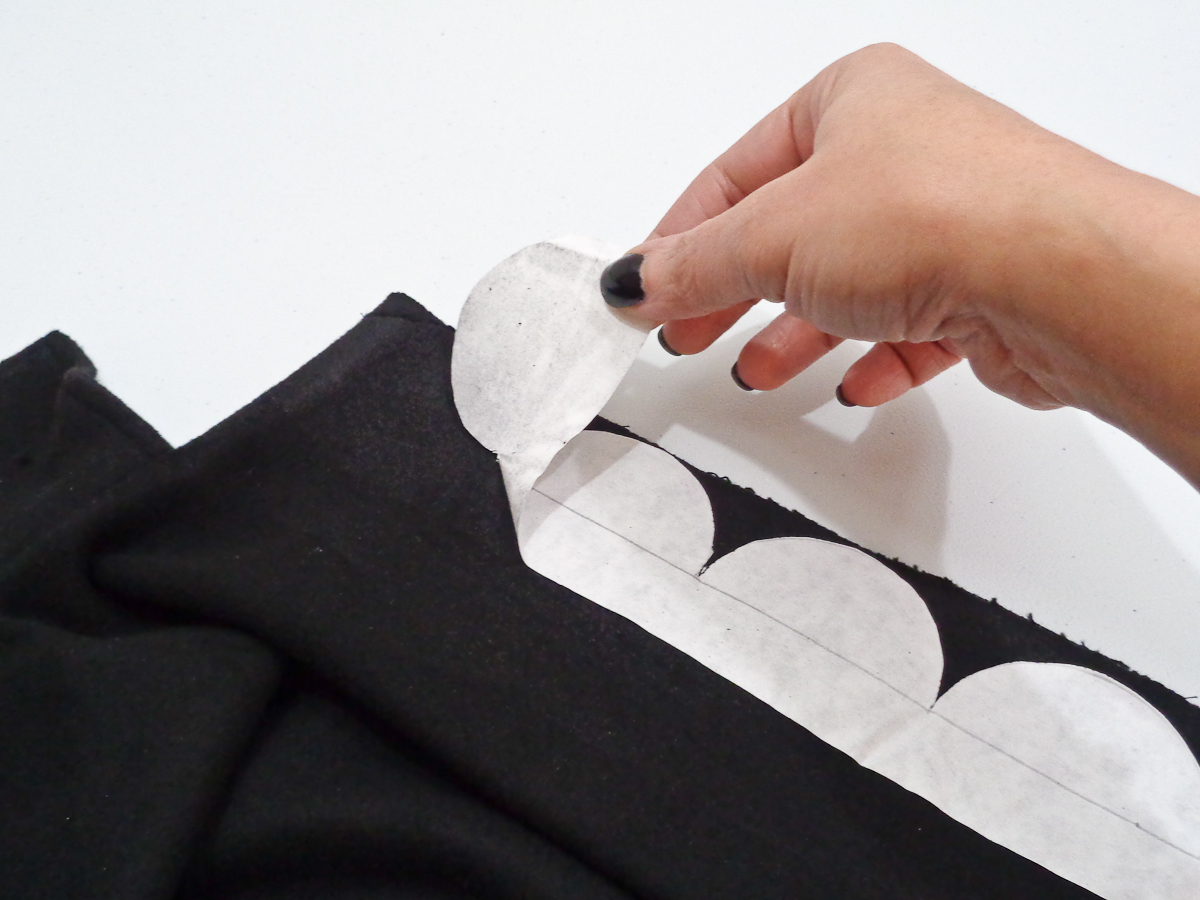
Remove the template.

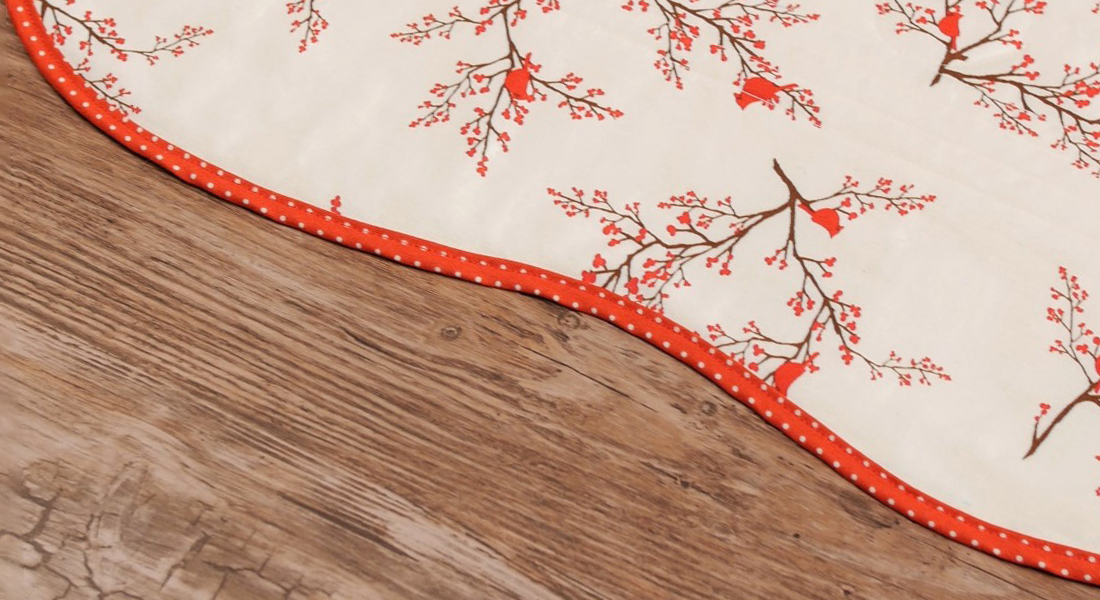
Since I sewed my scallops with wrong sides together, I trimmed my scallops close to the stitch line. Carefully cut into the point without cutting the thread. Had I used a lighter weight fabric, I would have sewn right sides together, trimmed the seam allowance and turned right side out and pressed. My stitch line will simply be an edge stitched detail.
I repeated the process along the hemline as well.

And a lovely scalloped edge finish is done!


What you might also like


7 comments on “Scalloped Edging Tutorial”
-
-
Yes, it did! Thank you!
-
-
Love this!!
-
Thank you gympygirl!
-
-
I might try to use this technique on placemats made from a heavier fabric. They would be so lovely with scallops all the way around the mat. The coat is adorable!
-
I think that would be beautiful on placemats! I may even do that myself! Thank you gloriap!
-
Leave a Reply
You must be logged in to post a comment.

Very nice, that also made button placement very convenient