Four Simple Serger Hacks
Sergers are marvelous machines with the ability to stitch super fast and finish the edge of fabric without skipping a beat. Sometimes it’s nice to slow down and look at some quick hacks which make using a serger (also known as an overlocker) even easier. Today I’m going to share with you my top four simple serger hacks.
Serger Hack #1
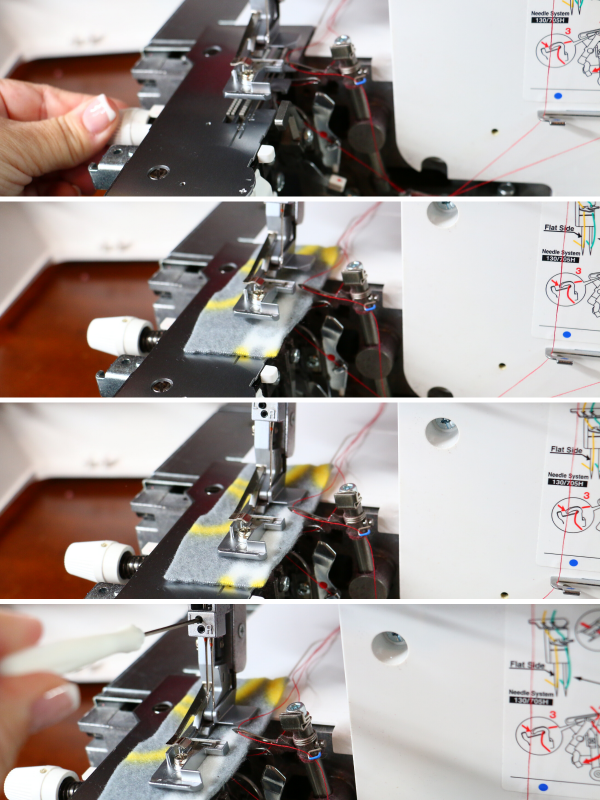
Changing a needle can feel intimidating on a serger because of the extra needles, extra threads, and all those moving parts inside. Here is an easy hack you can use to build confidence.
Simply raise the presser foot and lower the cutting knife. Slide a piece of fabric, or piece of paper will work too, under the presser foot. Lower the presser foot. Now you can change your needle without worry. Don’t forget to put the cutting knife back in place.
This hack will help reassure you that the needle will not fall down into the depths of the serger machine moving parts.
Serger Hack #2
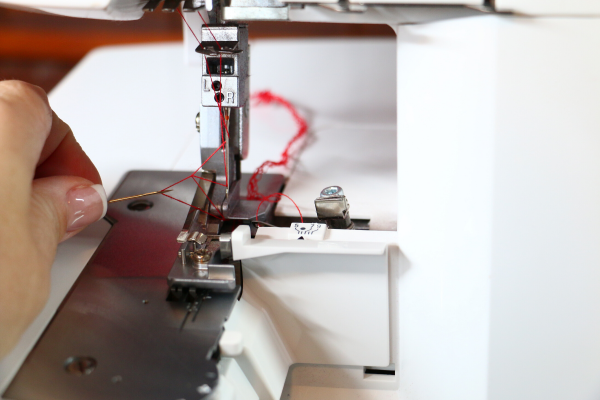
Just like hack #1, this hack is to help offer another quick solution for changing needles. This hack is especially nice when changing only one needle.
Lower the blade, just like #1. Keep presser foot down. Keep needle threaded. Loosen the screw of the needle you need to change. Allow the needle to fall down, it will not fall because the thread is holding it in place. Clip thread. Replace needle. Tighten screw. Raise the blade.
Serger Hack #3
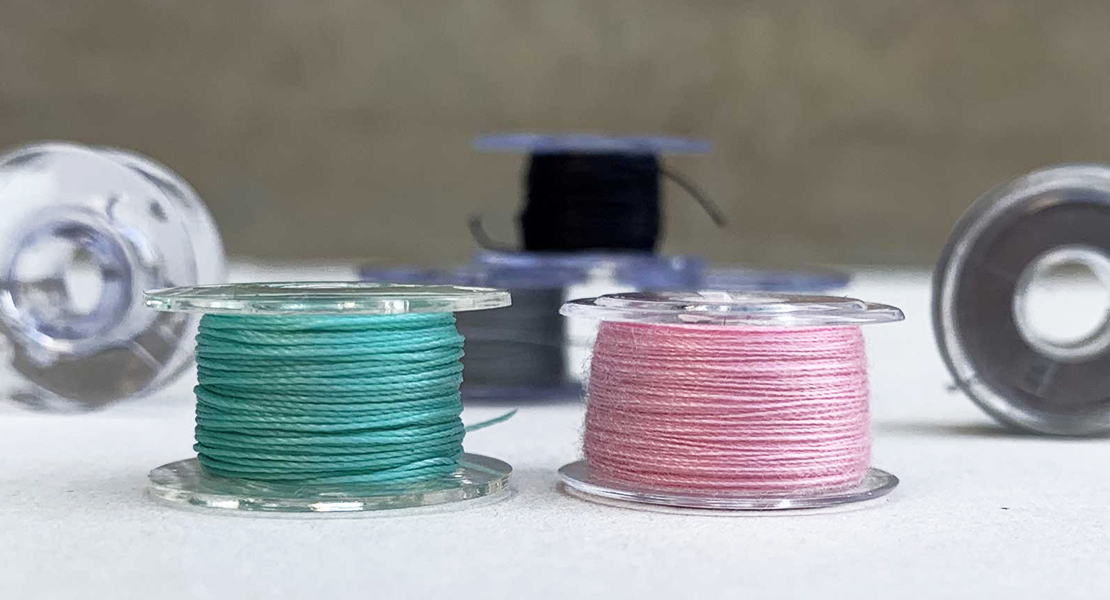
One of the best things about a serger is the ability to add a thicker decorative thread to the edge of your projects. The thread shown below is YLI Pearl Crown Rayon. It’s very versatile and can be used in the upper and lower looper of your serger. The fibers on Pearl Crown Rayon are continuous filament and virtually hairless and it’s colorfast and washes great. I like using this thread on the edge of napkins.
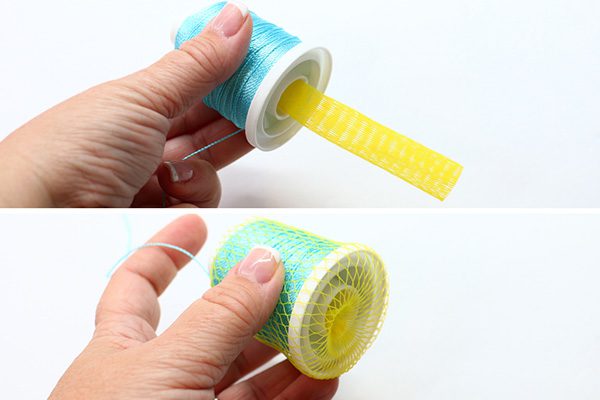
To achieve the best results with this thread you will need two things: a single thread net and spool disk. Check your machine’s supplies, they most likely came with your machine, if not, ask your local dealer.
If the thread net is long, cut it in half, it should be about two times the height of the cone of thread you’re using. Slip one end of the net up into the cone center hole. Fan out the remaining net around the outside of the cone. Add the spool disk on top of the spool stabilizer. Place spool on the top of the spool disk and thread machine. The benefit of putting the thread net inside the center of the spool is so the thread doesn’t fall down below the cone which helps prevent the thread from getting caught and break.
Serger Hack #4
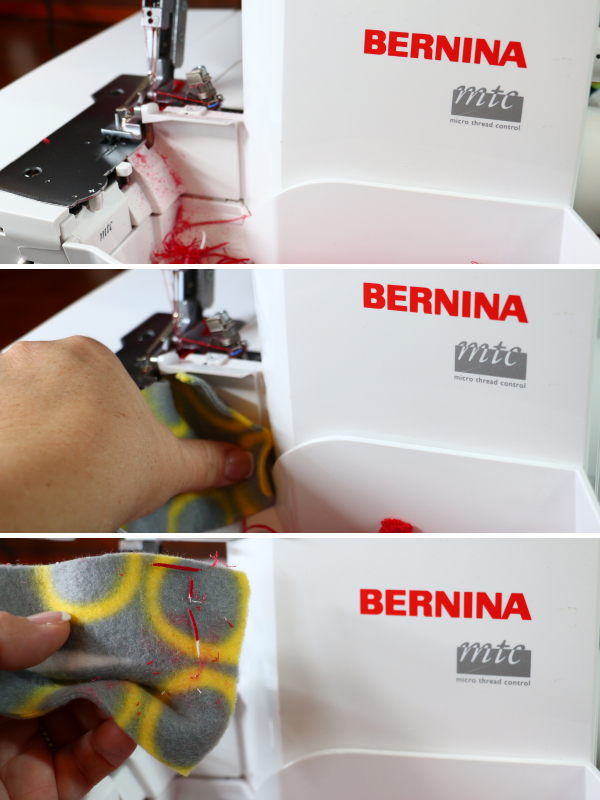
Keeping your serger clean can be nearly impossible at times. This hack is going to help you keep your sewing space and machine neat and tidy.
After serging a seam there will be leftover pieces of materials and tons of fiber fragments clinging to the face of your machine. Simply use a scrap of fleece or batting to clean up the mess. The fibers will cling to the fleece instead of the machine. This is a great trick for all your machines, give it a try.
What are some of your favorite serger hacks? Let me know if these hacks will come in handy for your stitching adventure. Have a creative day, Sue
What you might also like
6 comments on “Four Simple Serger Hacks”
-
-
🙂 so glad to hear
~ Sue
-
-
Have never known exactly how to deploy a thread net. Looking forward to giving this a try
-
Awesome! Give it a try 🙂
~Sue
-
-
Definitely fleece and the dangling needle are my favorites!
-
You’ll have to let me know how those tricks work for you!
~Sue
-
Leave a Reply
You must be logged in to post a comment.








Very handy. I think the fleece or dangling needle would be my fav.