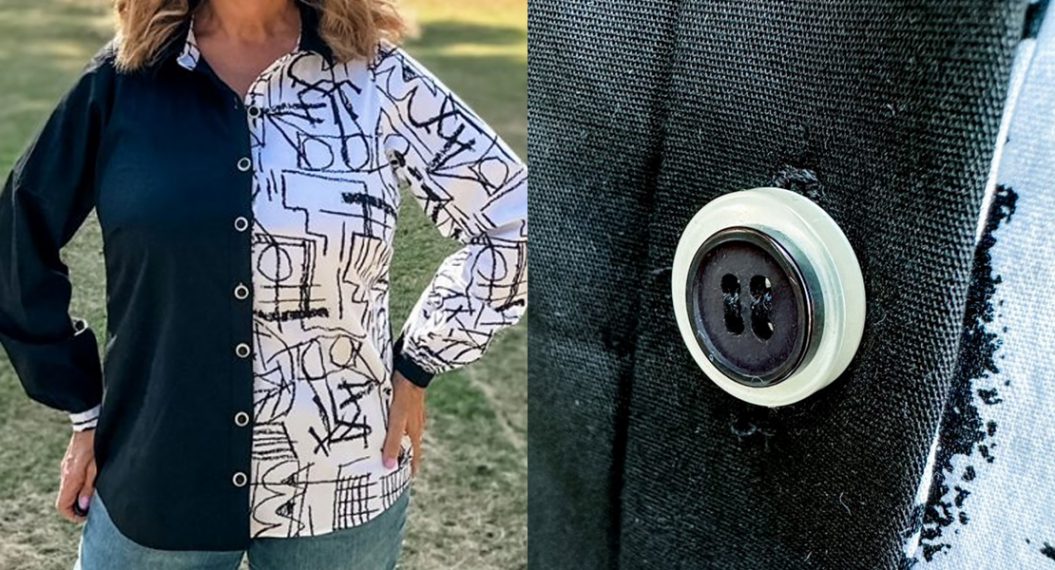
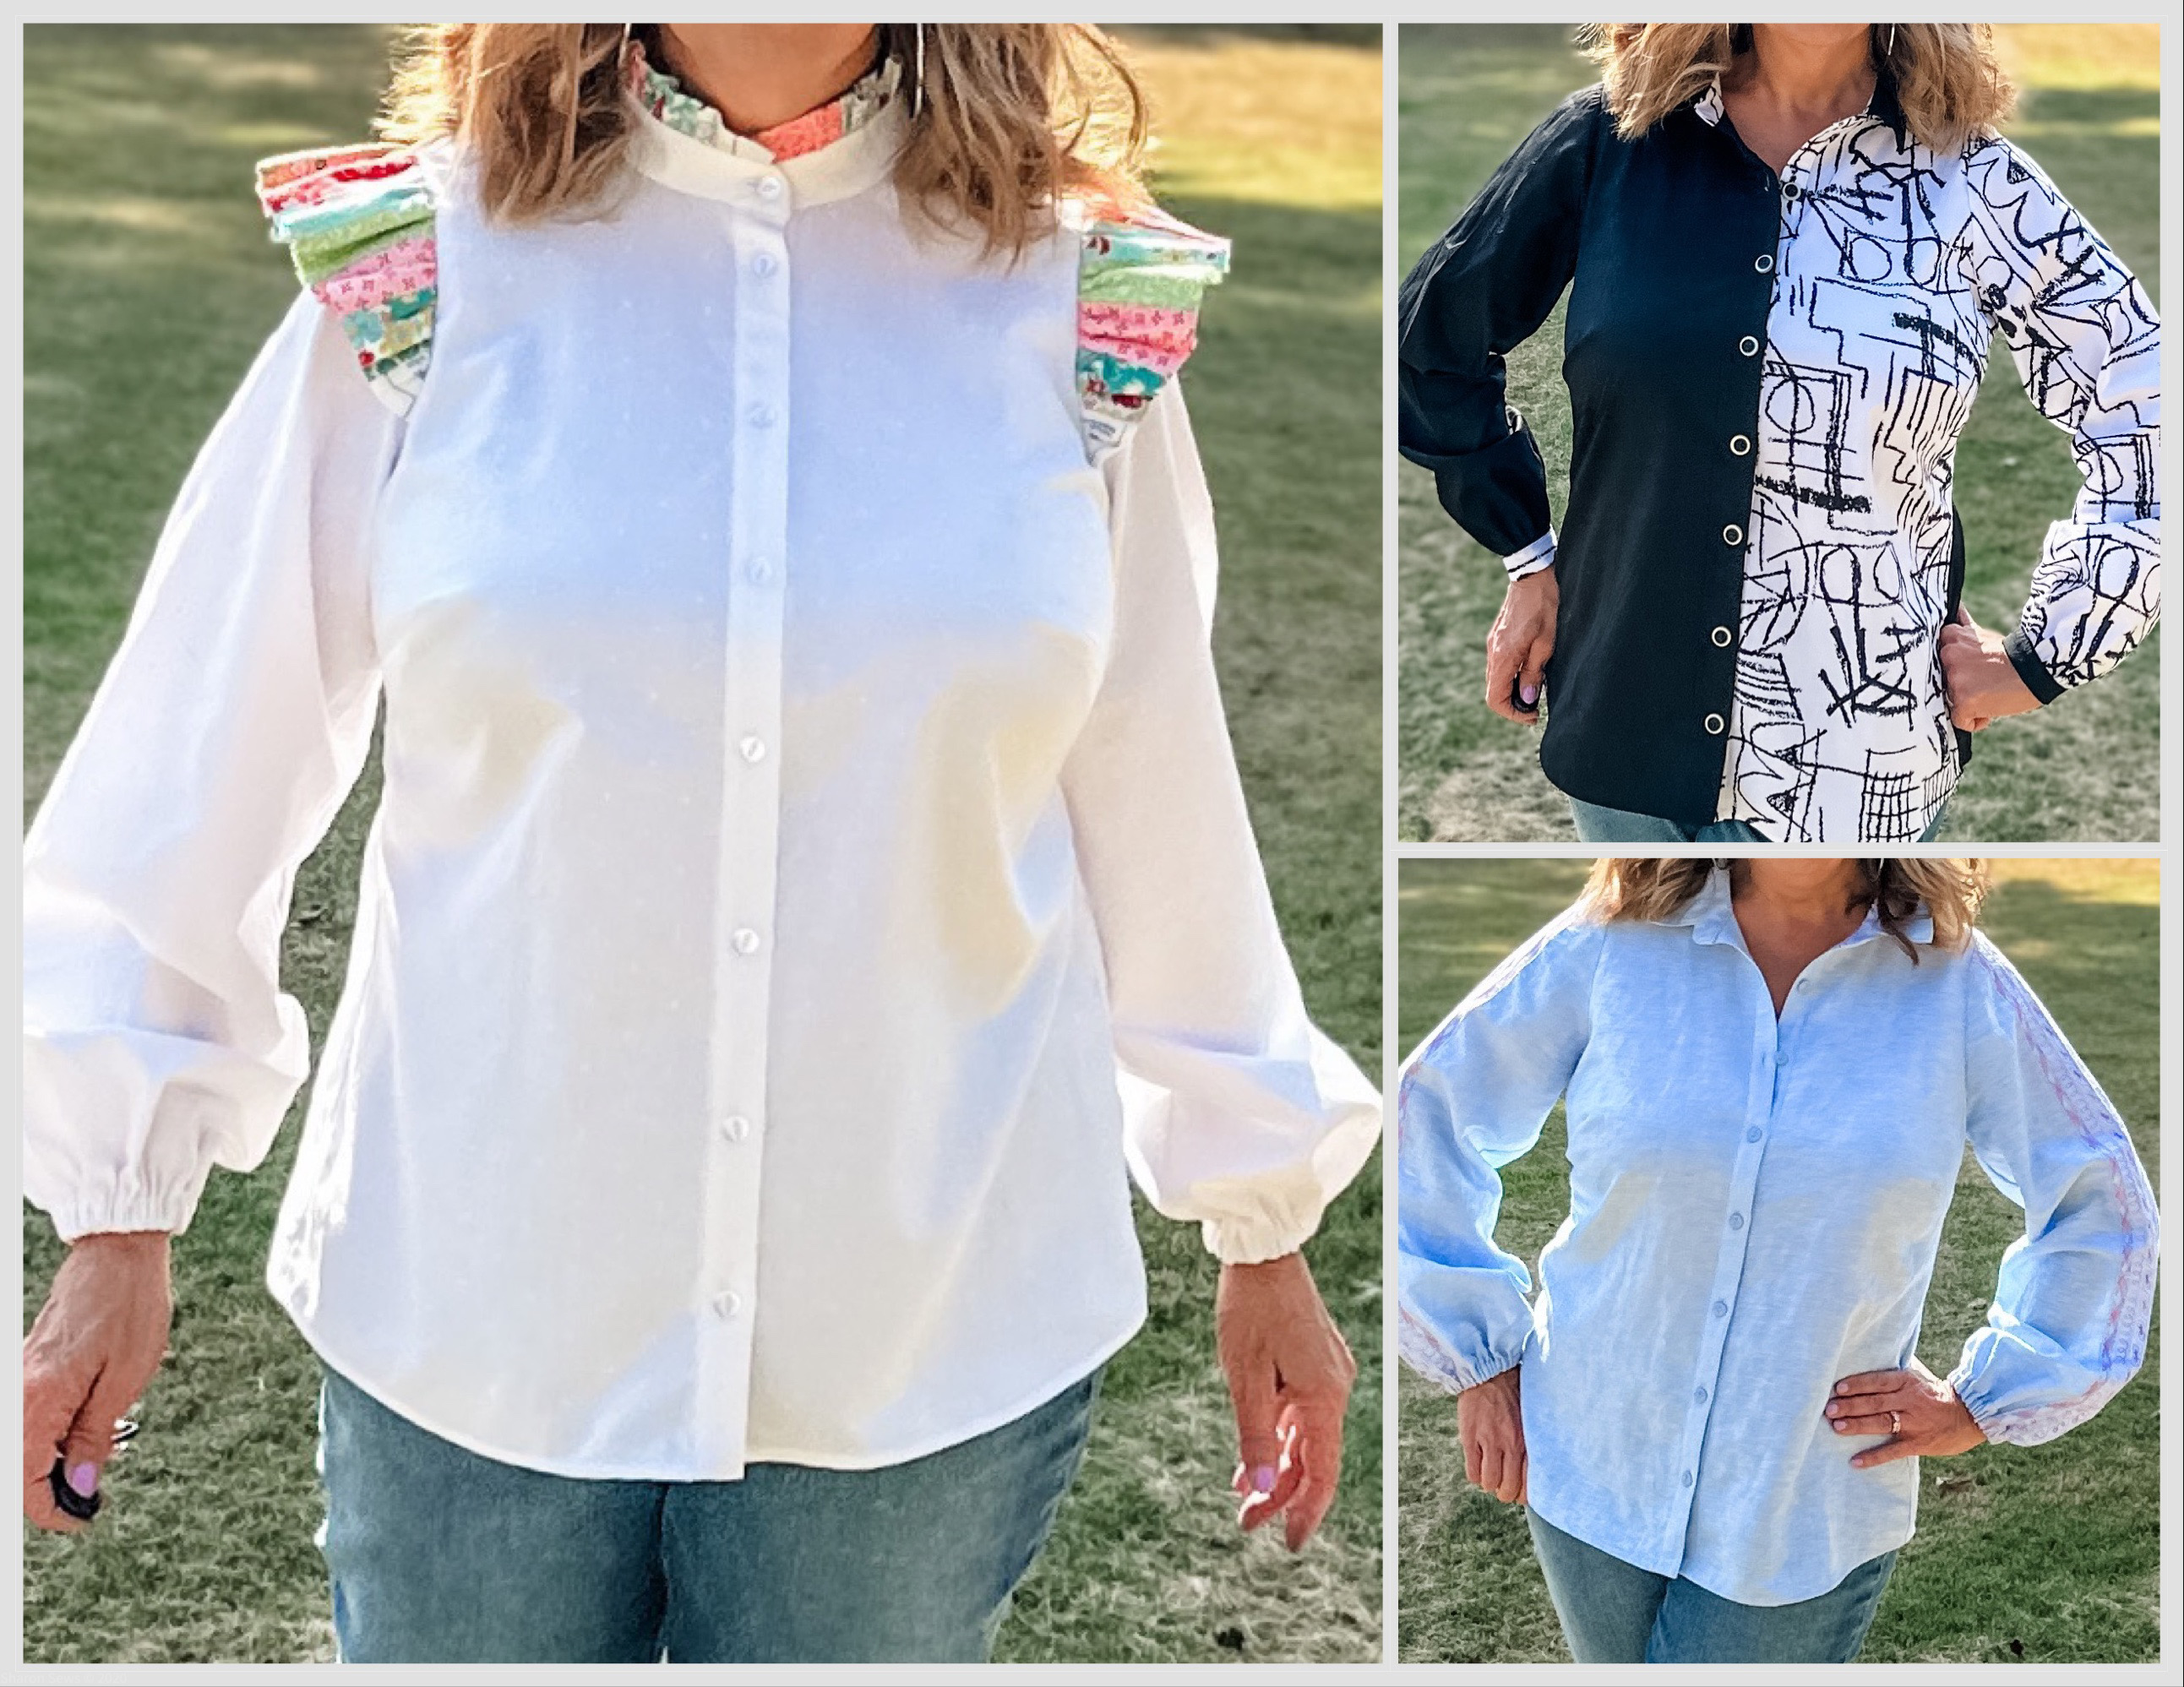
One Shirt Pattern Three Ways, Part Three: Patchwork Ruffles
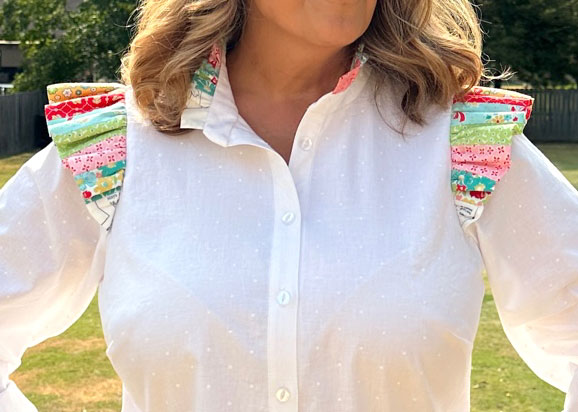
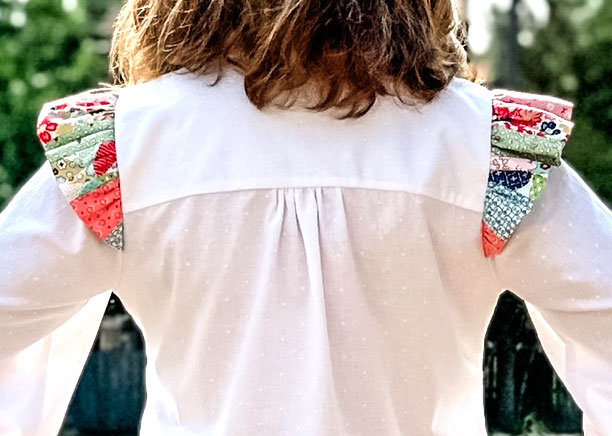
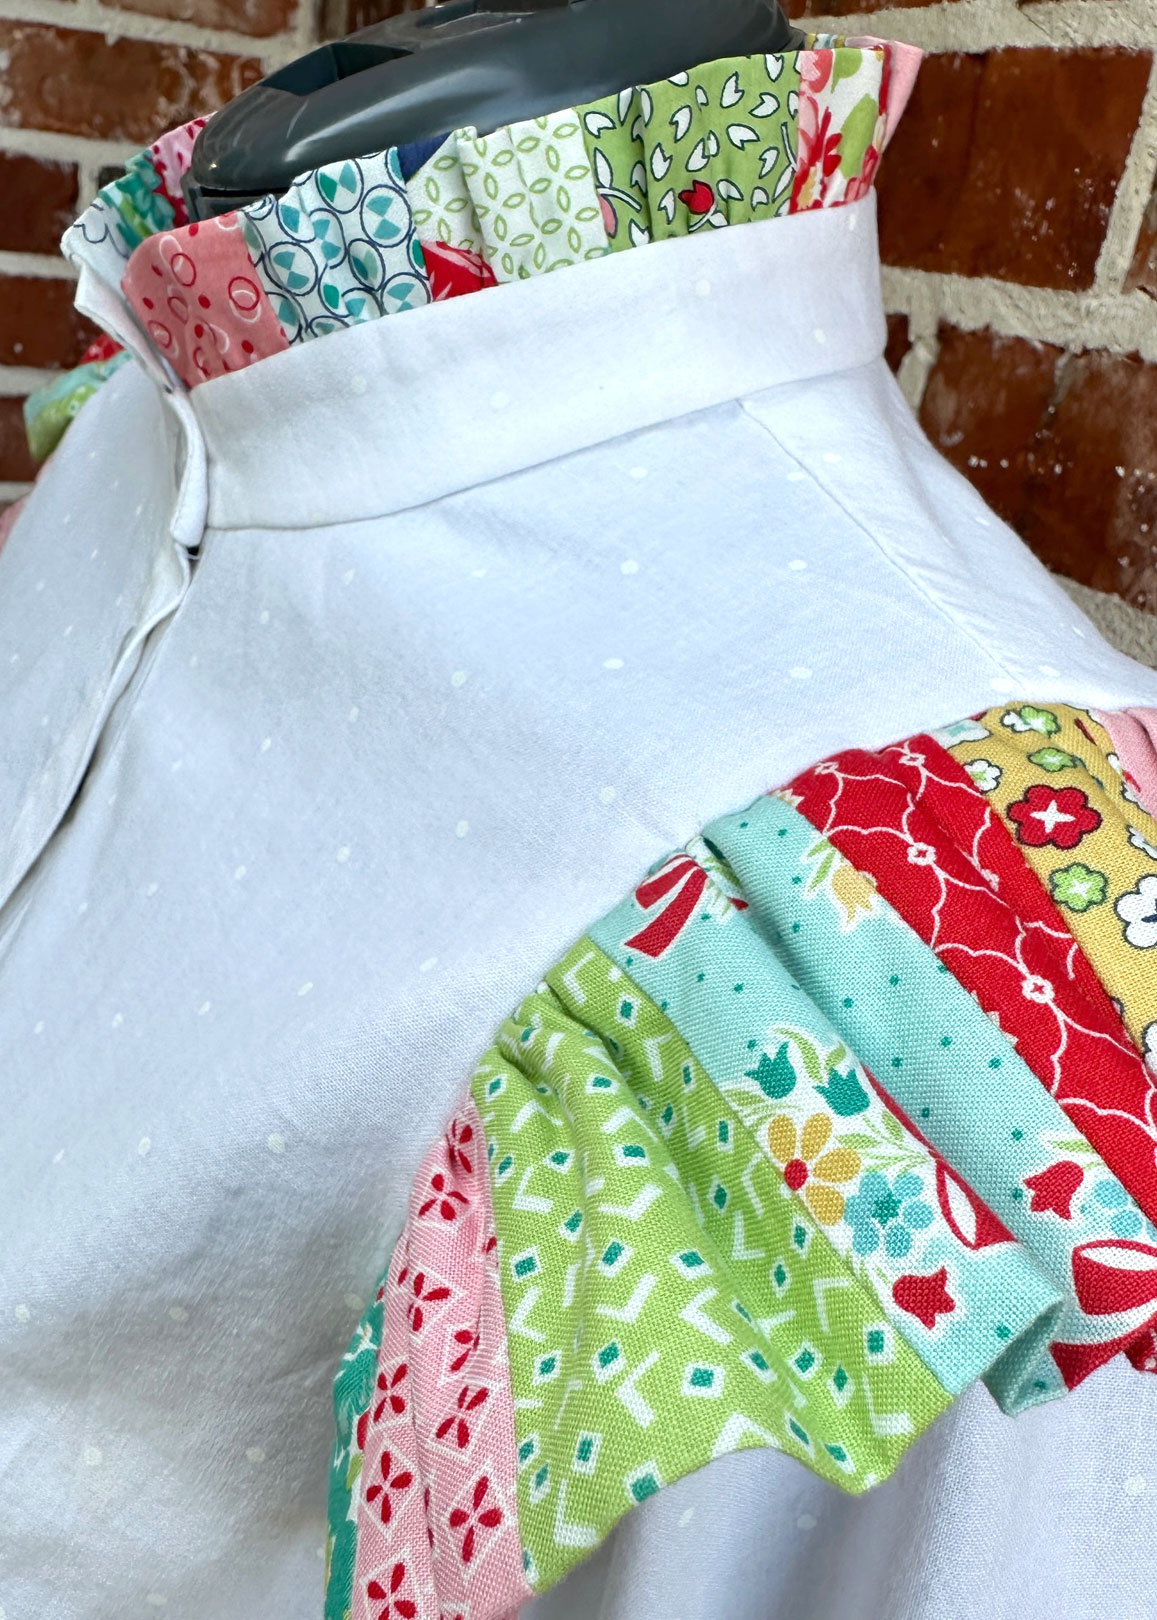
In part three of the One Shirt Pattern Three Ways series the sleeve is widened at the wrist, the sleeve cuff replaced with elastic, the collar eliminated, and a patchwork ruffle added to the shoulders and collar stand.
In this three-part series, I show you how to use one classic button up shirt pattern to sew three different looks.
- In part one, two fabrics are used to create a colorblocked shirt.
- In part two, pintucks and decorative stitches are added to the sleeves and back yoke.
- In part three, patchwork ruffles are added to the neck and shoulders.
Hello everyone! It’s Sharon from Sharon Sews. You can connect with me on YouTube, Instagram and my blog, where I share sewing tips, projects, reviews, and fashion sewing ideas.
For all three shirts, I used the Cashmerette Vernon Shirt pattern, a classic button up shirt with collar, collar stand, button placket, back yoke, and narrow buttoned cuff. The pattern is available in both print and PDF, has a wide range of sizes (0 to 32), as well as cup sizes (making it easy to fit the bust). Cashmerette provided the pattern for this project.

Let’s get started sewing the patchwork ruffle shirt.
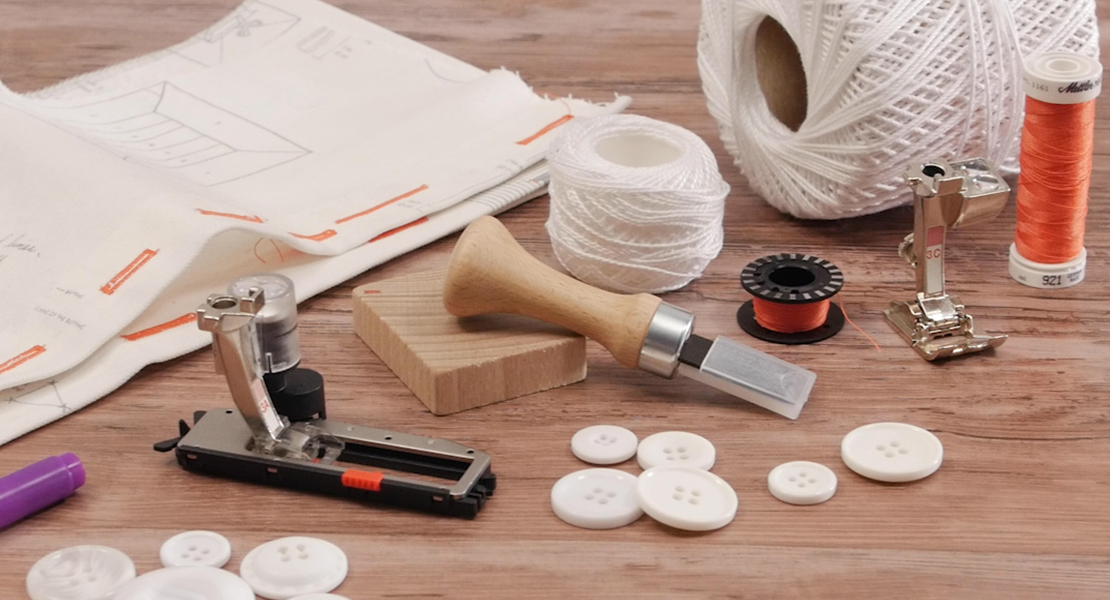
Materials to Sew the Patchwork Ruffle Shirt
- Sewing Machine – I used my BERNINA 770 QE PLUS
- Classic long sleeve button-up shirt pattern, the Cashmerette Vernon Shirt Pattern
- Note: you can use any shirt pattern with a long sleeve and and collar stand as long as it’s designed for woven fabrics.
- Cotton or cotton blend shirting fabric – yardage per pattern (I used a quilting cotton from my stash)
- Quilting cotton for the patchwork ruffles – 26 pieces 2-1/2″ x 7″ and 13 pieces 3″ x 7″ (I used a fat quarter bundle from my stash)
- Interfacing – yardage per pattern
- Seven 1/2″ buttons
- 3/8” elastic – enough to fit around each wrist
- Coordinating all-purpose thread
- Point turner
- Buttonhole cutter and wooden block
- Tracing paper
- Pen
- Ruler
- French curve ruler
- Paper scissors
- Tape
- General sewing supplies
- Rotary cutter and mat
- Iron and pressing surface
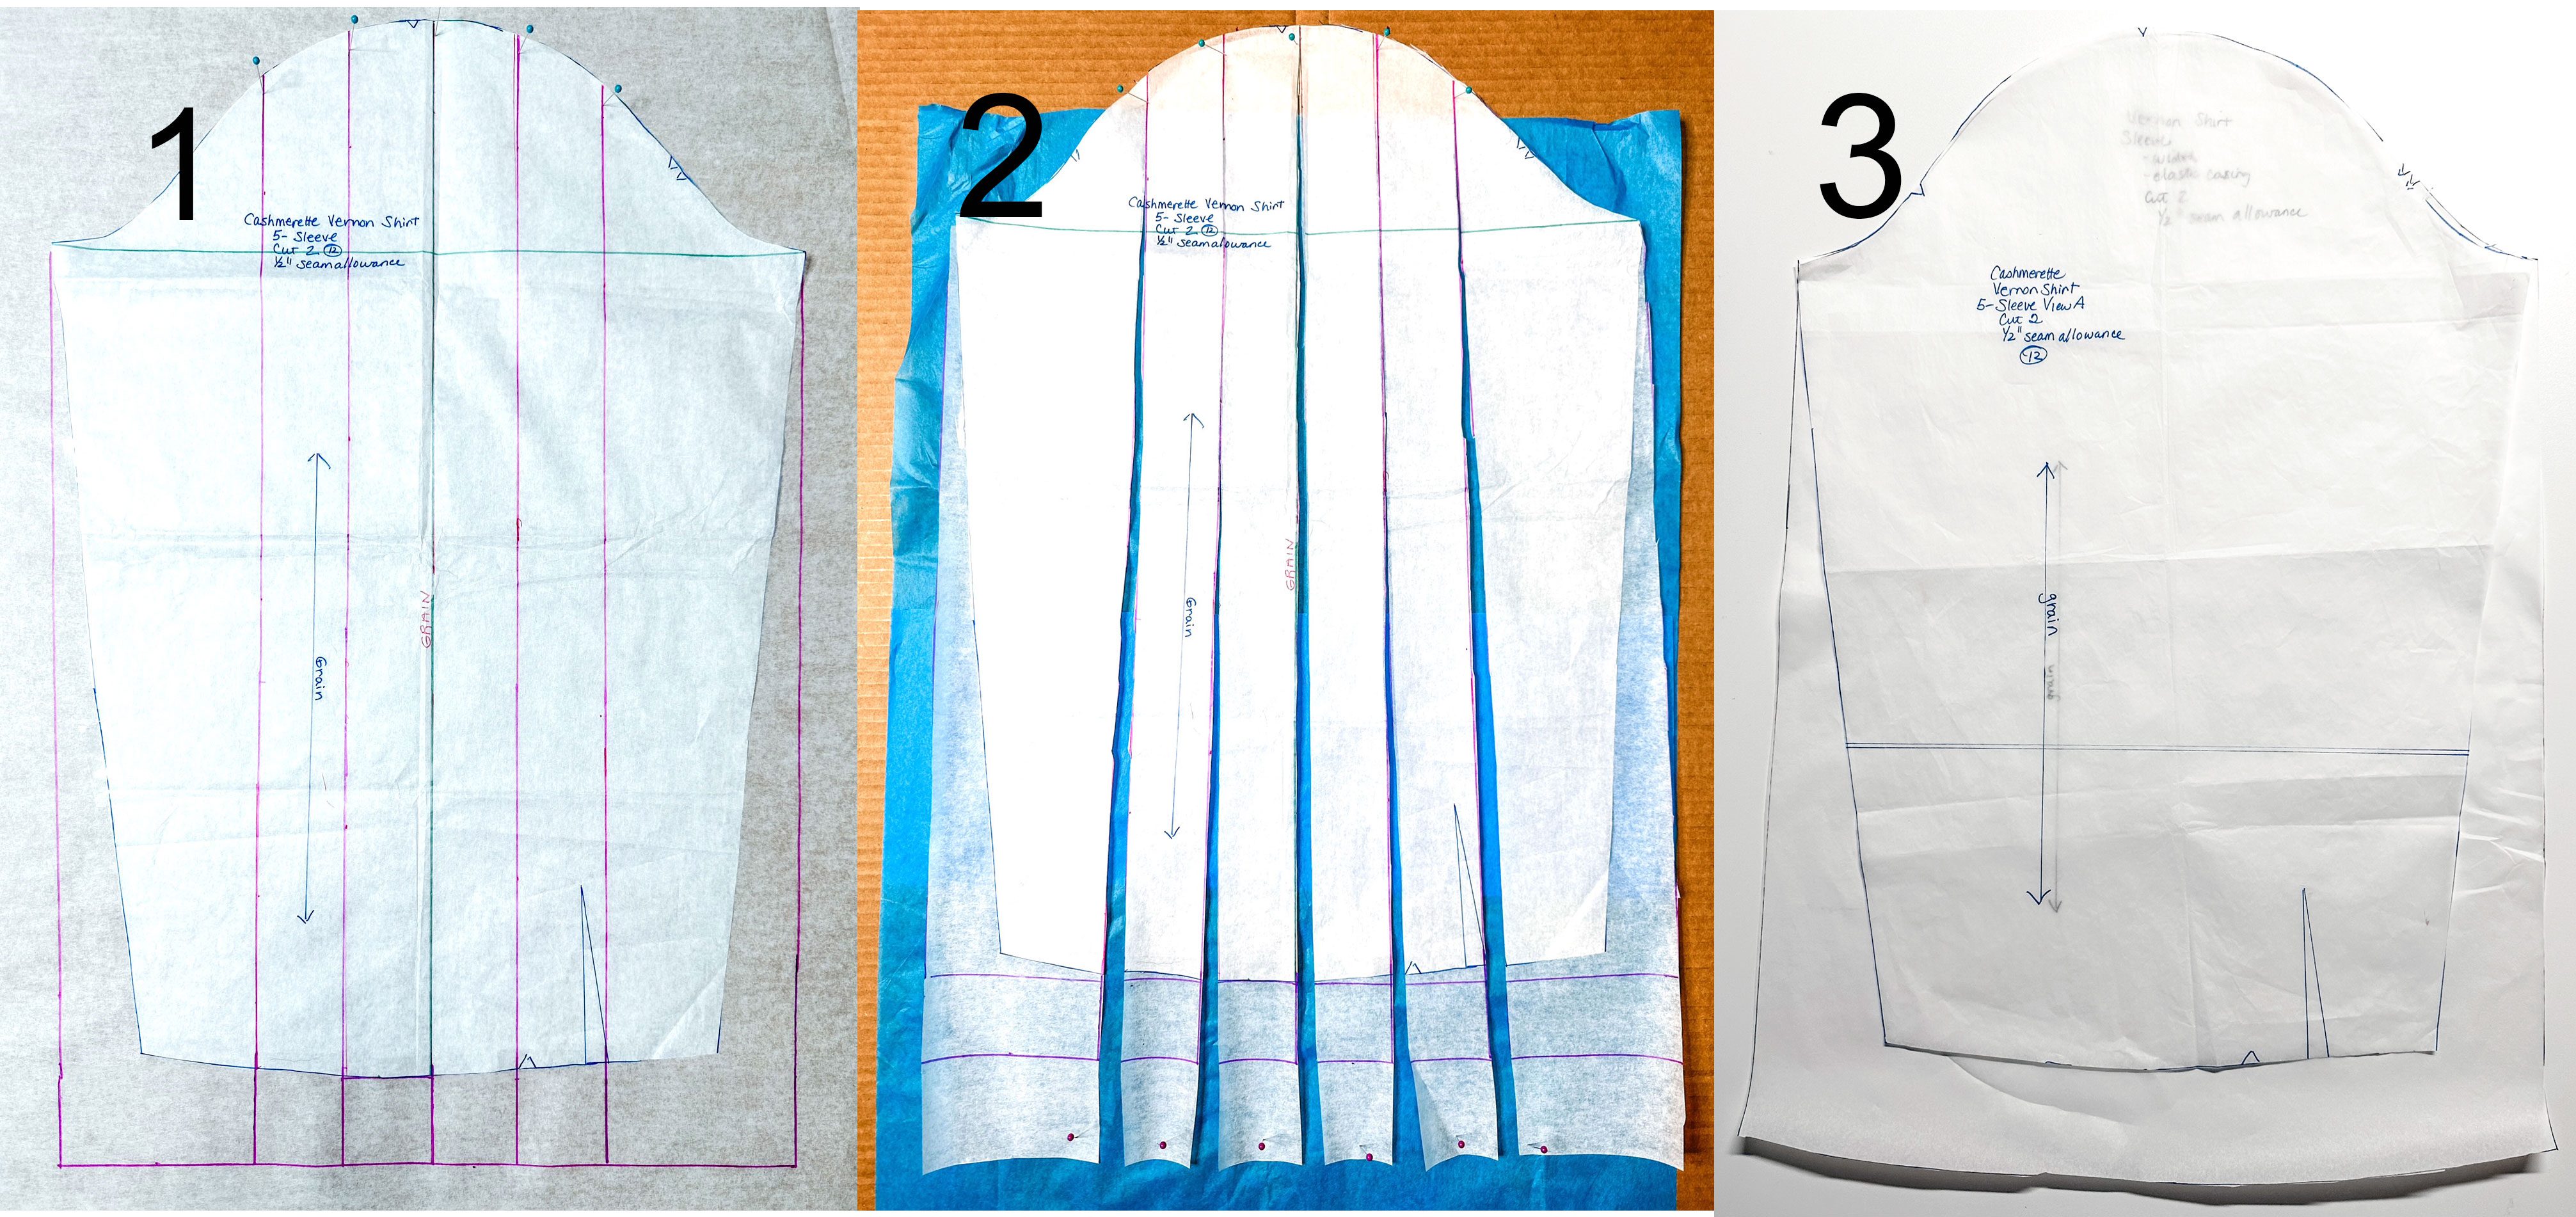
Prepare the Sleeve Pattern
Trace and Mark the Sleeve Pattern for the Shirt
Note: If you are using a multi-sized shirt pattern, consider tracing all of your pattern pieces. Tracing will allow you to keep the original pattern pieces which is helpful if you want to sew additional sizes.
Trace the sleeve pattern in the size you are using. To do so, place the sleeve pattern piece right side up on a flat work surface and place tracing paper over the top of the pattern piece. Using a pen, ruler, and French curve, trace along the size line of your sleeve pattern piece. Transfer all the pattern markings to your traced pattern piece.
Place the traced sleeve pattern on top of at new piece of tracing paper and secure in place.
Draw vertical lines from the underarm points to the lower edge. Extend the lines beyond the lower edge by 2″. Connect the lines straight across at the lower edge.
Fold the sleeve pattern in half lengthwise and unfold; verify that the fold line is parallel to the grain line as it’s important to maintain an accurate grainline.
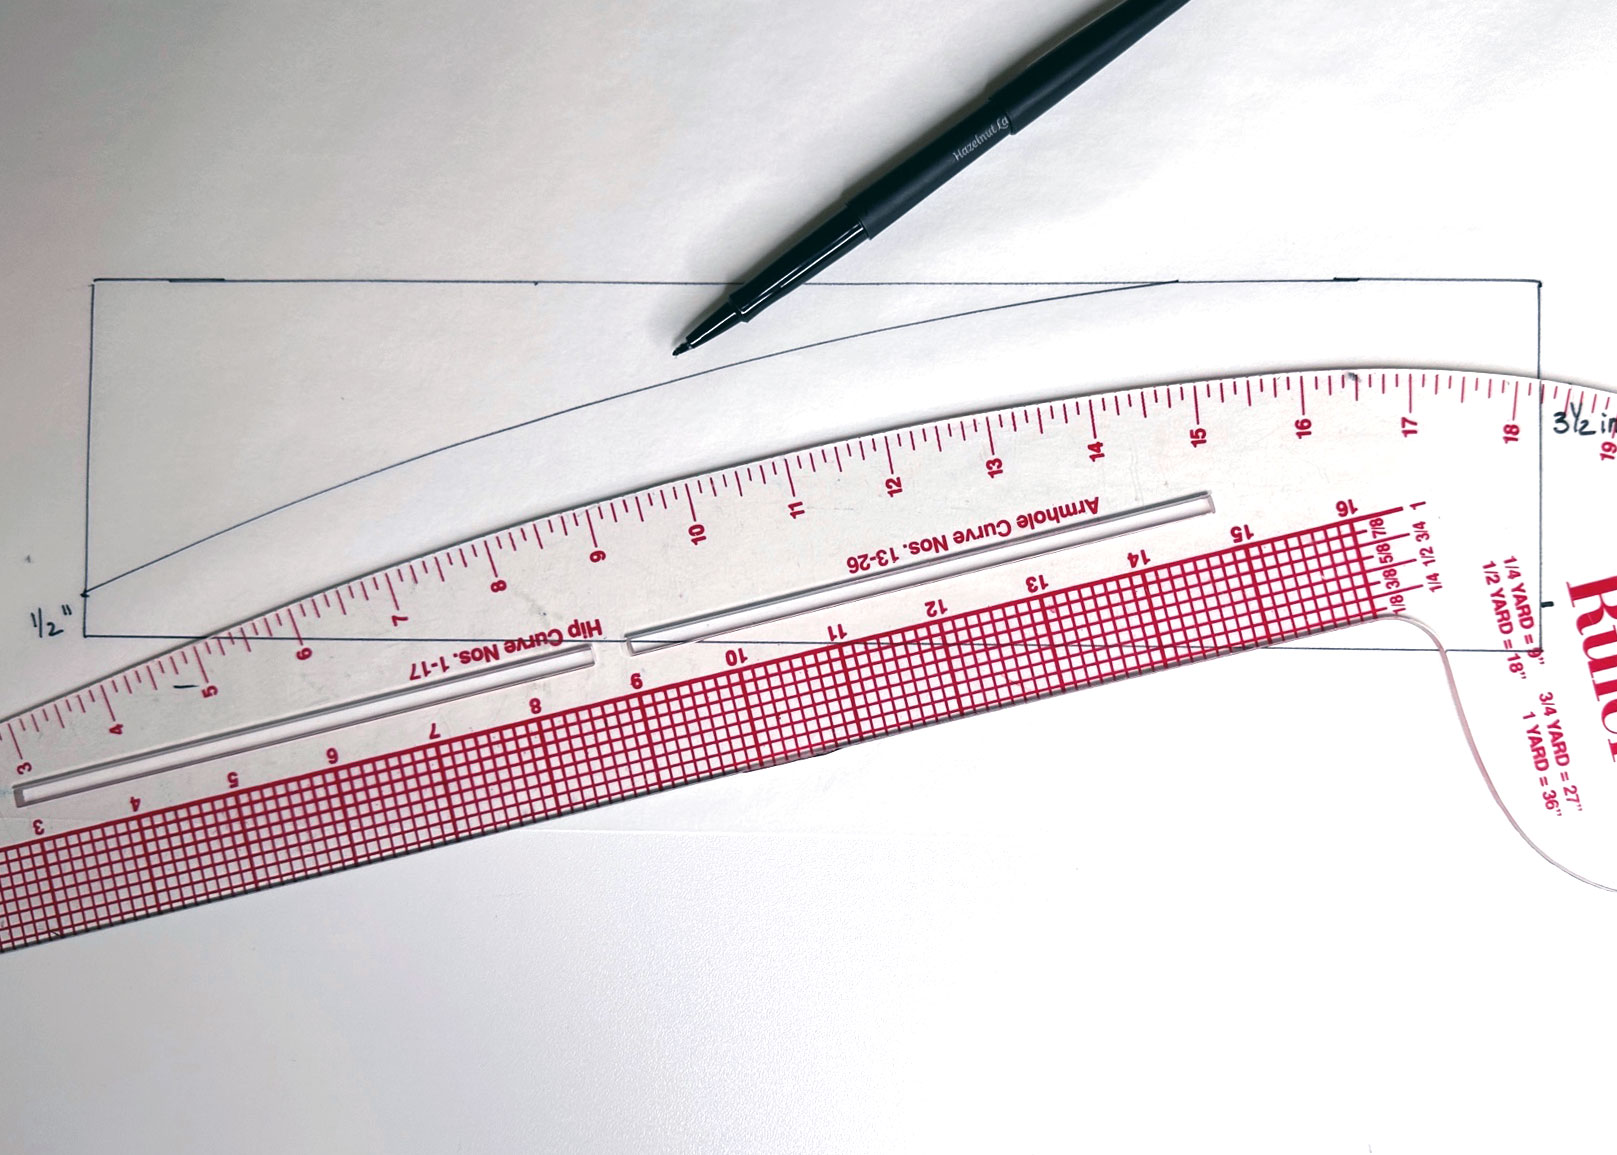
Draw a vertical line along the foldline from the sleeve cap to the bottom edge of the sleeve. Measure 2″ from the line and draw another vertical line. Continue until there are five vertical lines drawn. These are the slash lines that will be used to add width to the sleeve. (Image 1)
Cut along each line from the bottom to the seam line (1/2” from the sleeve cap). Cut a small clip in the seam allowance, forming a hinge. Spread each slashed section 1/2″ and tape in place. If you want a wider sleeve, make the space between each section larger. Normally I use tracing paper for all my alterations, but I added colored tissue paper to make the change more visible. (Image 2)
Measure 1/2″ at the bottom center of the sleeve and make a mark. Use a fashion ruler to draw a slight curve from that mark tapering to the side seams to complete the new sleeve pattern. The finished pattern will be wider and longer at the bottom. (Image 3, with the original sleeve pattern on top).
Create the Shoulder Ruffle Pattern
On a piece of tracing paper, use a ruler and pen to draw a rectangle that measures 3-1/2″ x 18″.
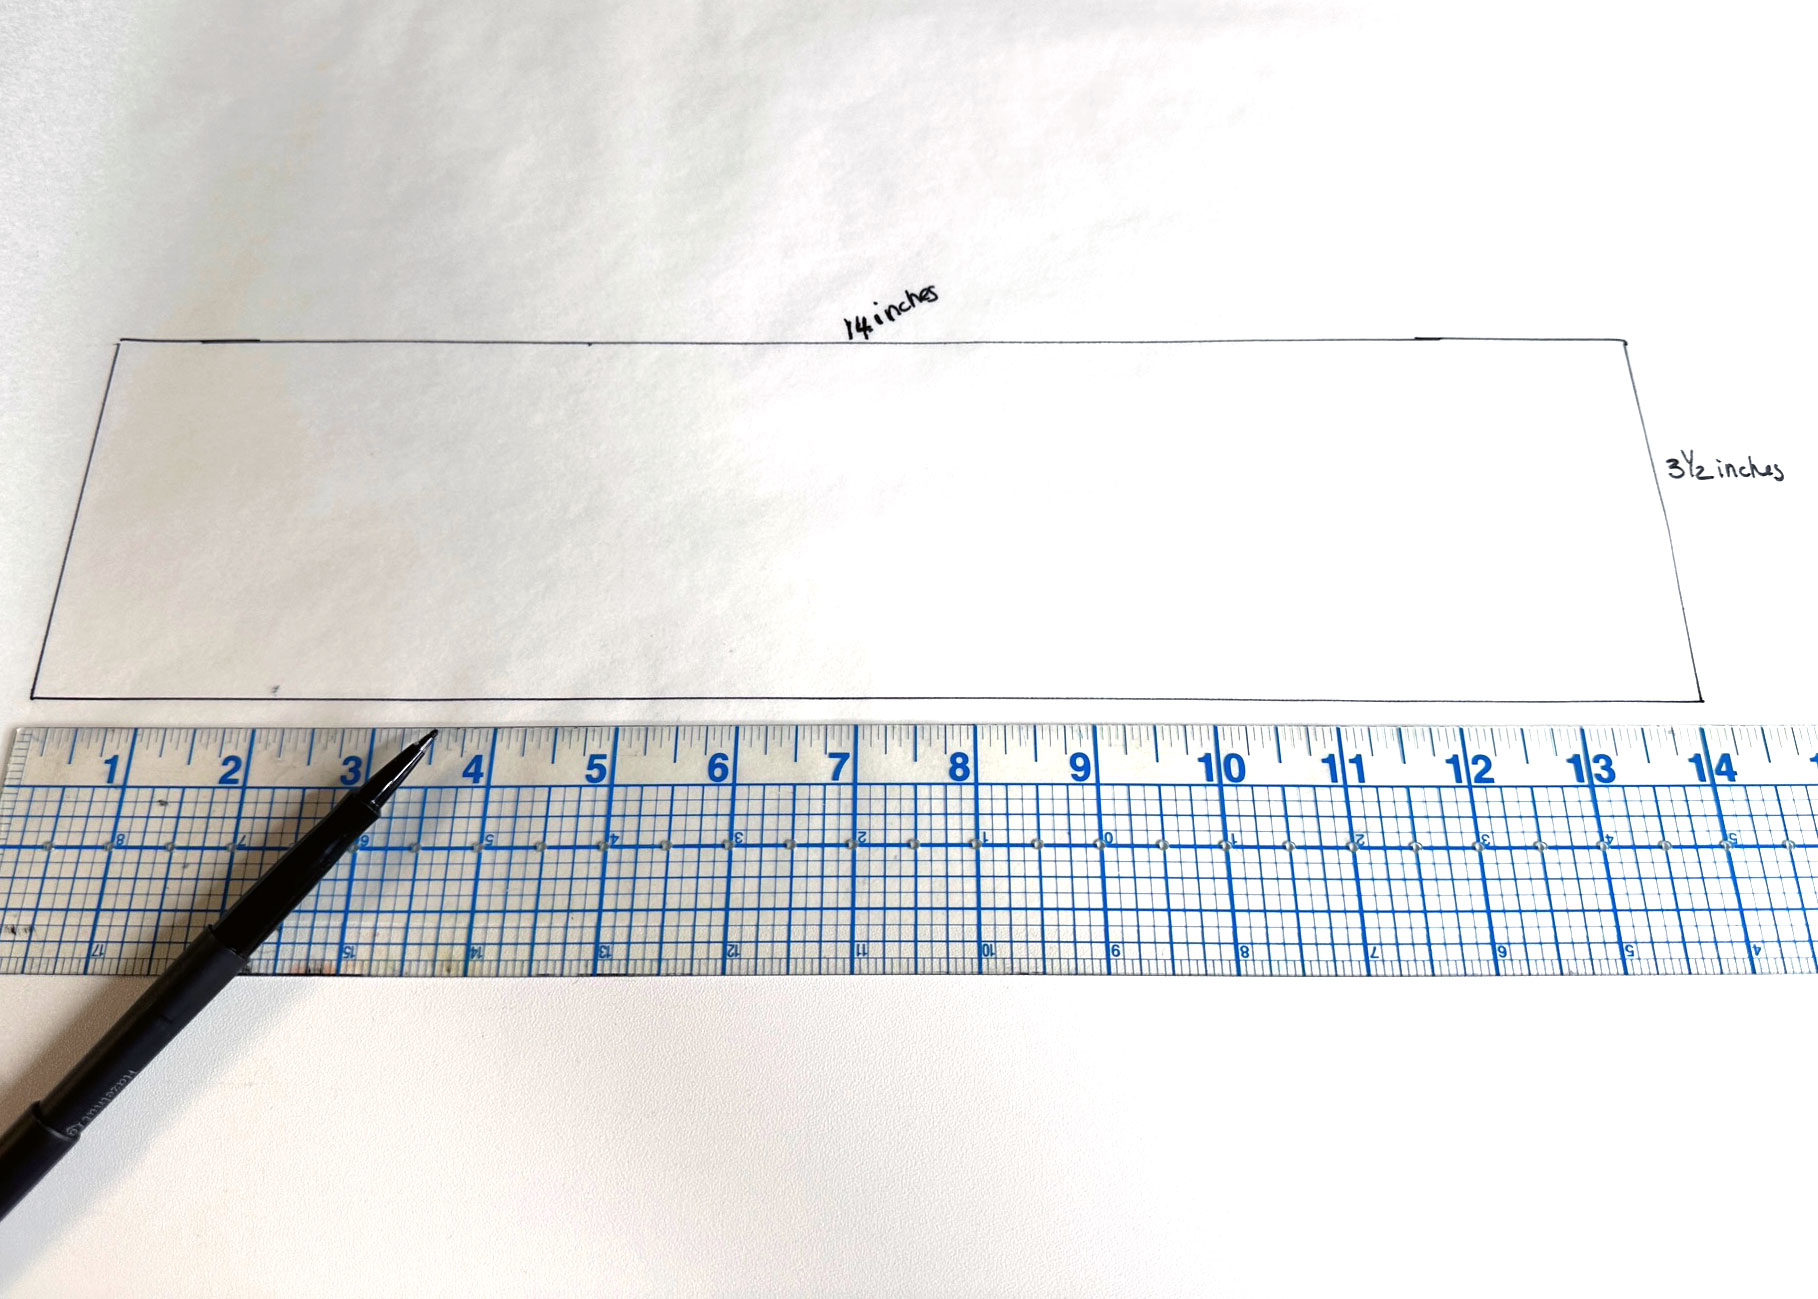
Starting at the top of one short end, use a fashion ruler to draw a slightly curved line to the other short end, ending about 1/2″ from the bottom. Cut out the pattern piece.
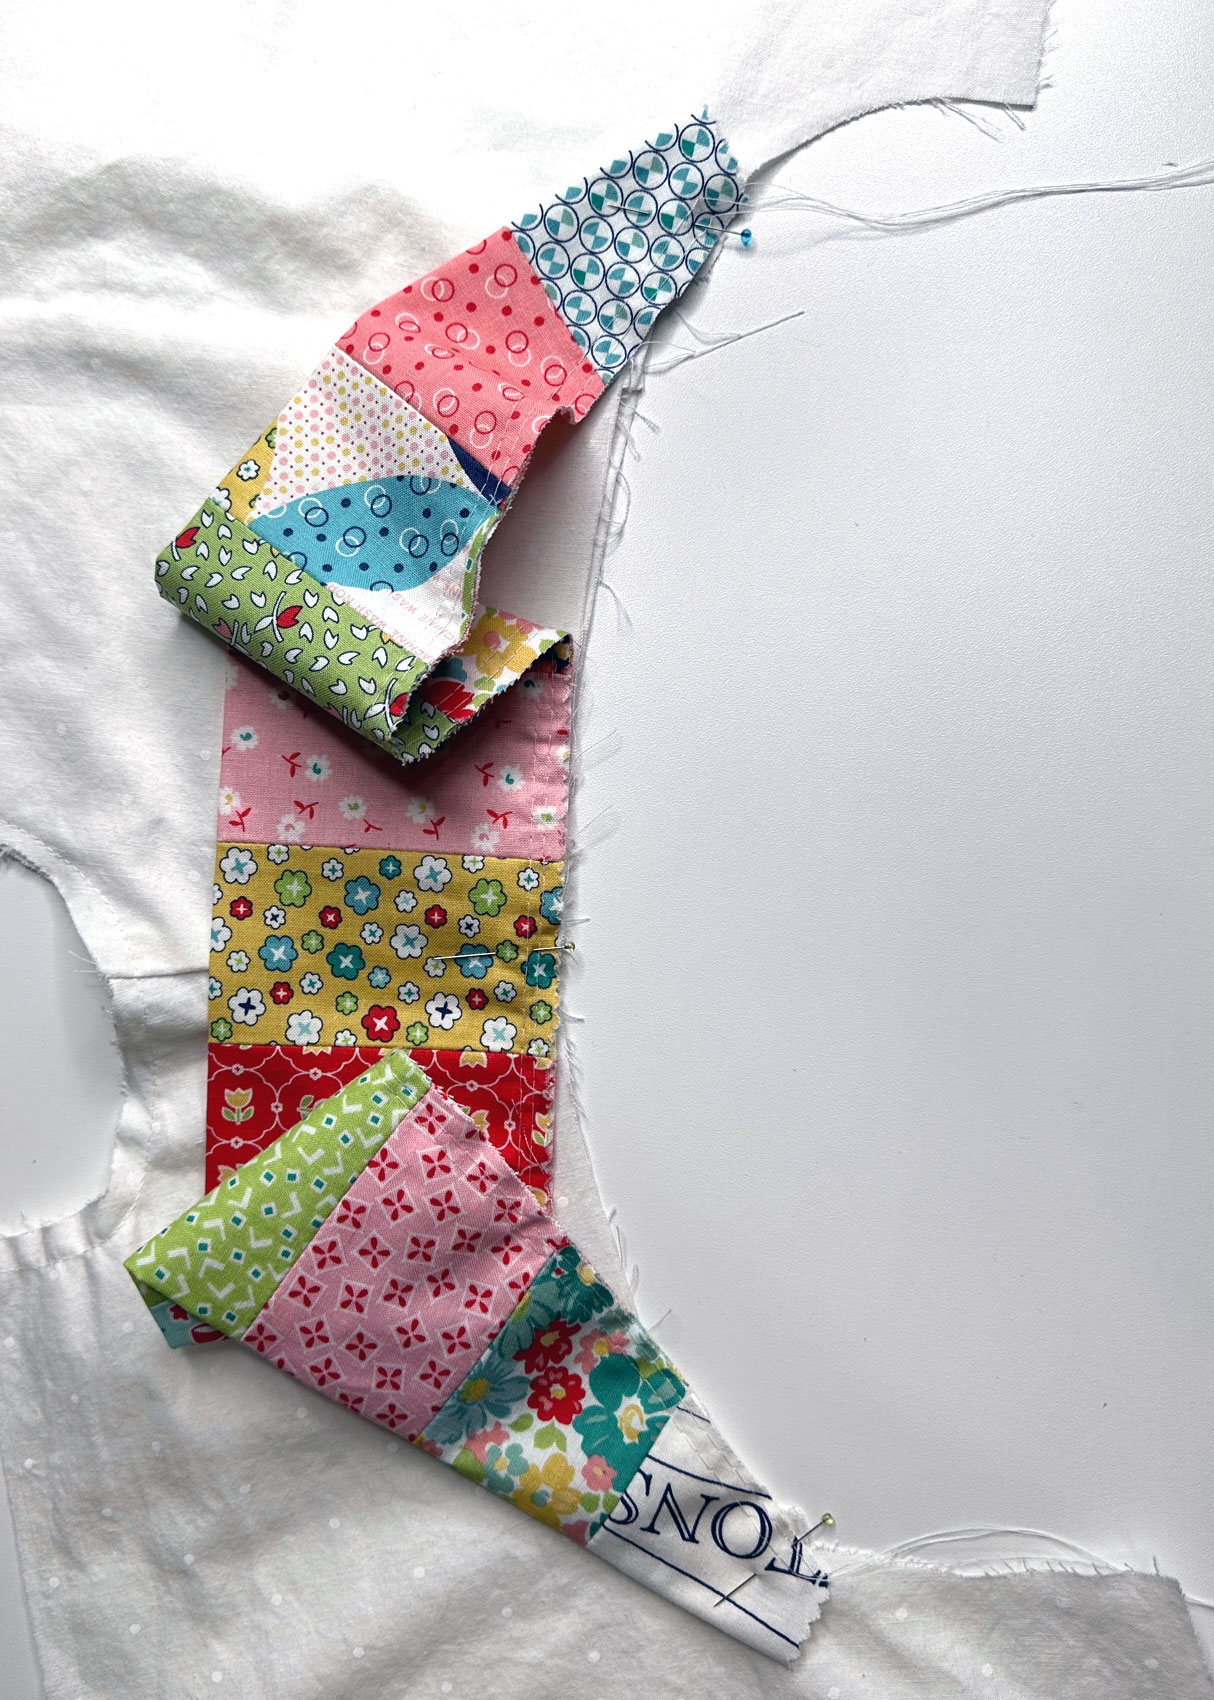
Create the Patchwork for the Ruffles
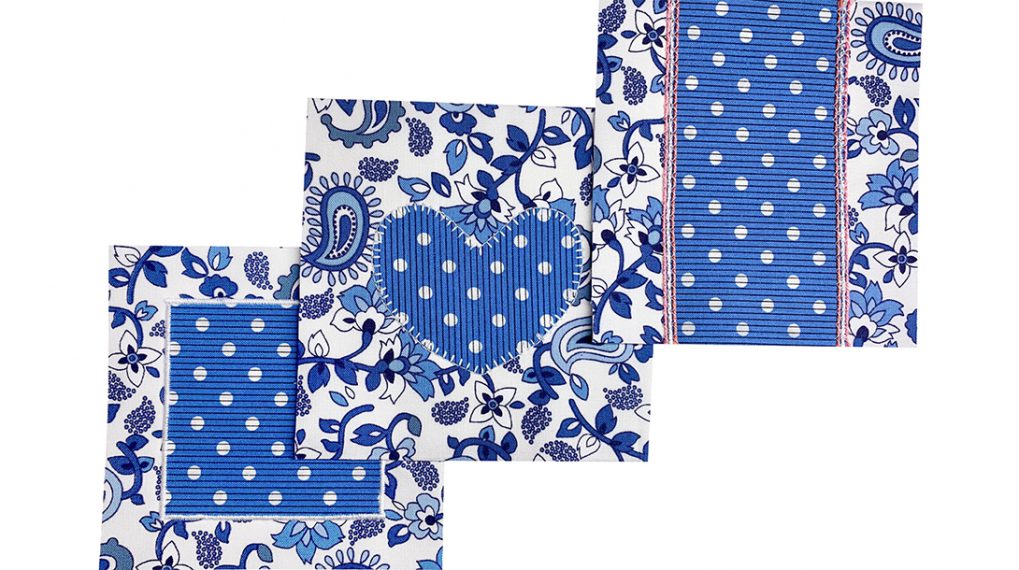
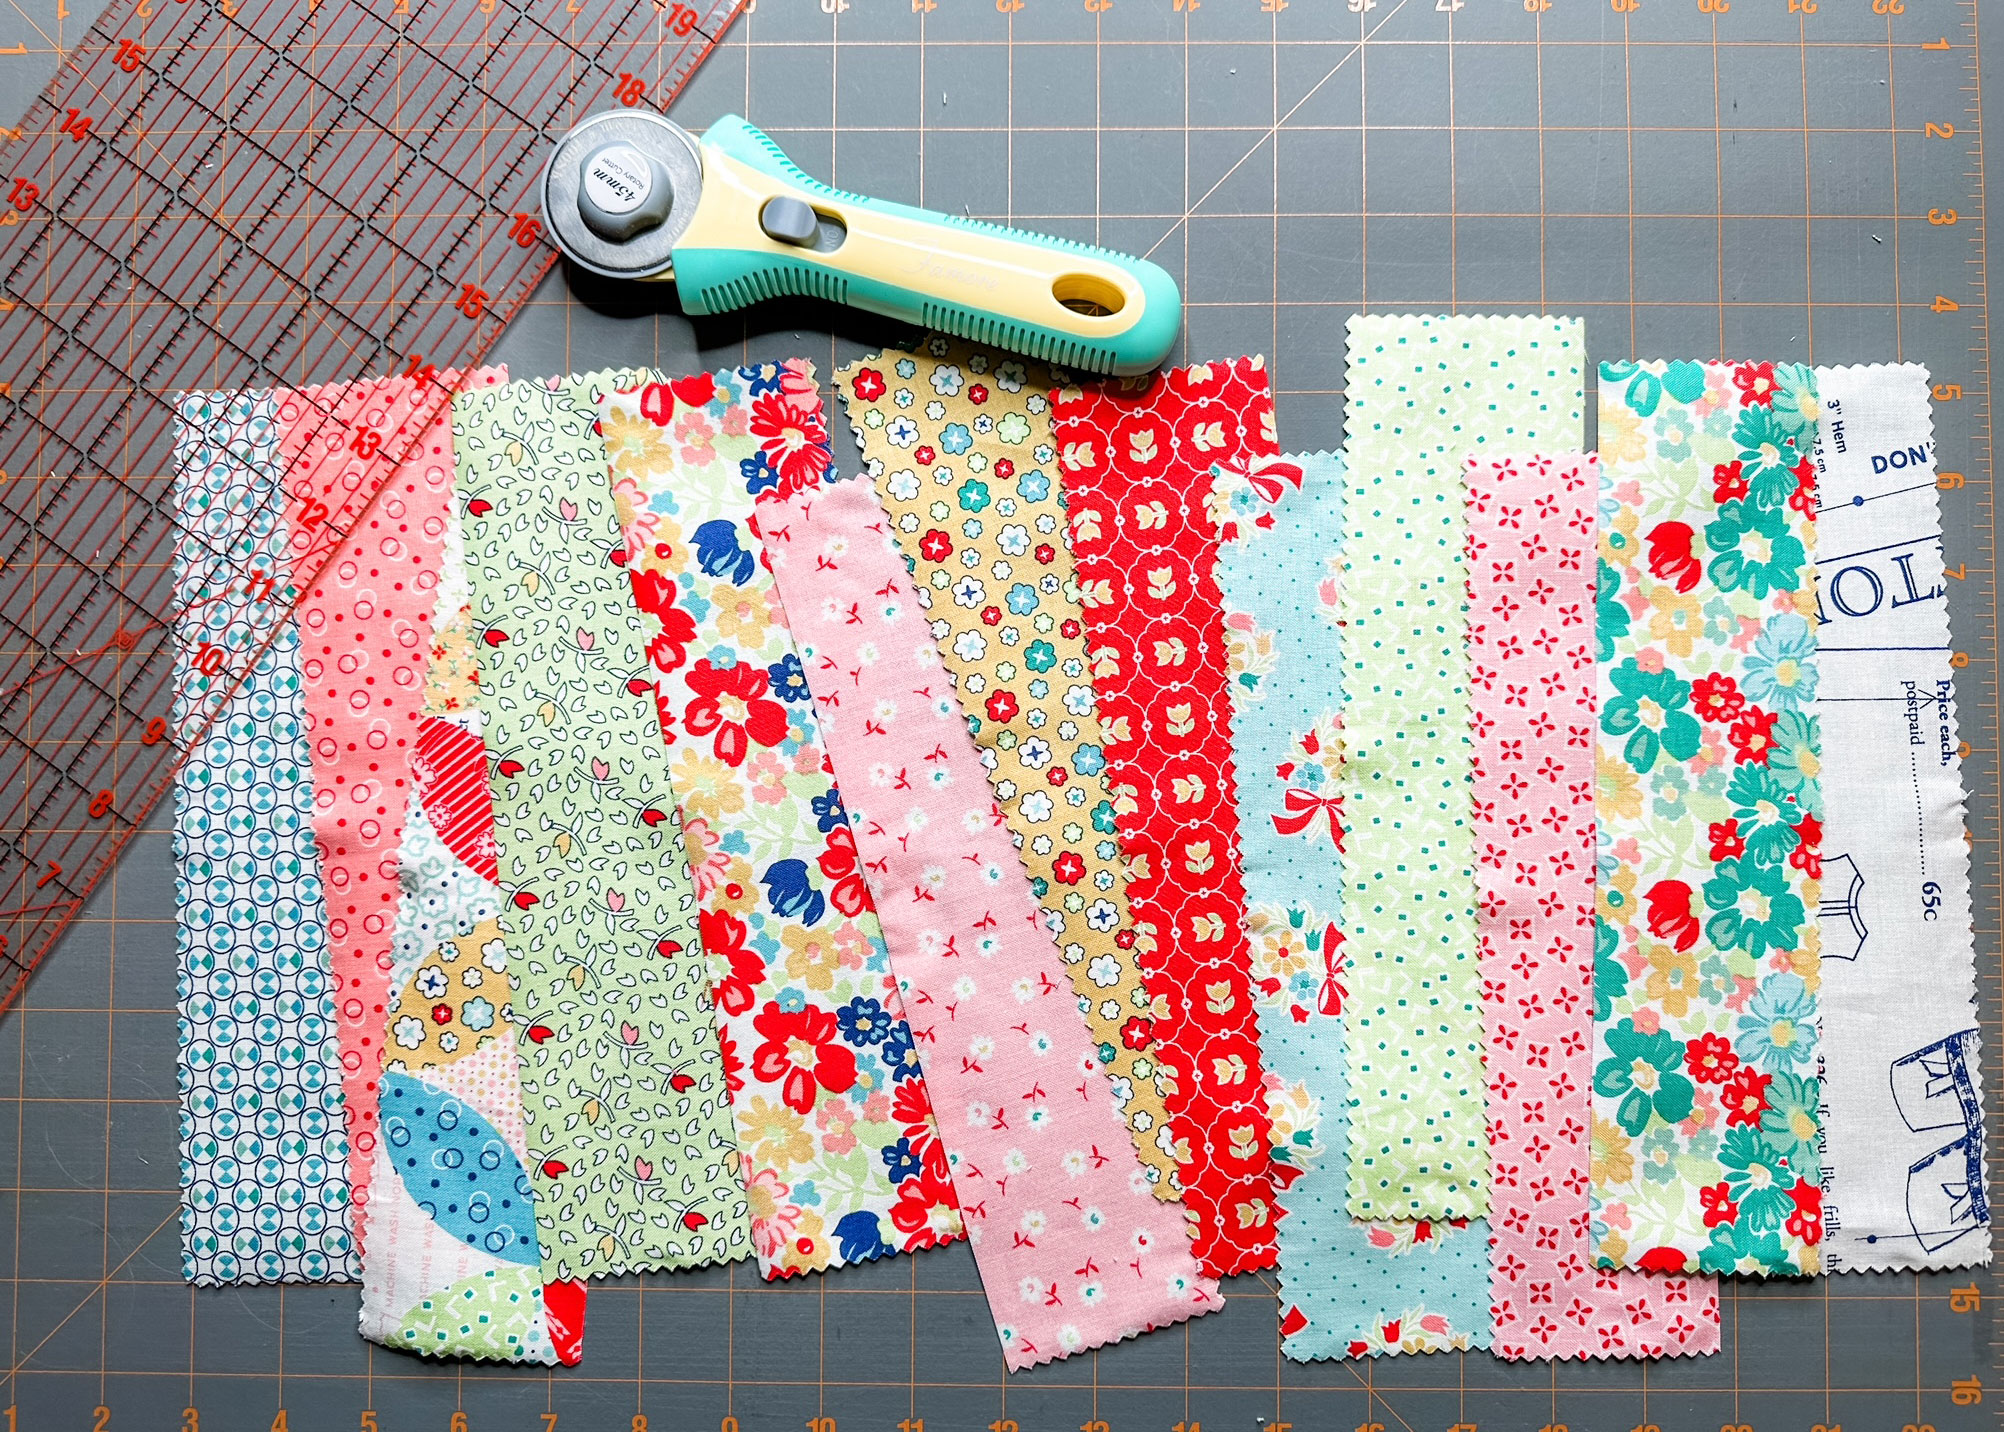
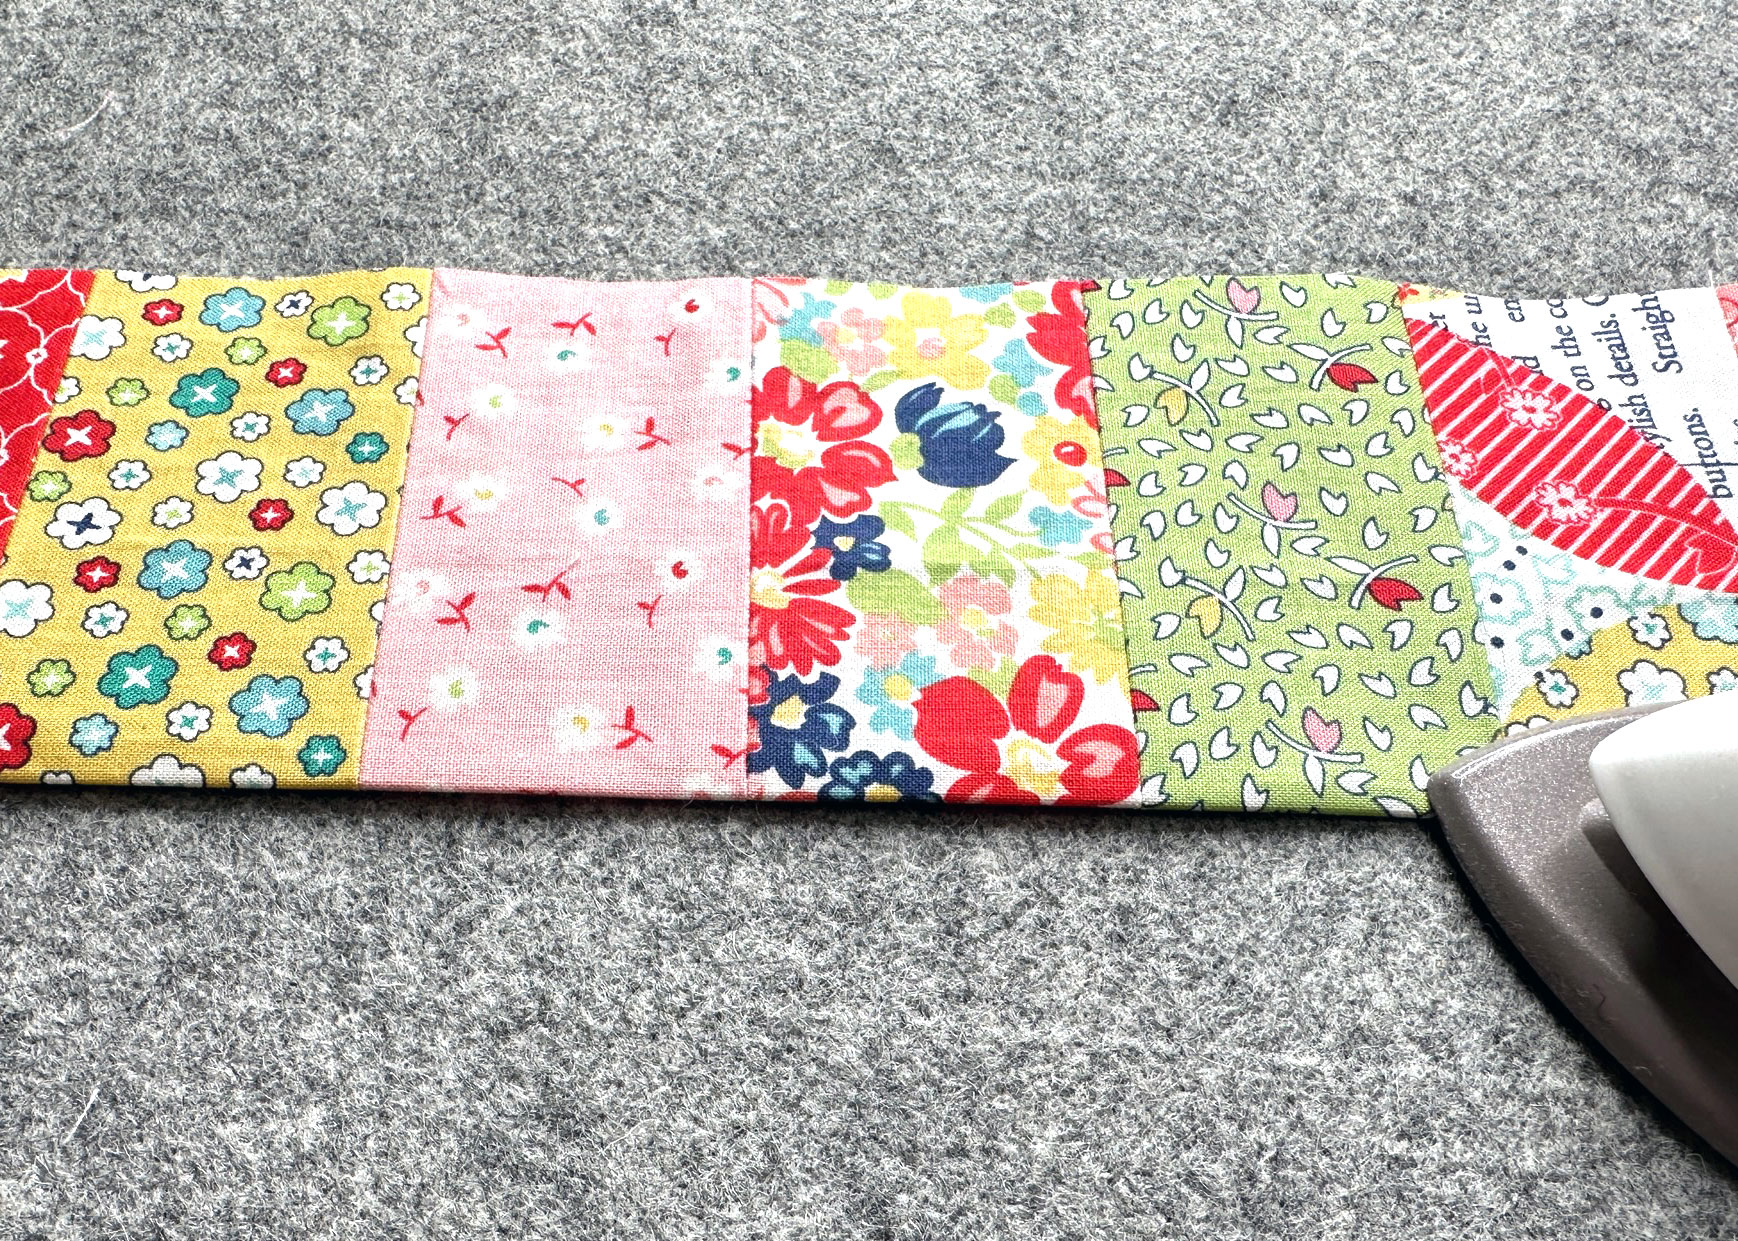
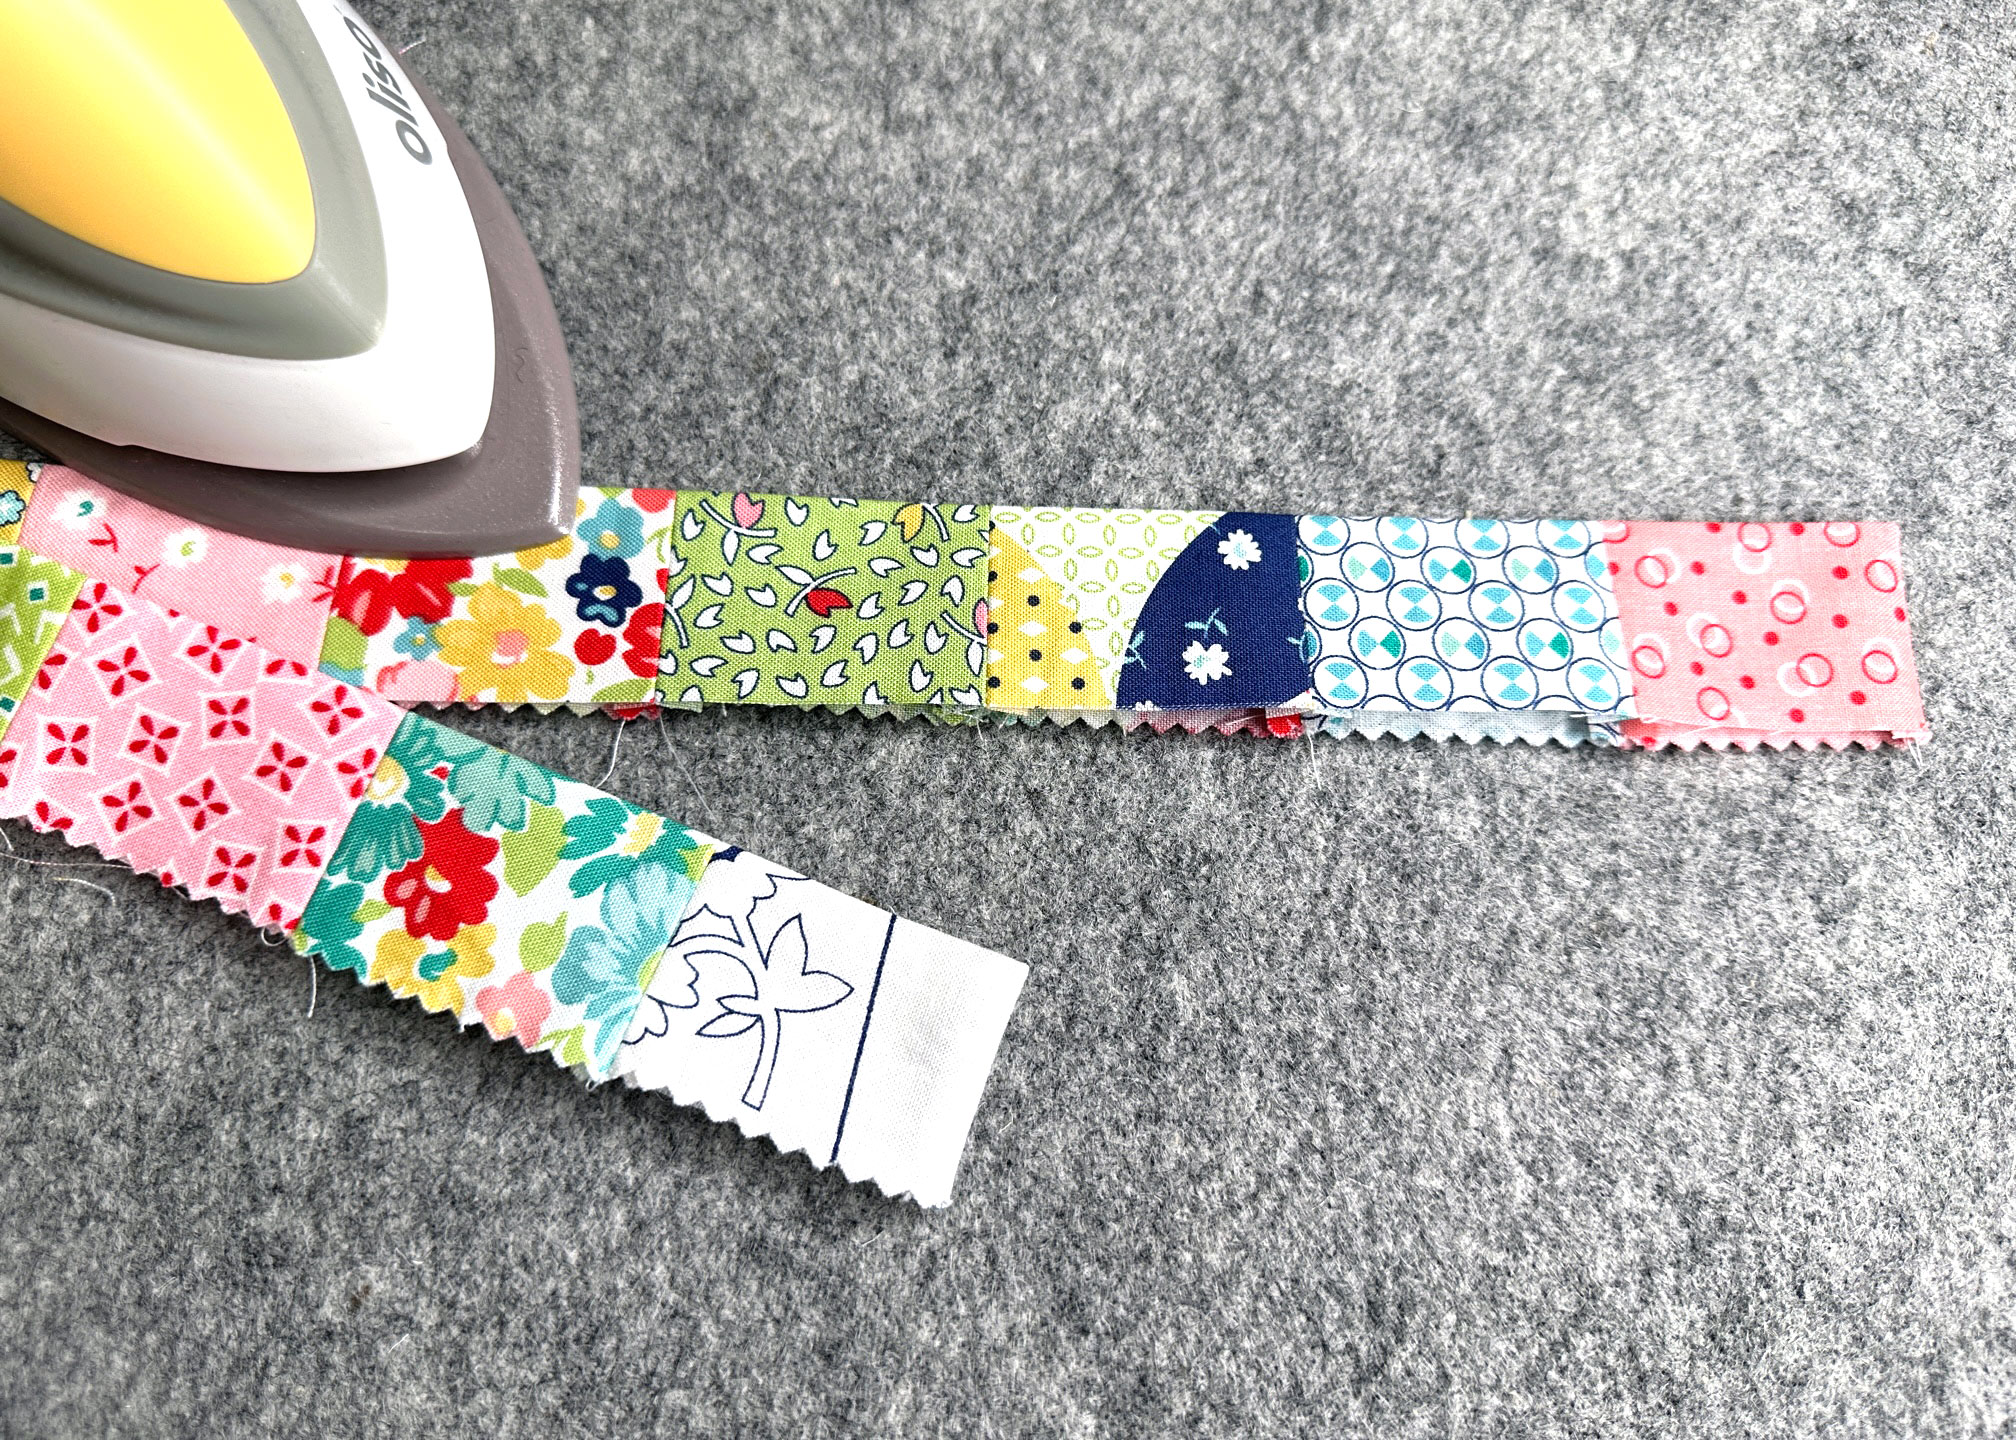
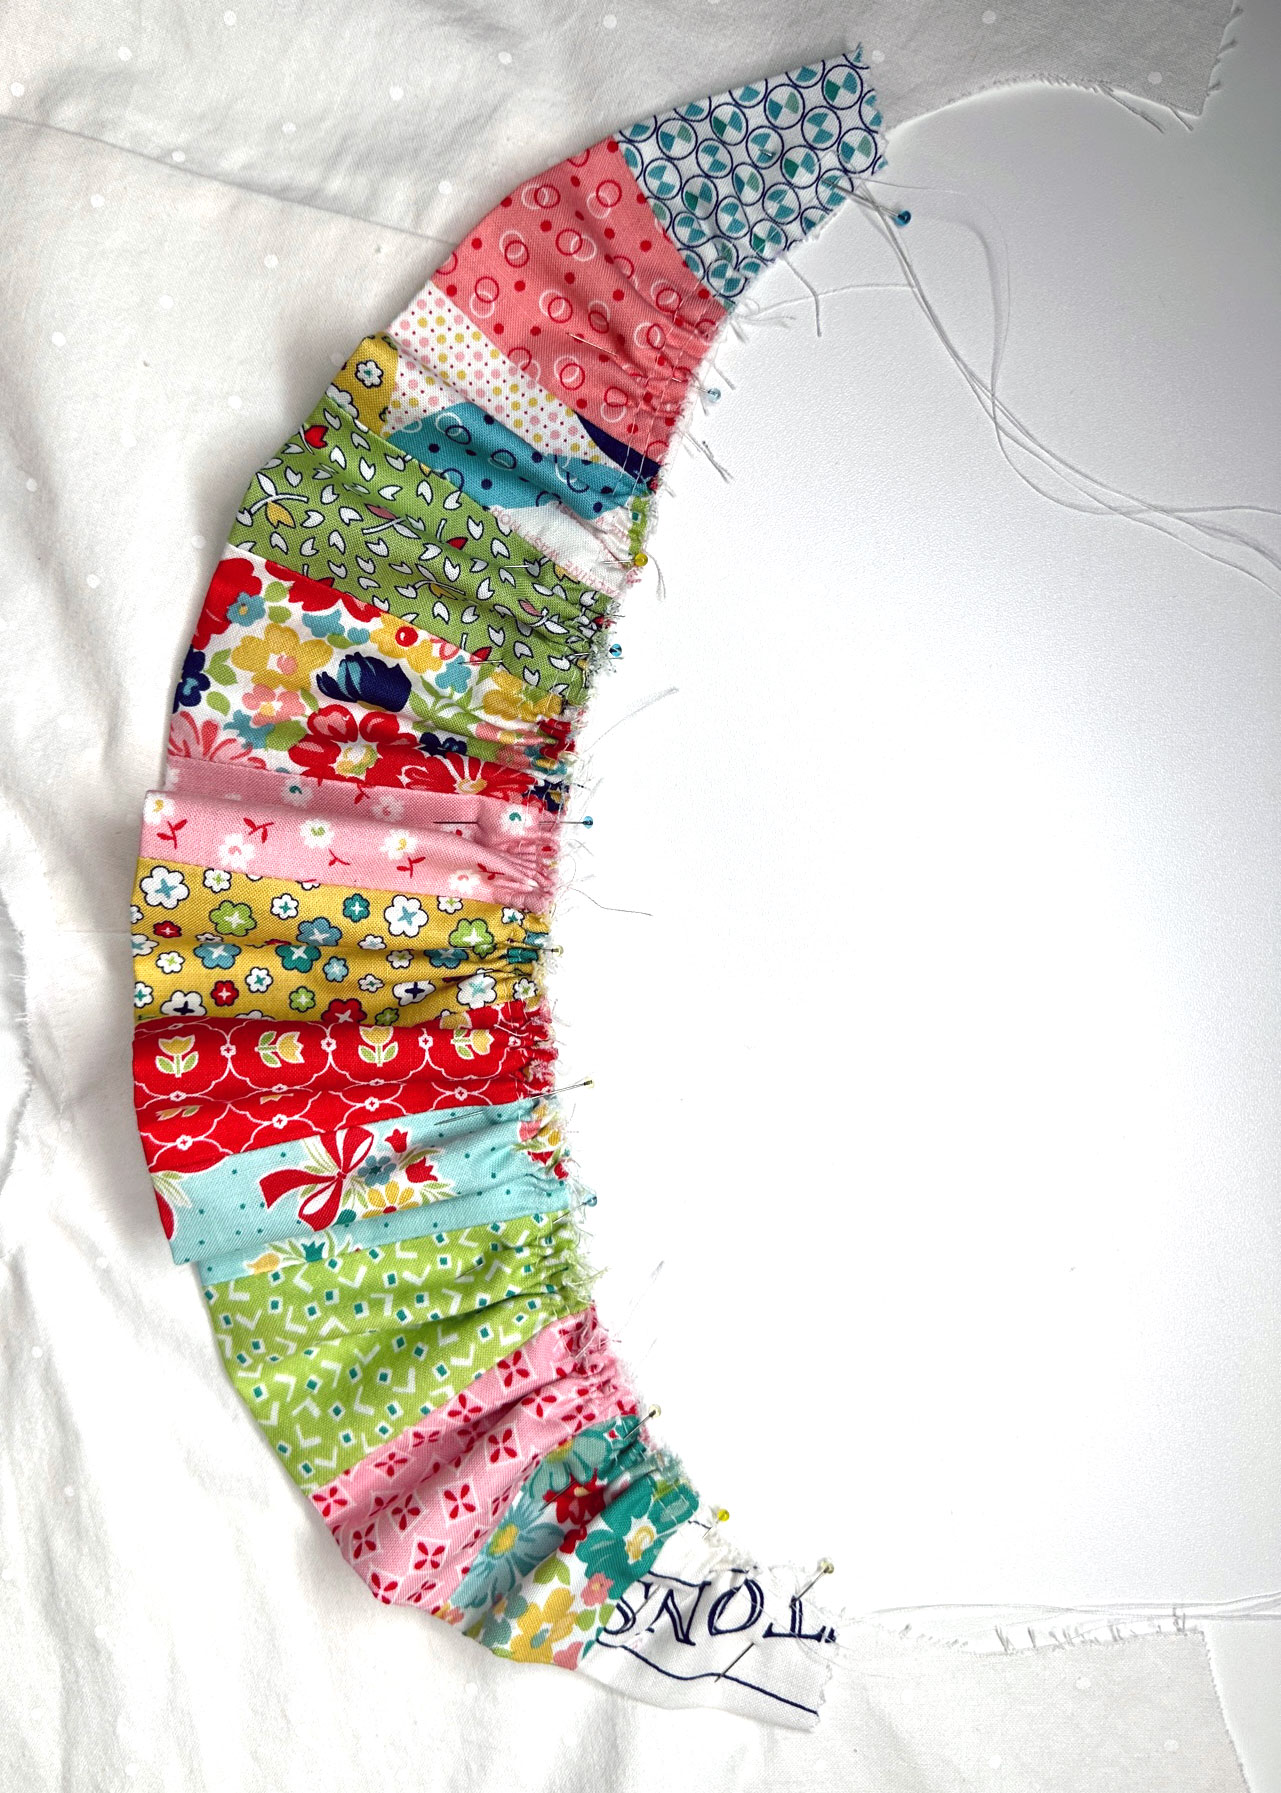
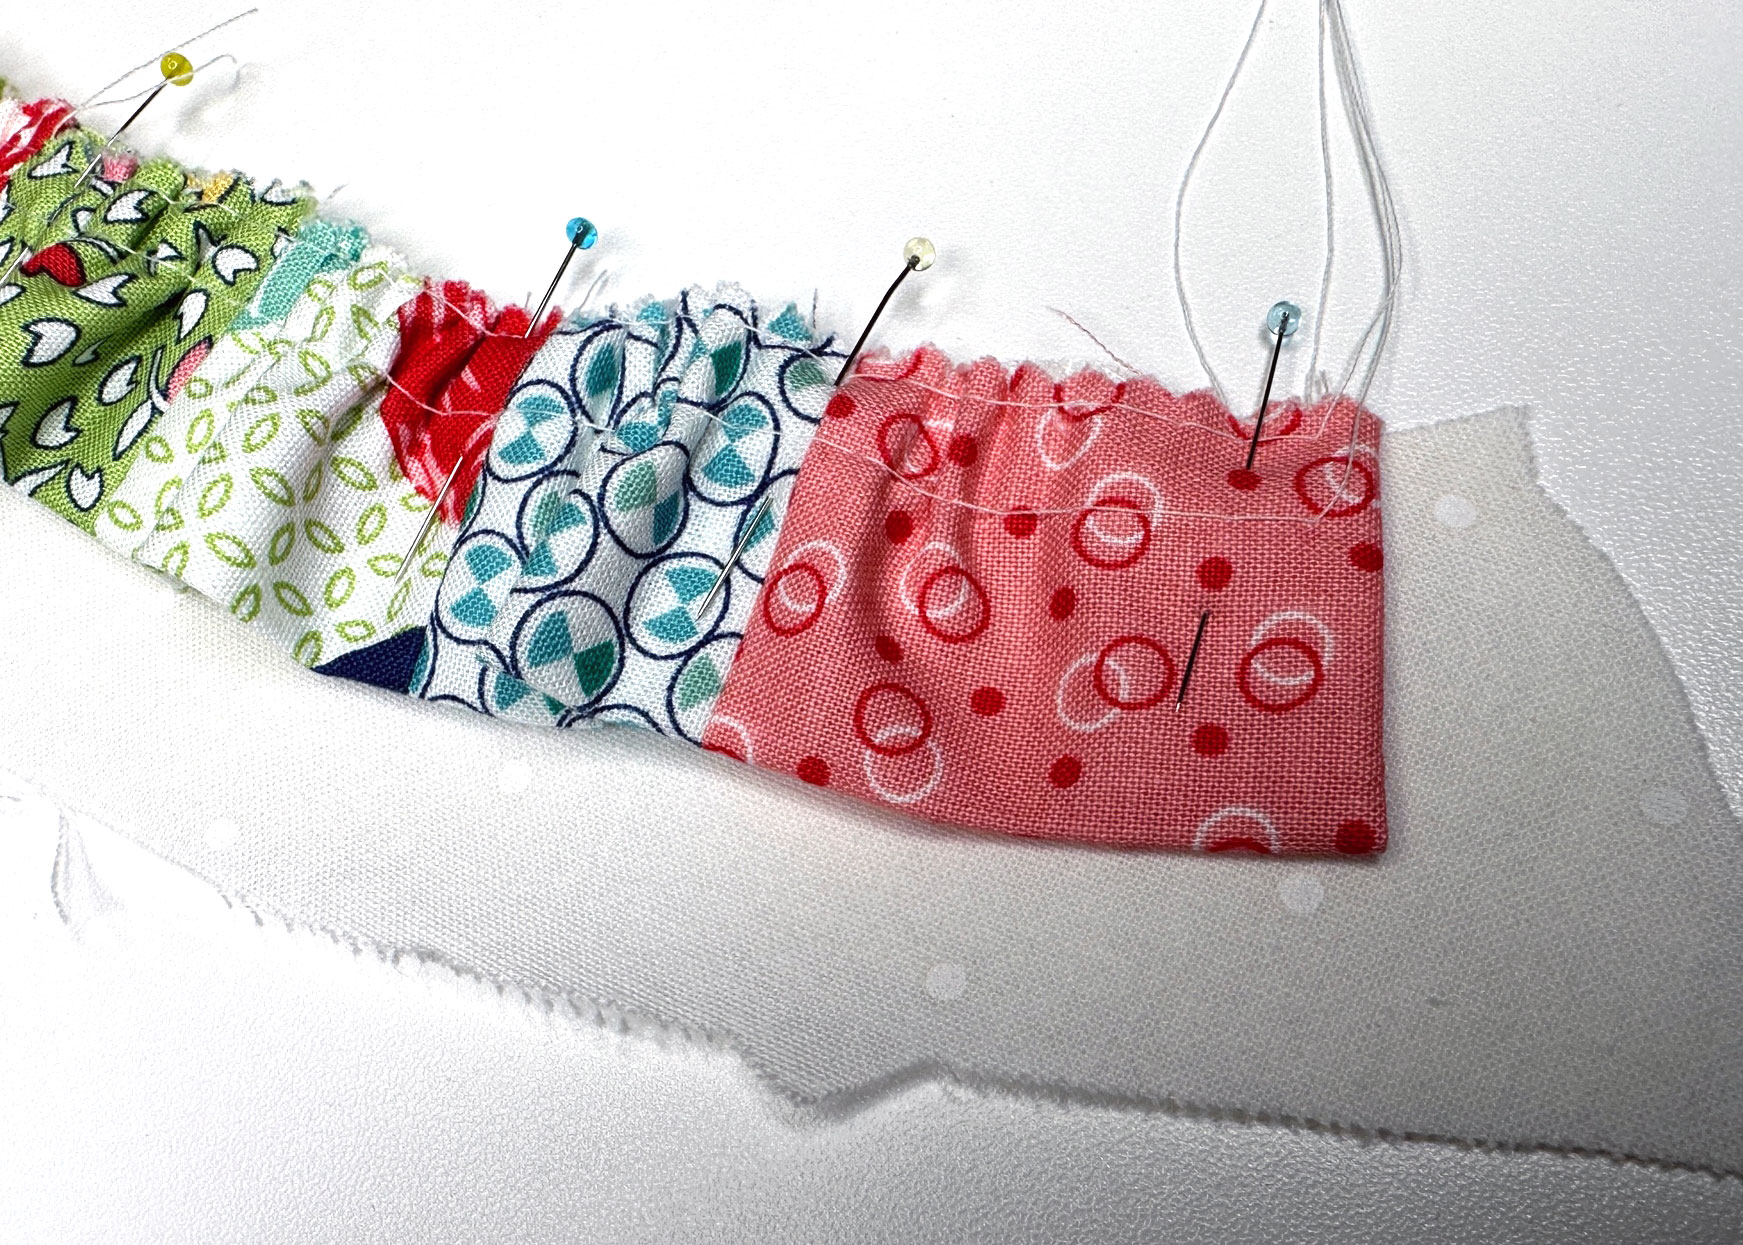
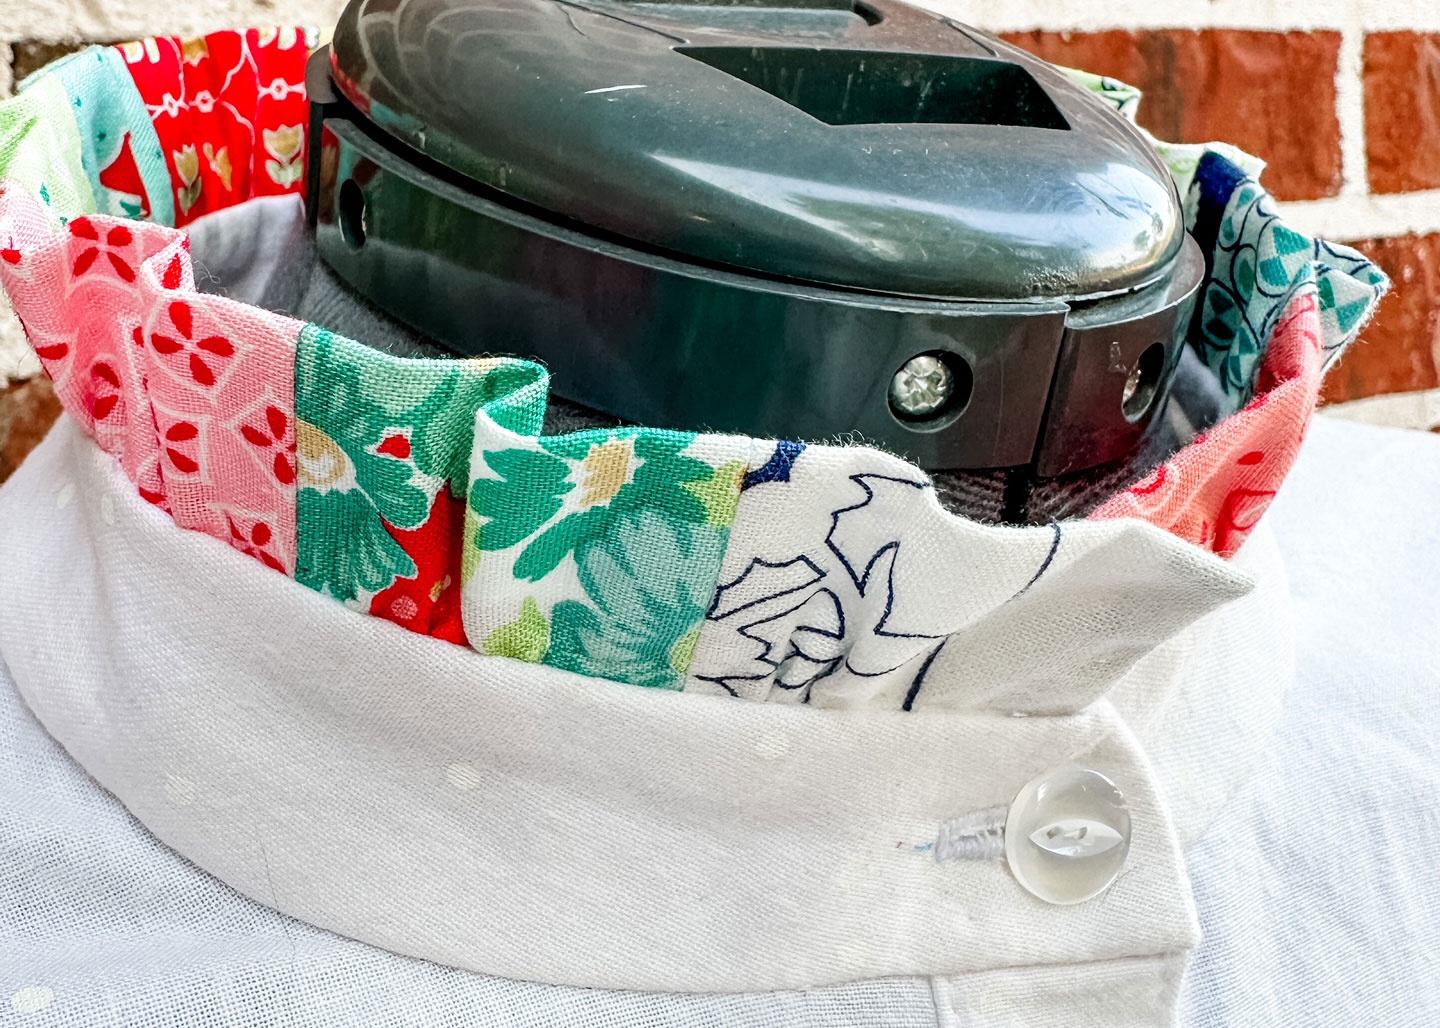
Using a rotary cutter and mat, cut two sets of 13 strips of fabric each measuring 2-1/2″wide x 7″ long, one set for each shoulder ruffle. Cut 13 strips of fabric measuring 2-1/2″ wide by 3″ long for the neck ruffle.
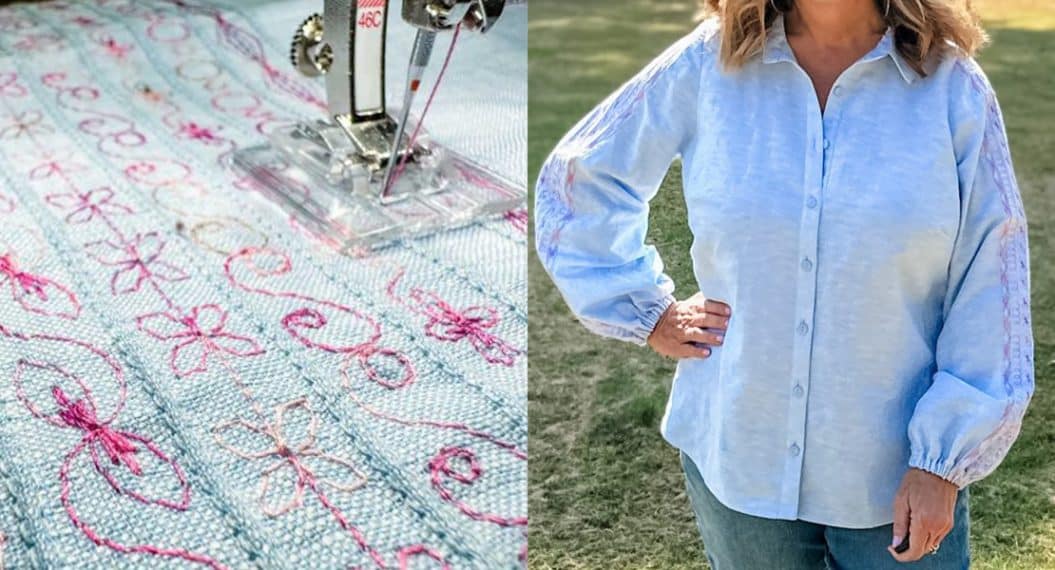
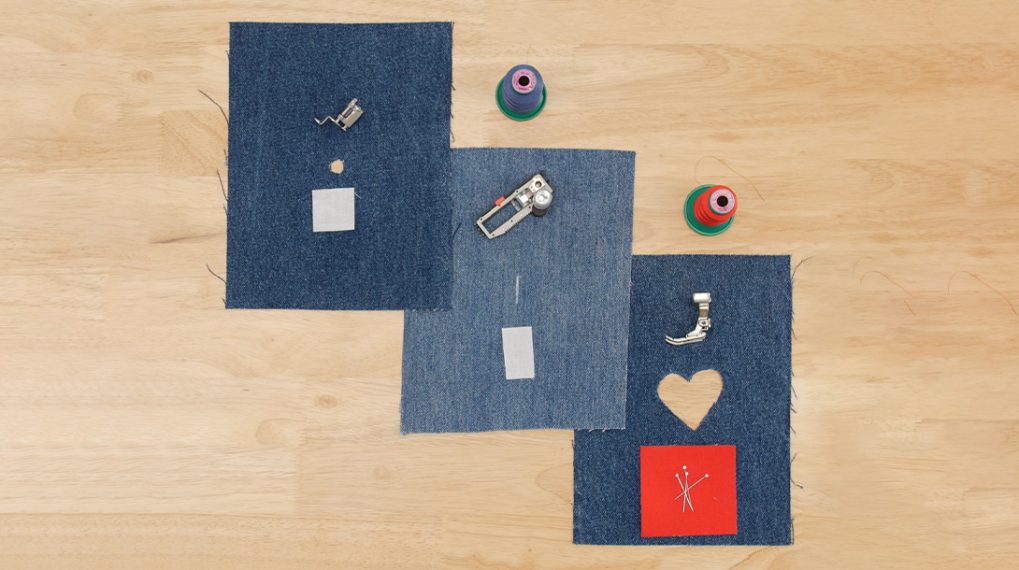
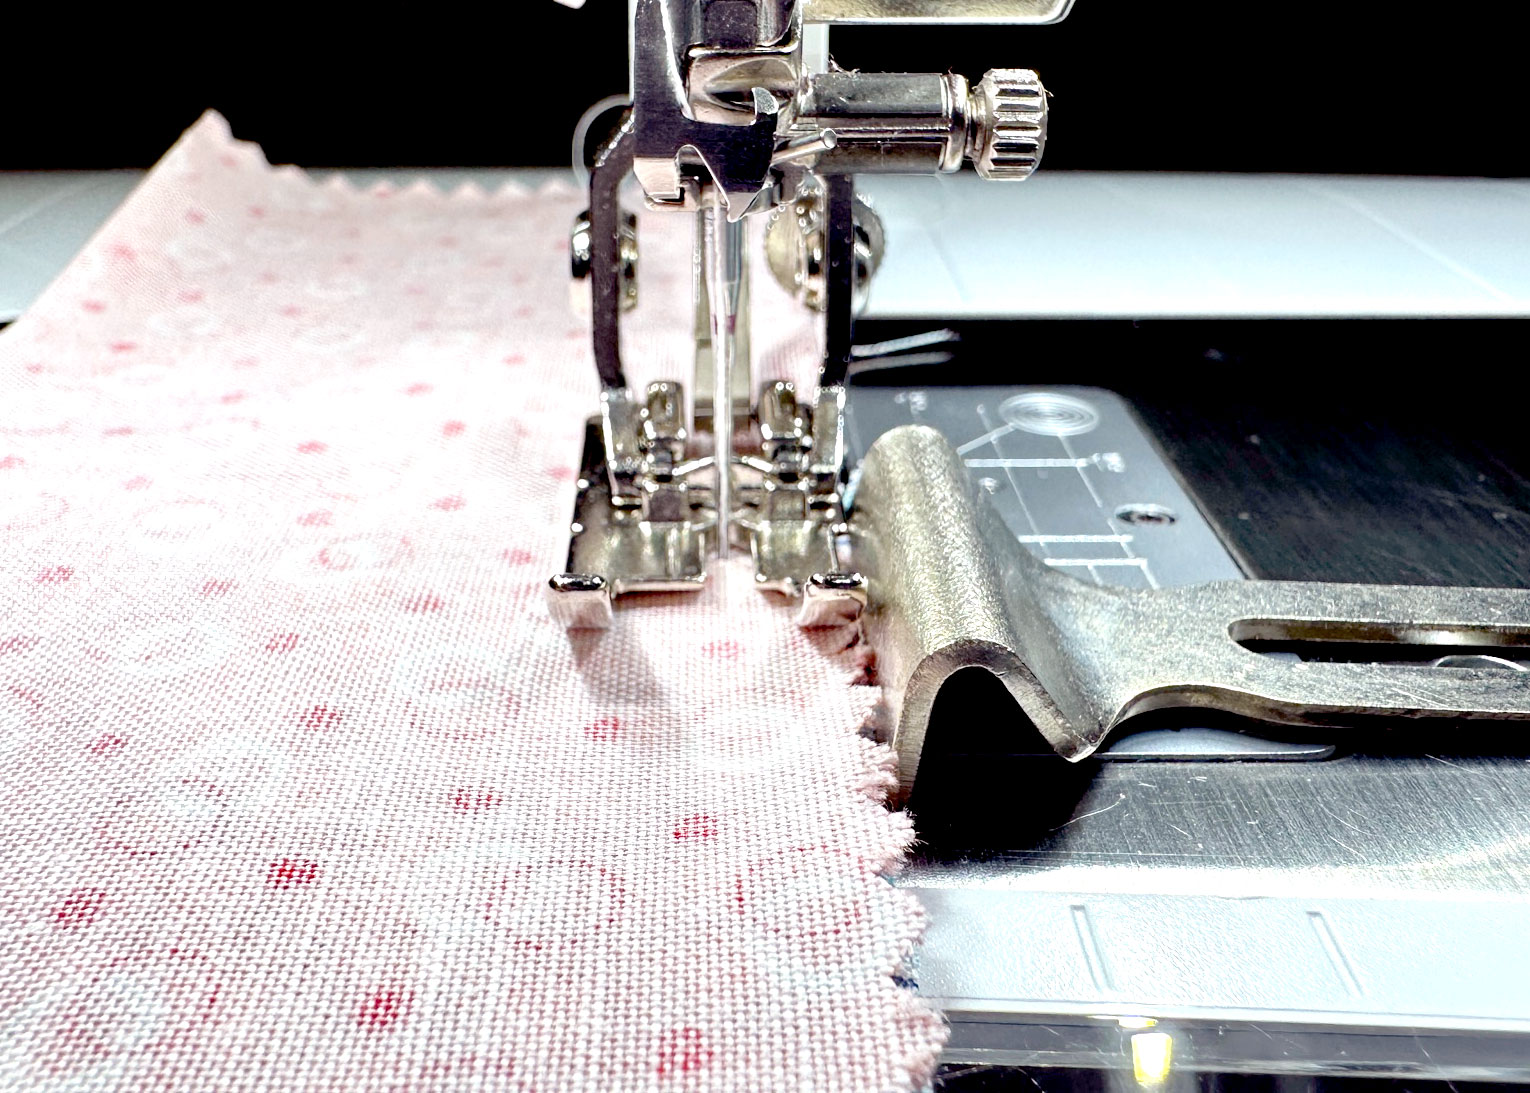
Bring the strips to the sewing machine and stitch along the long edge with a 1/4″ seam allowance for each set. You’ll have two pieces that measure 28-1/2″ wide x 3″ long (sleeves) and one piece that measures 28-1/2″ wide x 3″ long (neck). The Patchwork Foot #97D is perfect for this step!
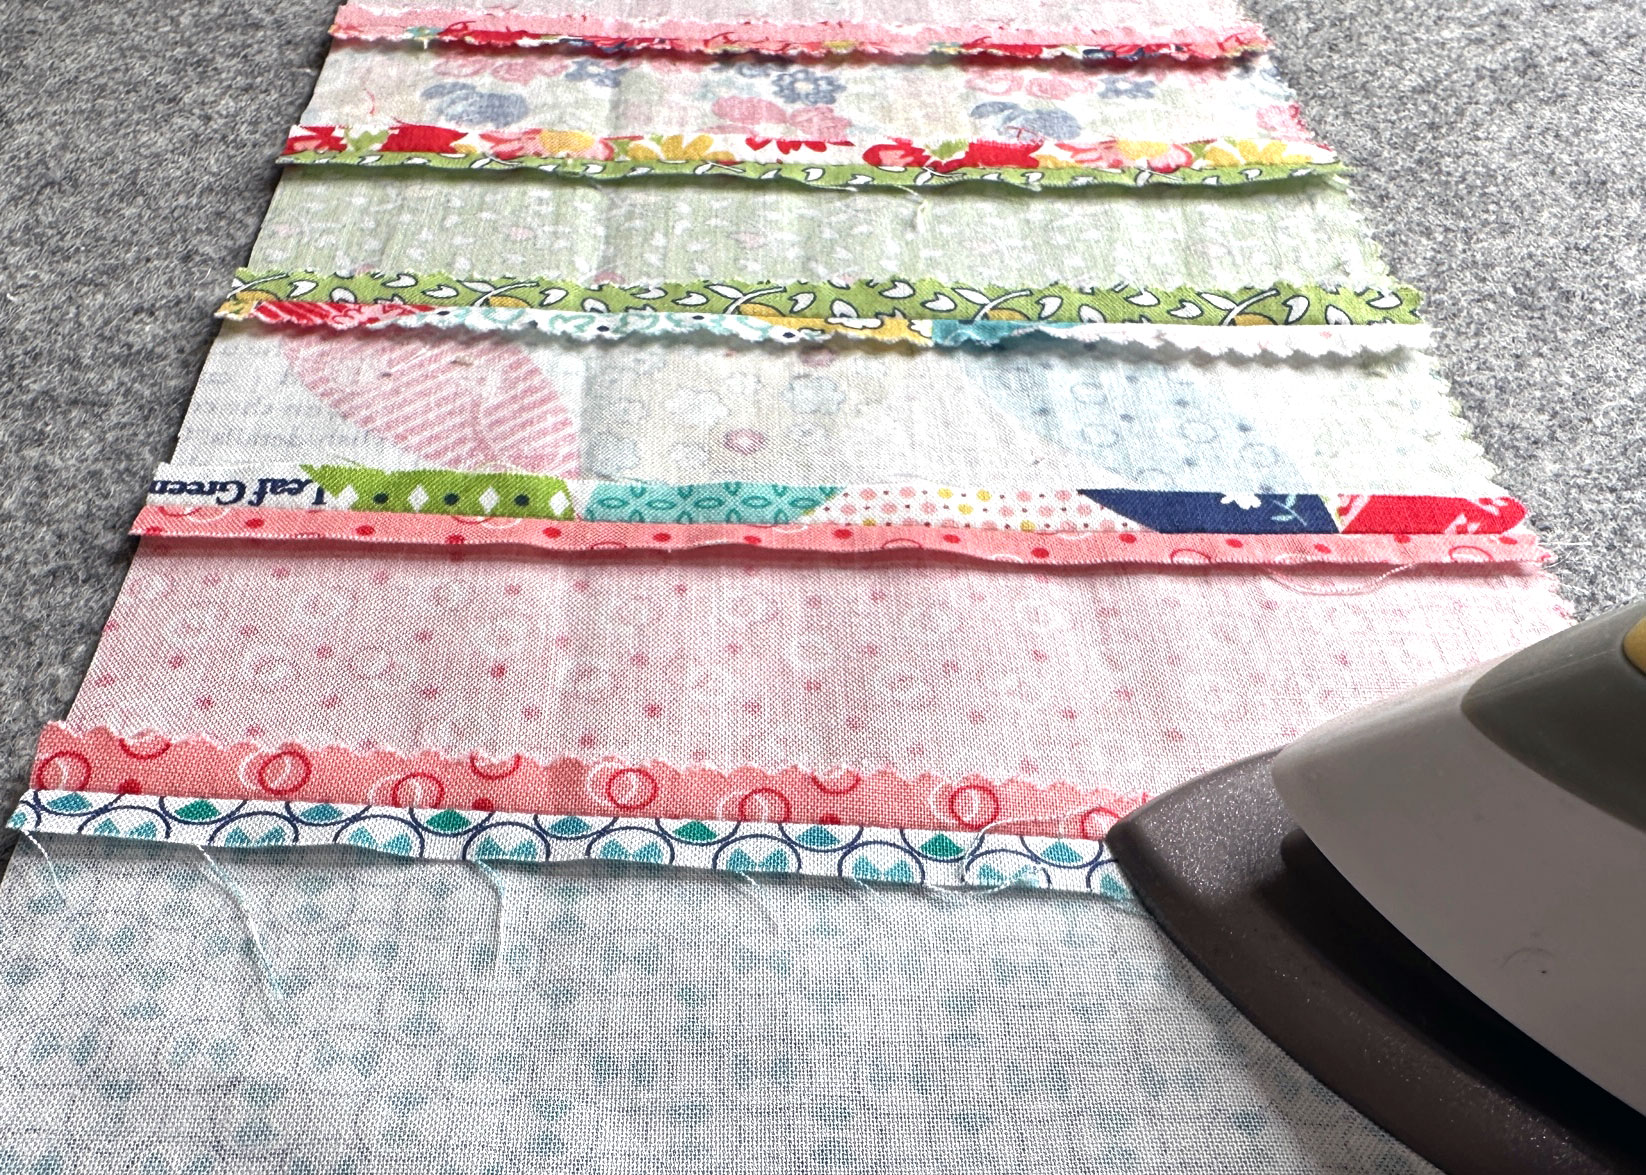
Press all of the seams open.
Fold the sleeve ruffle pieced fabric in half lengthwise, wrong sides together, and lightly press.
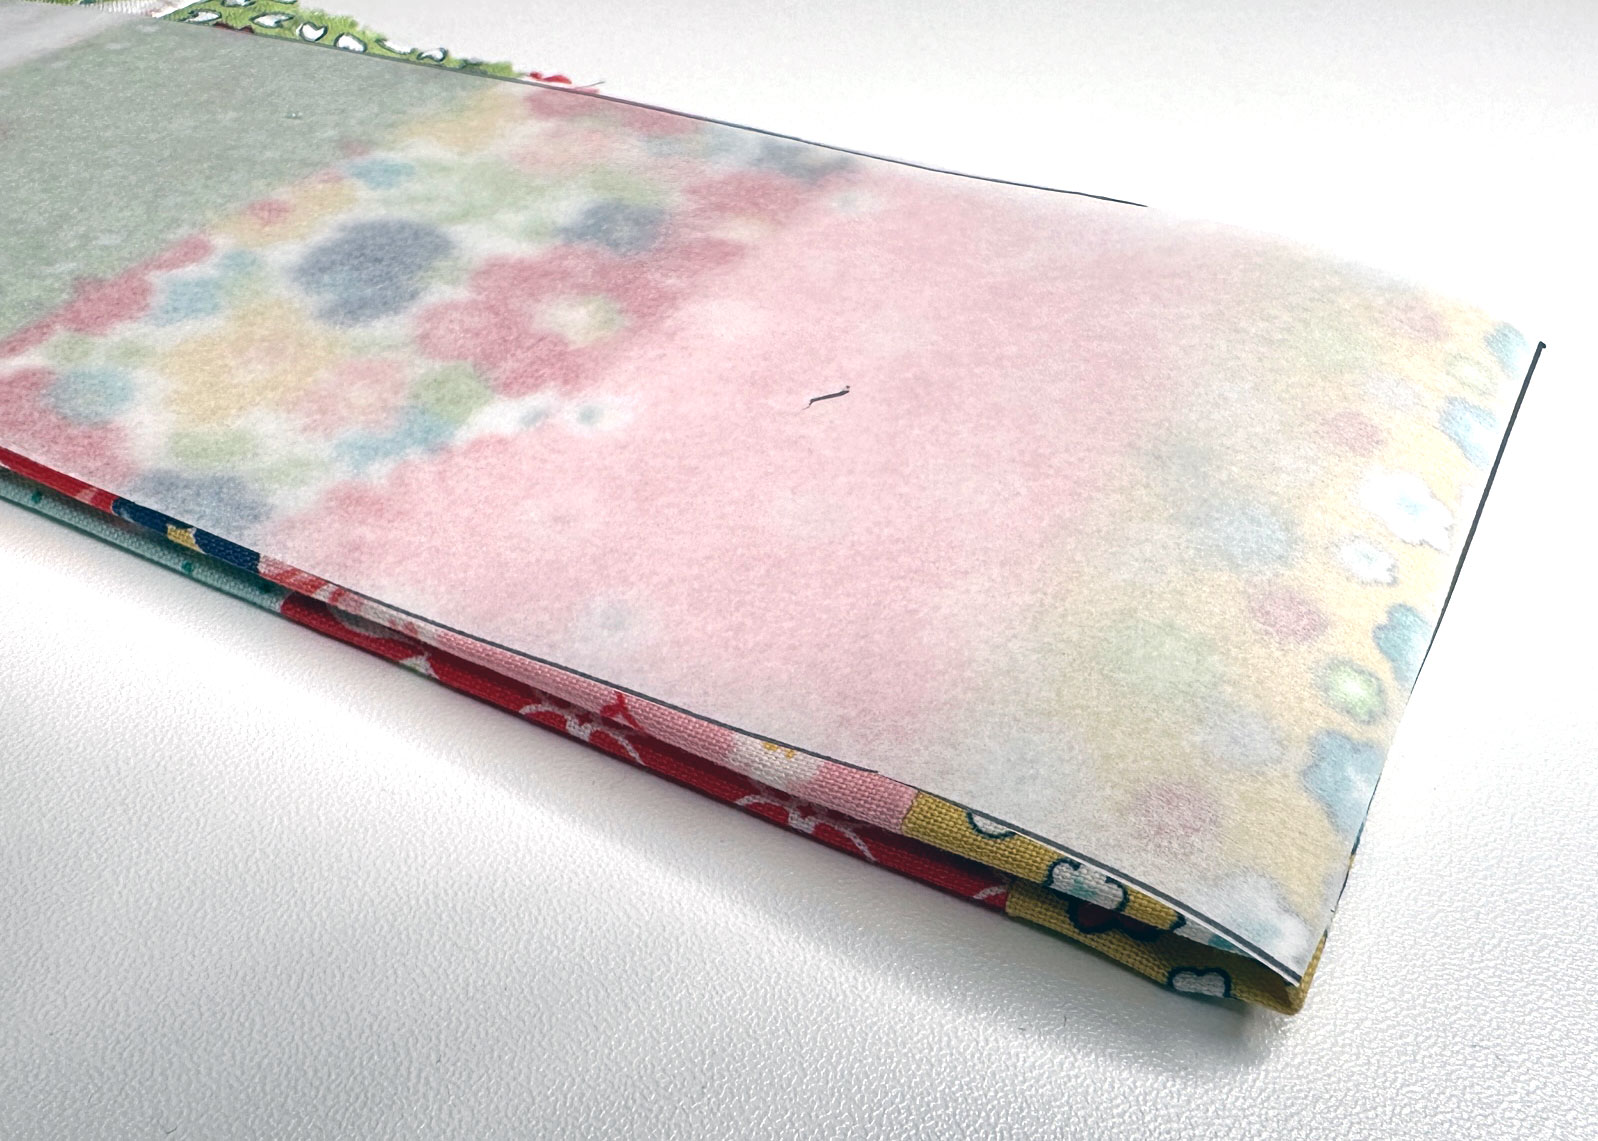
Fold the neck ruffle pieced fabric in half lengthwise, matching the short ends. Stitch along each short end using a 1/4″ seam allowance, turn right side out and press.
With the sleeve patchwork fabric still folded in half lengthwise, fold in half again along the short end. Using the pattern piece you created earlier cut out two sleeve ruffles.
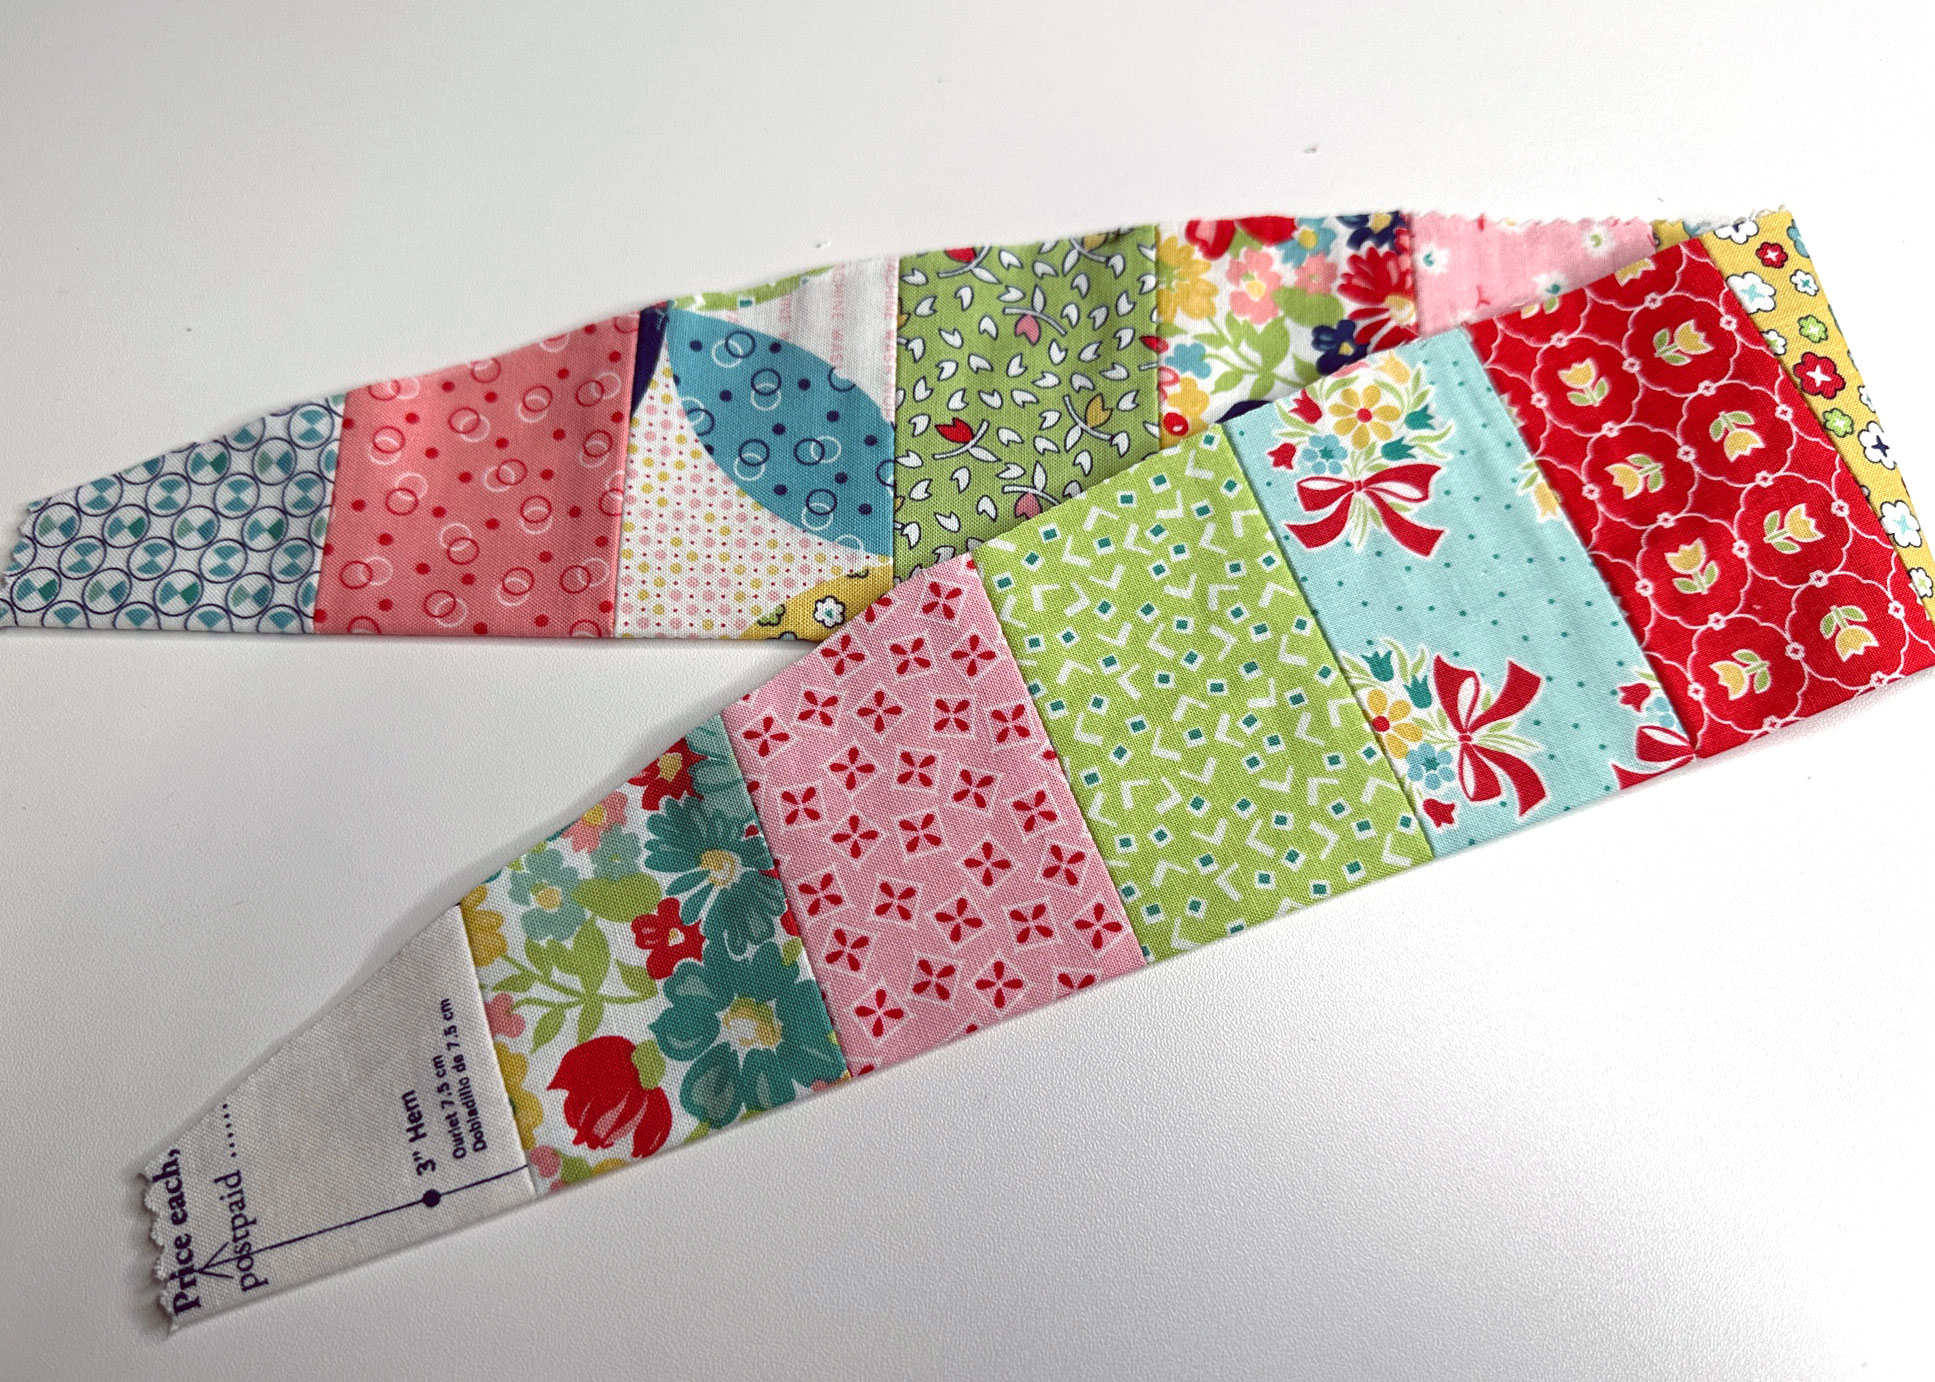
Note: It’s okay if your pieced fabric is shorter than the pattern piece you created. Simply cut so it ends 1/2″ above the fold. That part will be sewn in the shoulder seam allowance.

Sew the Patchwork Ruffle Shirt
Cut Out the Pattern Pieces for the Shirt
Cut out the shirt pattern pieces, eliminating the collar, the sleeve placket, and sleeve cuffs.
Before cutting the lower back piece, place it 1″ from the fold of the fabric as the extra fabric is needed to change the center back pleat to gathers.
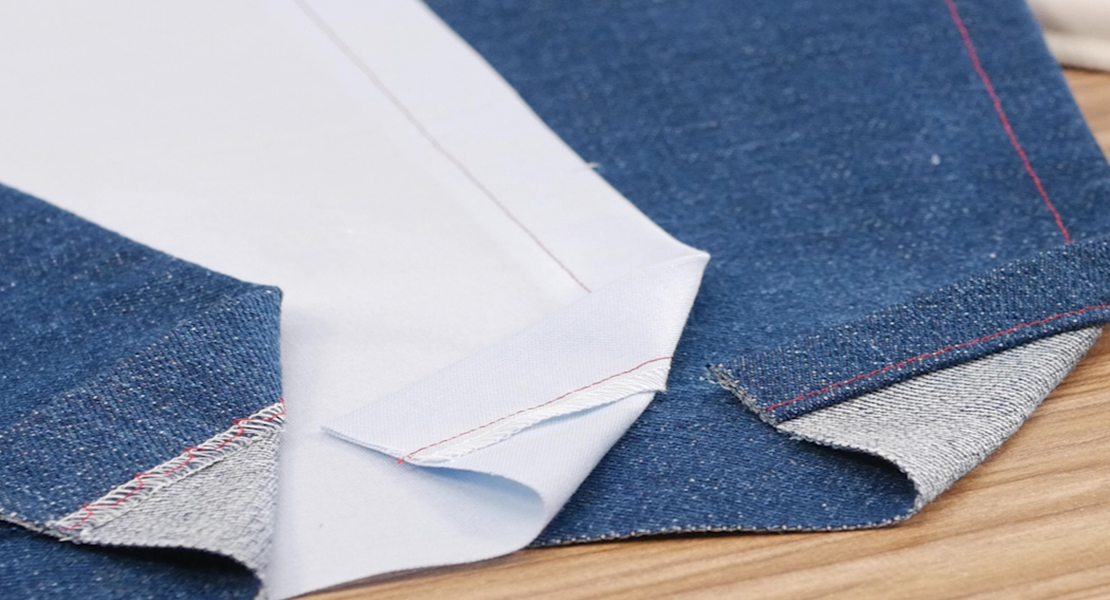
Cut out and apply interfacing to the collar stand, and front bands per the pattern instructions.
Construct the Shirt
Begin construction of the shirt following the pattern instructions, noting the changes to the instructions listed below:
- Do not cut or sew the sleeve placket or sleeve cuffs as the sleeves will be finished with an elastic casing.
- When you reach the step to sew the lower back and yoke, follow the instructions below for adding a label and adding gathers to the lower back.
- Before you sew the sleeve to the shirt, add the patchwork ruffle to the armhole, following the instructions below.
- Instead of attaching the collar to the collar stand, sew the patchwork ruffle to the collar stand, following the instructions below.
- Add an elastic casing in place of the sleeve cuff, following in the instructions below.
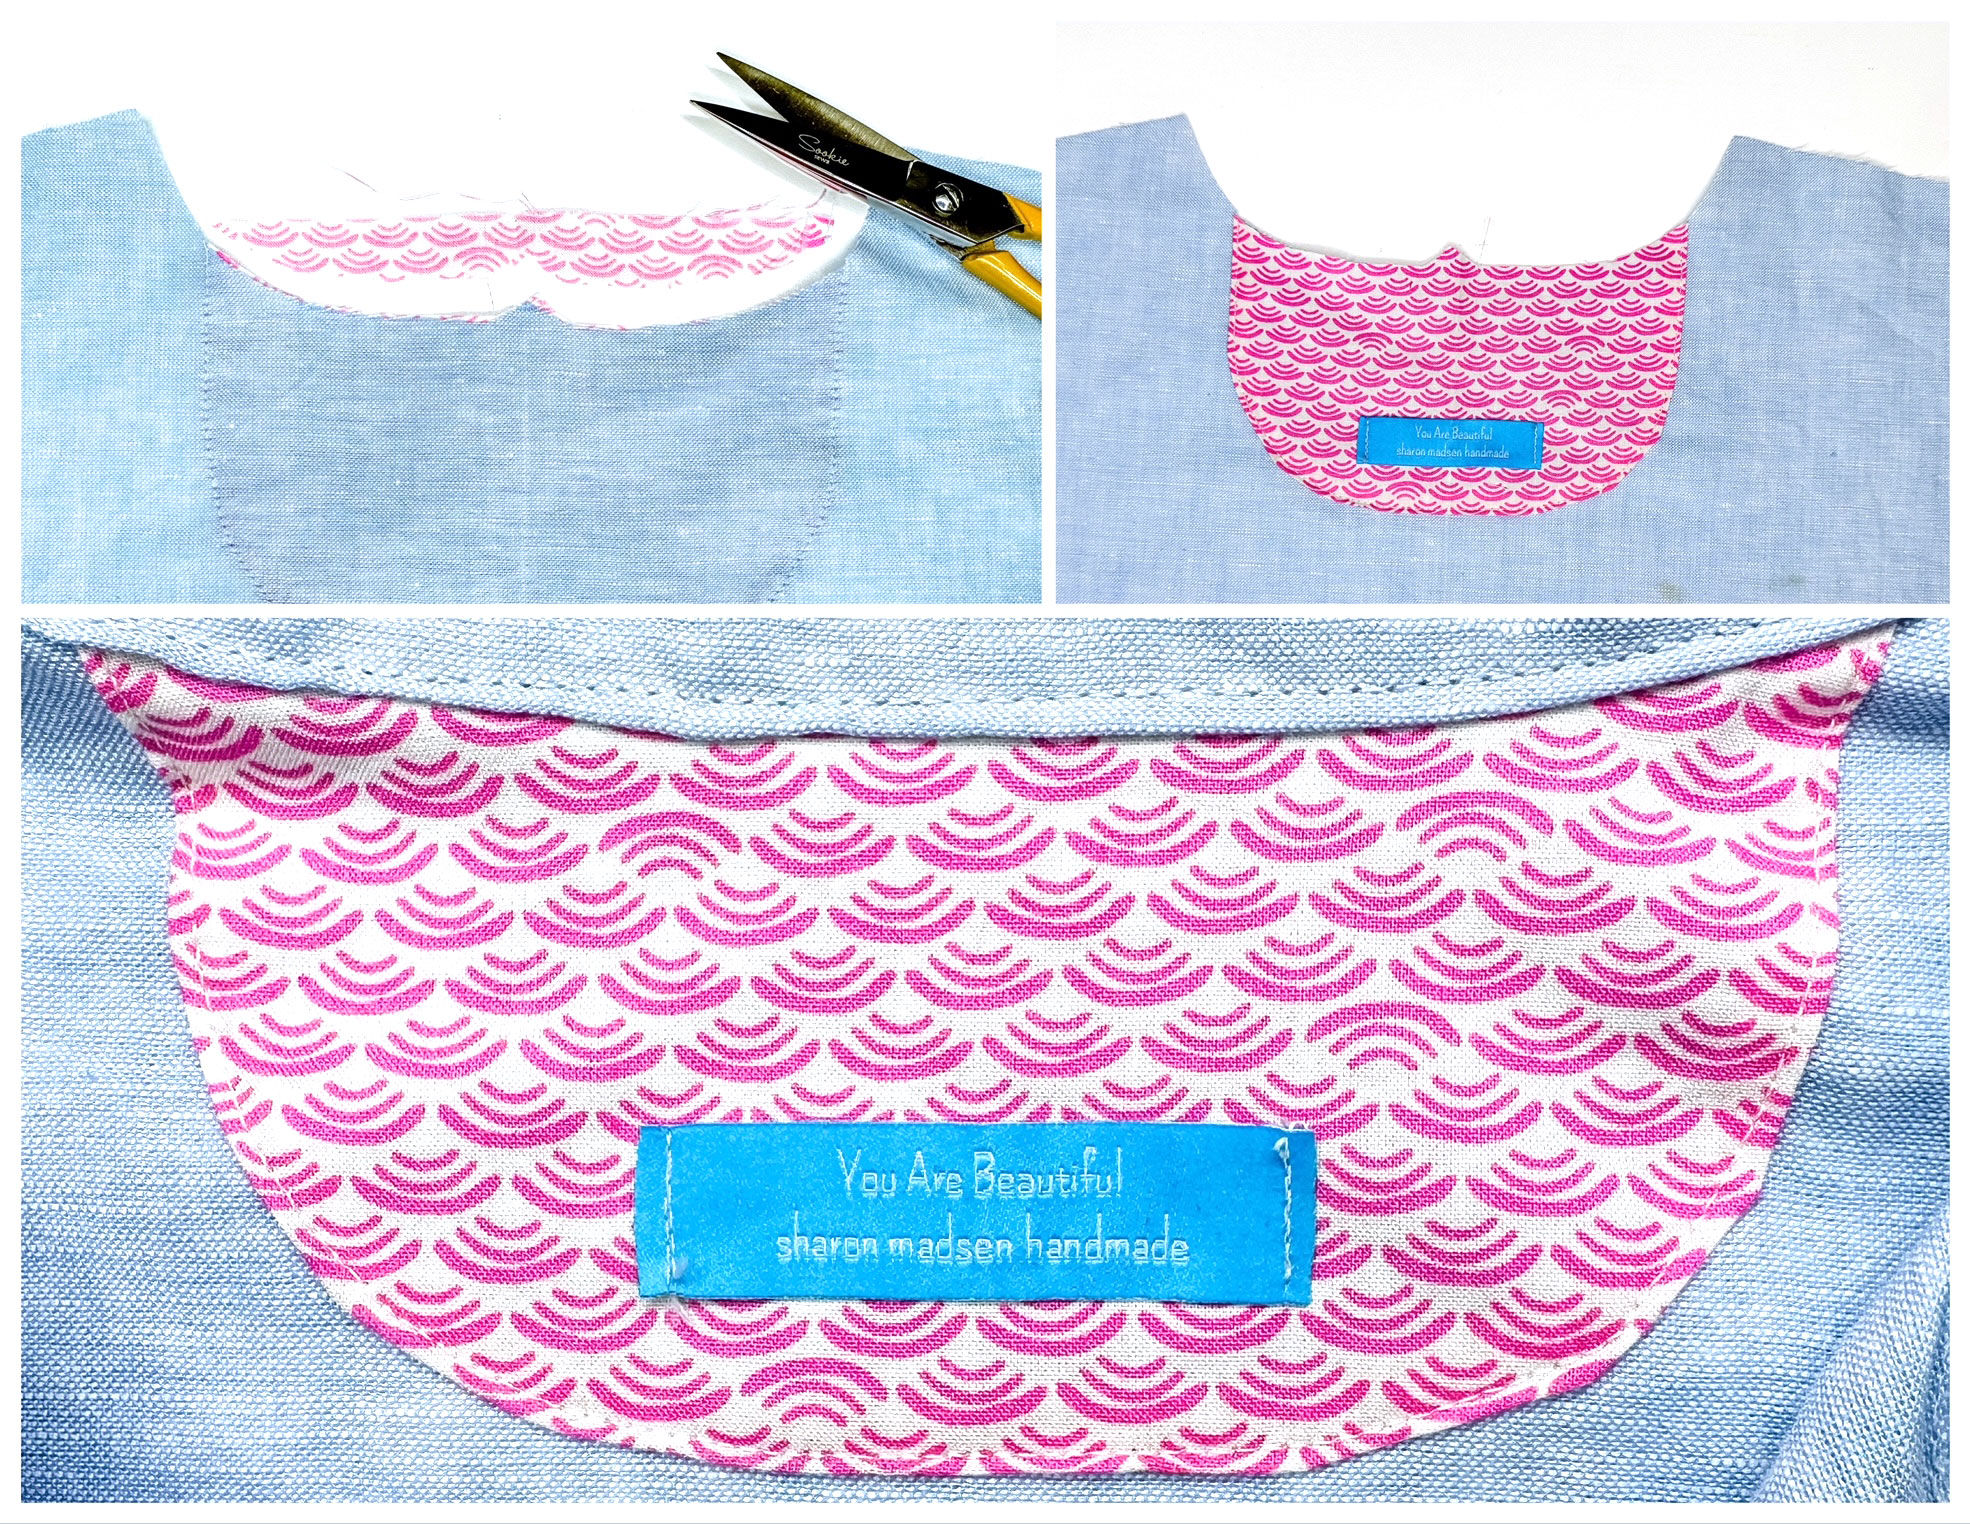
Add a Label to the Back Yoke Facing (Optional)
If you want to add a personalized label to the back of the shirt, add it to the back yoke facing now.
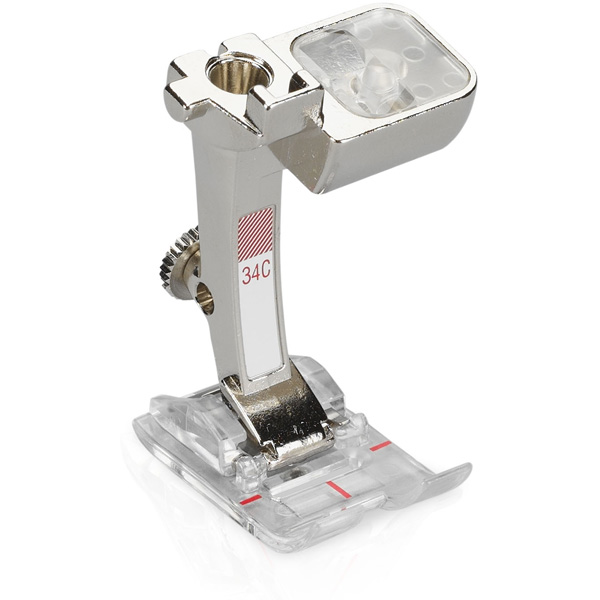
I add an inner facing to highlight the label on my shirts that include a back yoke, a design detail inspired by a high-end menswear shirt. Fold a 6″ x 8″ piece of fabric in half, cut an arc shape, press under 1/4″ to the back side, sew the label to the fabric, pin to the back yoke facing, edgestitch in place using the Edgestitch Foot #10D.
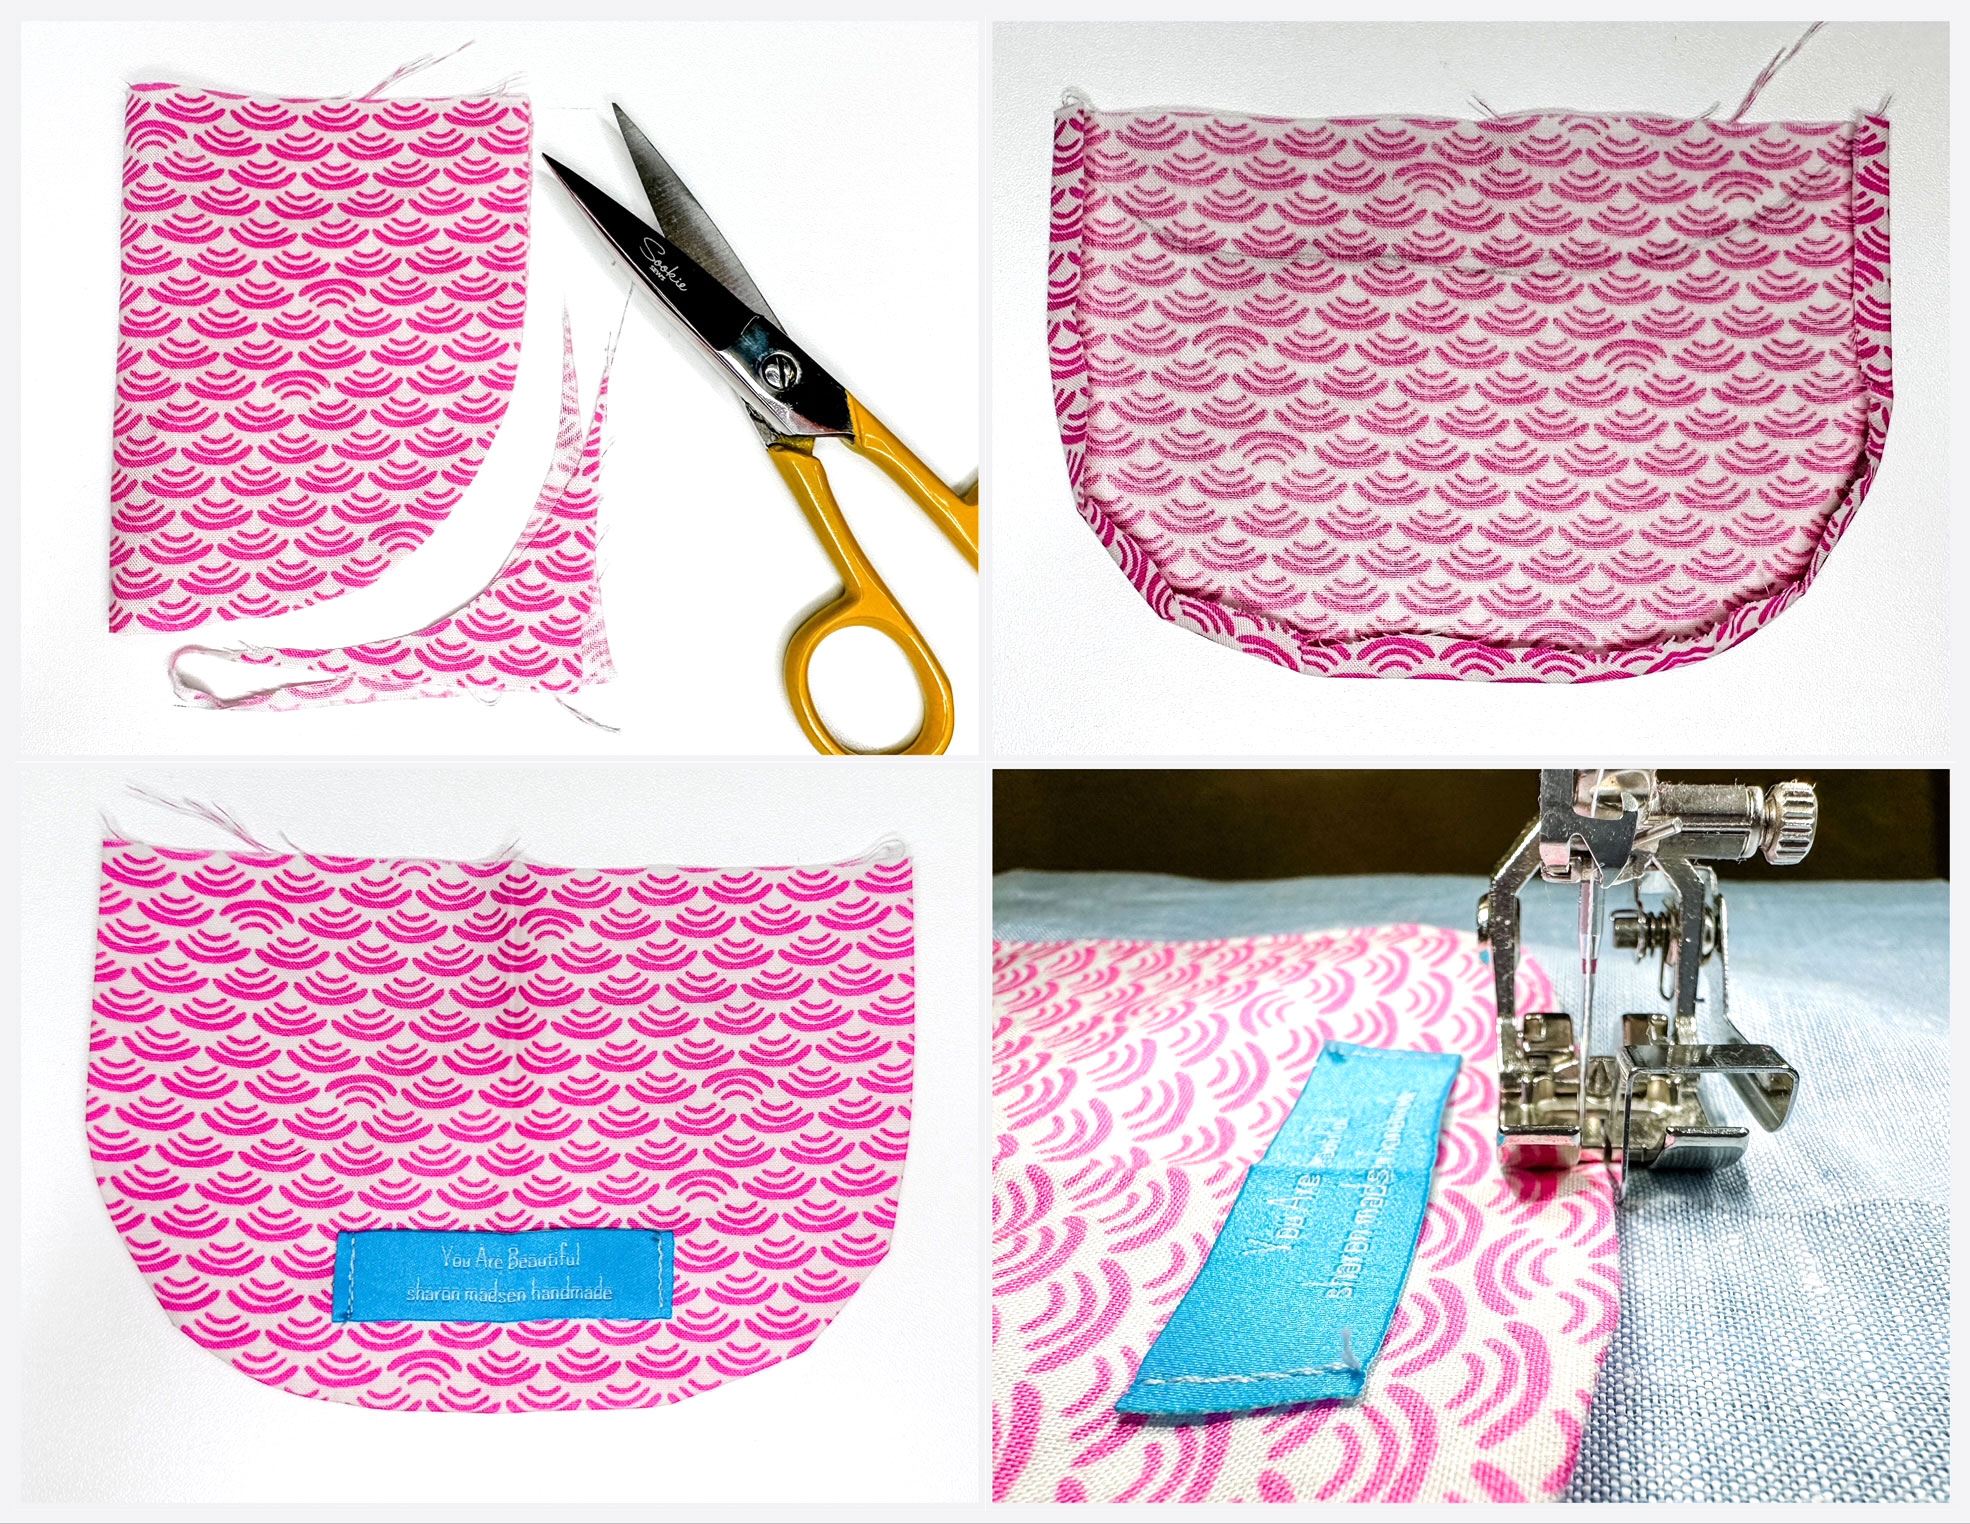
Turn the back yoke facing over, trim away the excess following the neck edge of the yoke, and the back yoke facing is now ready to sewn when you reach that step. If you prefer a step-by-step video tutorial, you can find one on my YouTube channel.
Change the Back Pleat to Gathers
To add the gathers on the back piece (instead of the pleat) make a mark 1″ away from each notch.
Using a long stitch length, stitch two rows of stitches in the seam allowance between the marks. Match the center of the yoke to the center of the lower back and pin. Match the side ends of the yoke to the side ends of the lower back and pin. Gently pull on the stitches until the lower back fits the yoke, with the gathers in the center, and stitch.
Add the Patchwork Ruffle to the Armhole
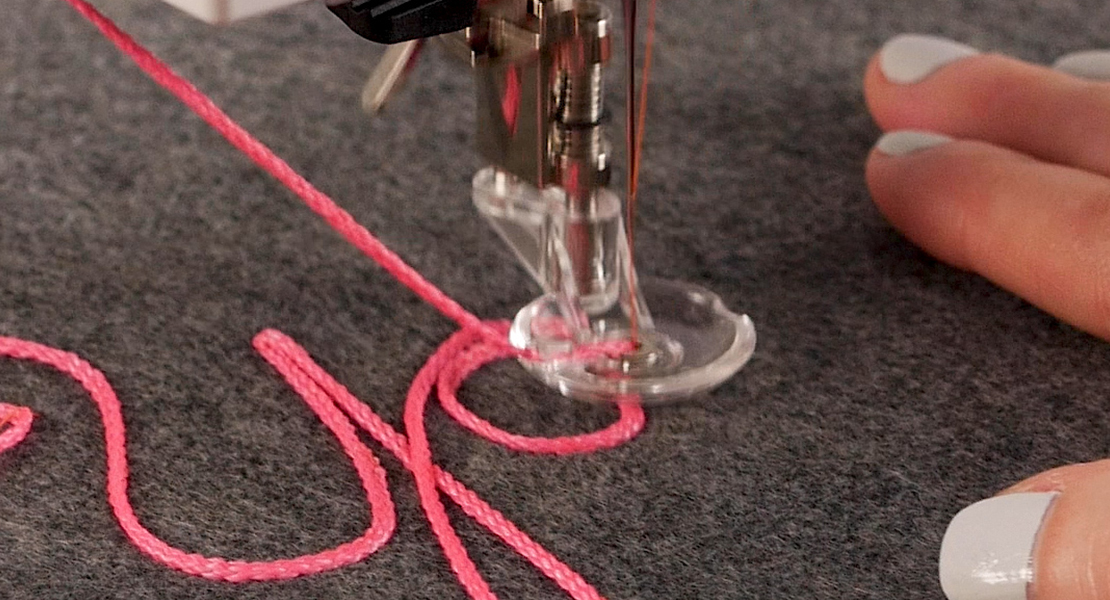
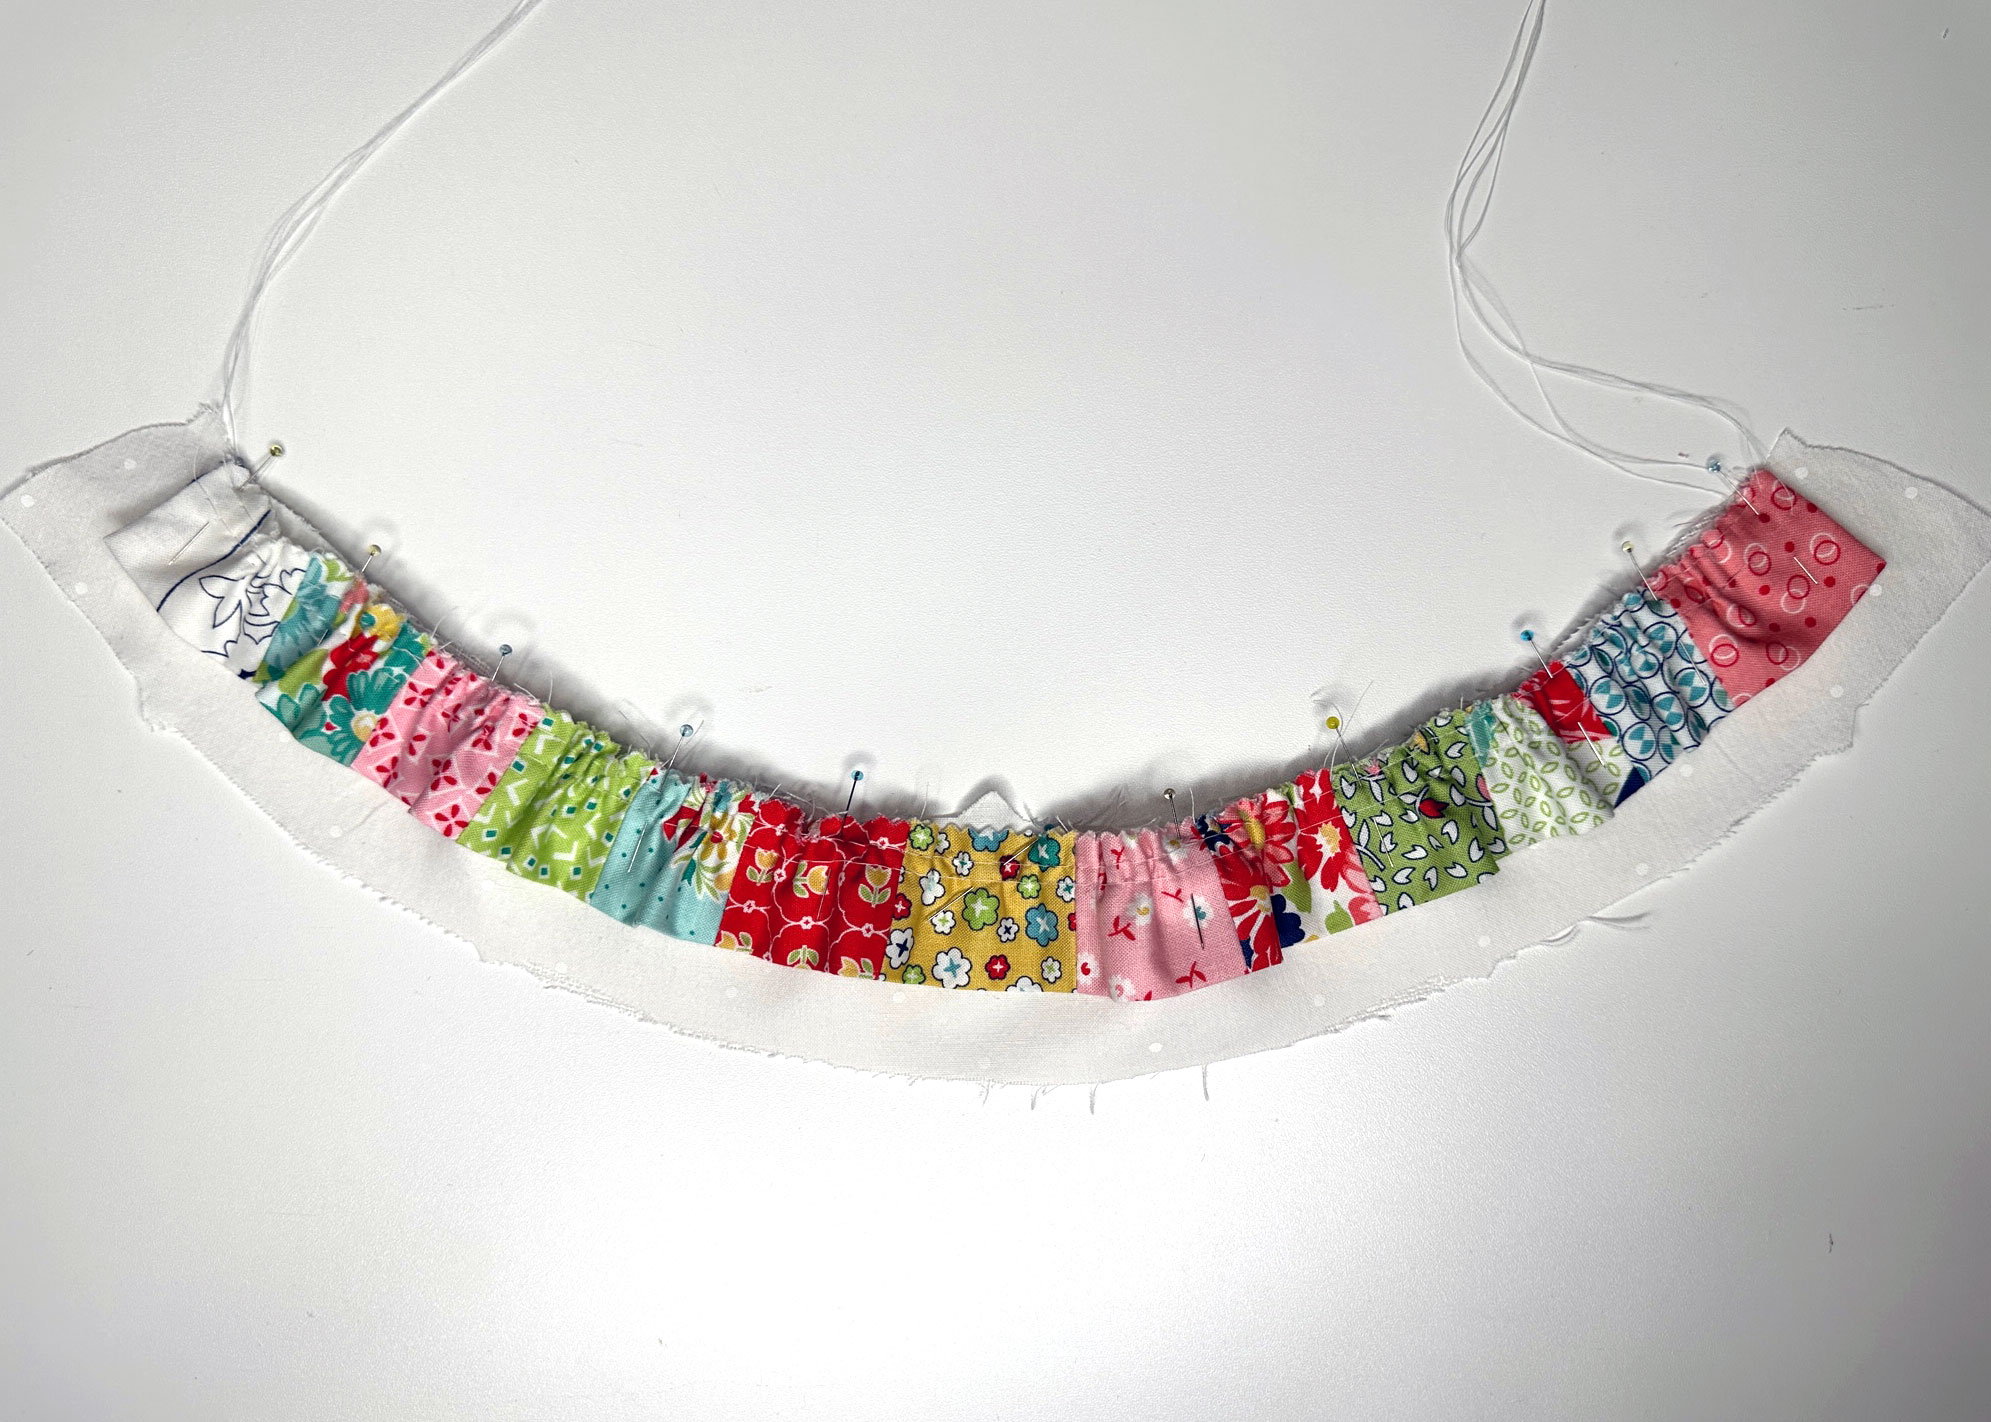
Using a long stitch length, stitch two rows of stitches in the seam allowance along the long curved end of each sleeve ruffle.
Align the center of the sleeve ruffle with the shoulder seam and pin. Align each end of the sleeve ruffle with the front and back armhole notches and pin.
Gently pull on the bobbin threads to gather the ruffle to fit, pin, and baste in place along the seam allowance.
The shirt sleeve is sewn in per the pattern instructions.

Sew the Neck Ruffle
Using a long stitch length, stitch two rows of stitches in the seam allowance along the long raw edge of the neck ruffle.
Align the center of the neck ruffle with the back of the collar band and pin. Align each end of the neck ruffle with the neckband notch and pin. Gently pull on the bobbin threads to gather the ruffle to fit, pin, and baste in place along the seam allowance.
Follow the shirt construction steps for the collar band, noting that the ruffle replaces the collar.
Add an Elastic Casing to the Sleeves
To create the elastic casing, turn under the bottom edge of the sleeve 1/4″ to the wrong side and press. Turn under another 5/8″ toward the wrong side and press. Stitch close to the fold, leaving a 1″ opening at the seam to insert the elastic.
Cut two pieces of elastic to fit comfortably around your wrist. Secure a safety pin to one end of the elastic and insert into the casing.
Pull the elastic all the way through, but be careful the other end of the elastic doesn’t pull through, then sew the two ends of the elastic together, making sure the elastic did not twist. The last step is to sew the casing opening closed.
Sew the Buttonholes
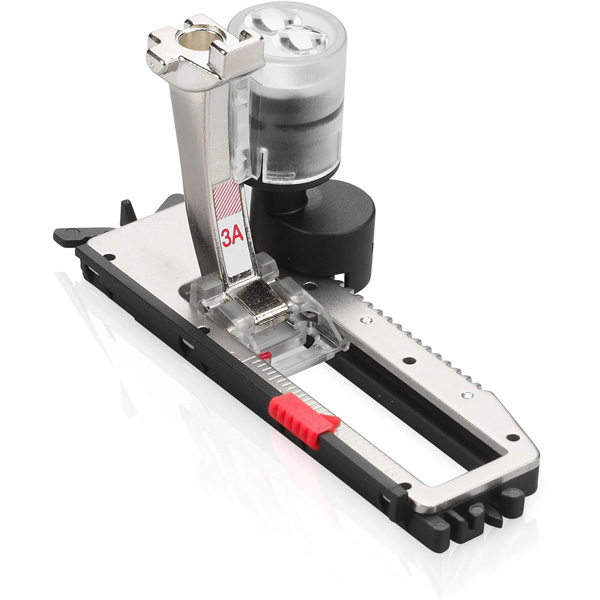
Mark the buttonholes on the front placket and sew using the Buttonhole Foot #3A which makes sewing buttonholes a breeze!
When you sew the buttonhole on the neck stand, use the Buttonhole Leveler, which fits underneath the Buttonhole Foot #3A. It is designed to help sew buttonholes that are close to a fabric edge that may have an uneven surface, like the collar stand.
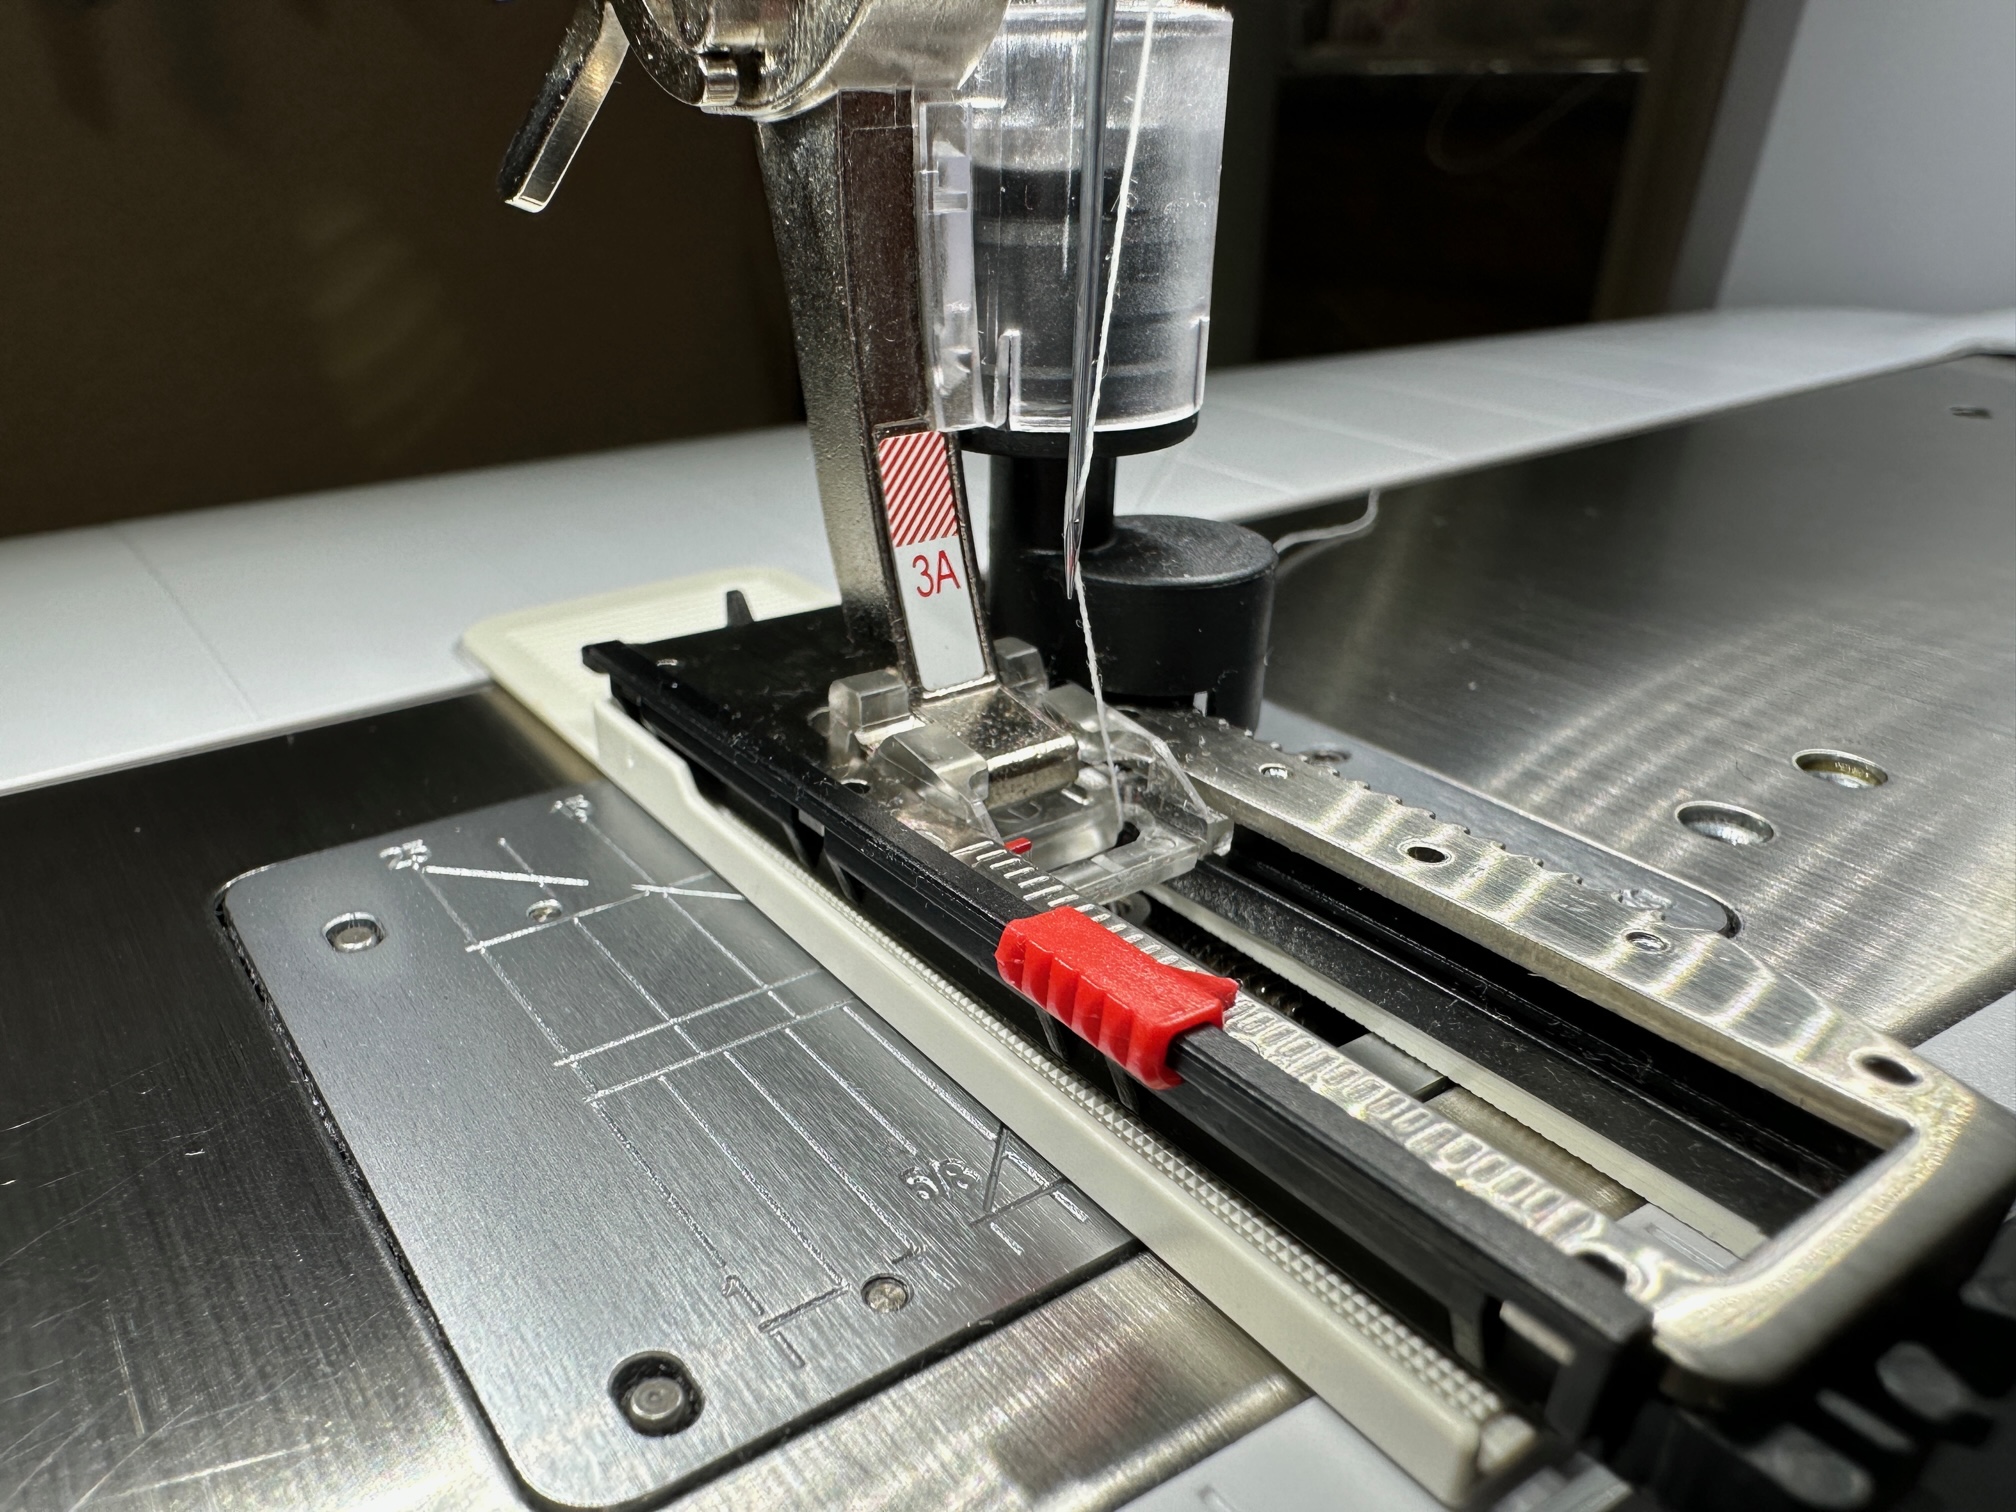
When cutting open the buttonholes, use a buttonhole cutter and wood block to easily – and safely – cut them open.
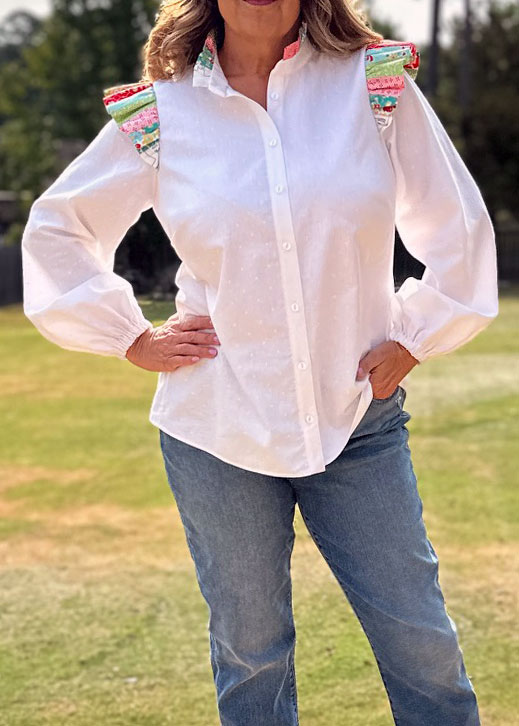
The patchwork ruffle shirt is complete! This technique offers a range of possiblities – use a mix of fabrics like I did, use a single contrasting fabric, use the same fabric as the shirt, or even use lace. Remember, you are the designer! Be sure to tag me (@thesharonsews) and BERNINA (@berninausa) on Instagram when you sew your shirt!