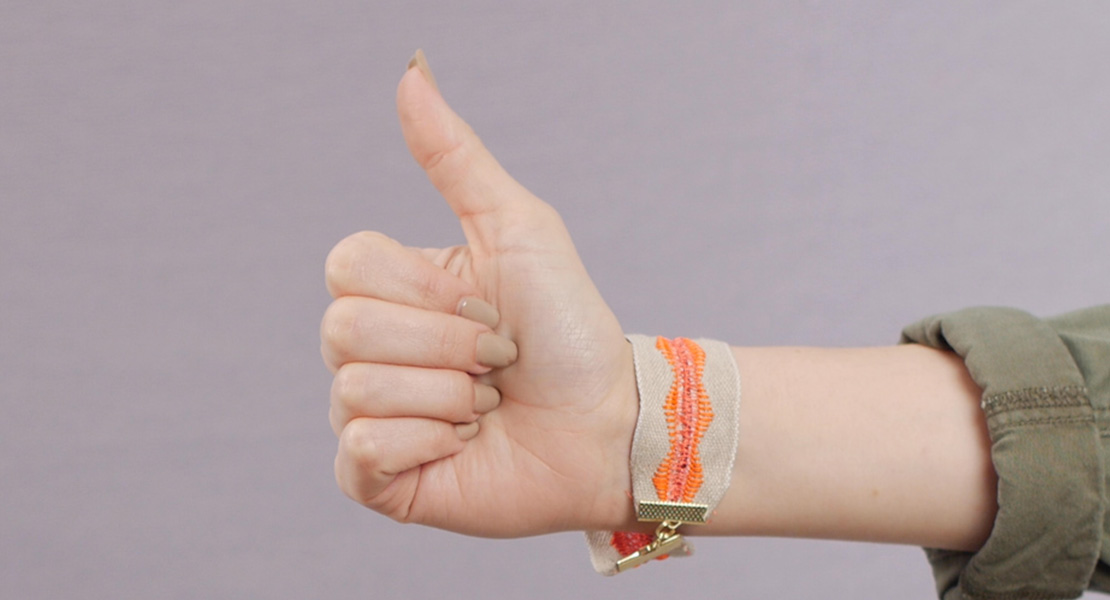
Summer Glow Cuff Bracelets
Textile artist, Paula Scaffidi, shares her creative technique to stitch up a bunch of Summer Glow Cuff Bracelets.
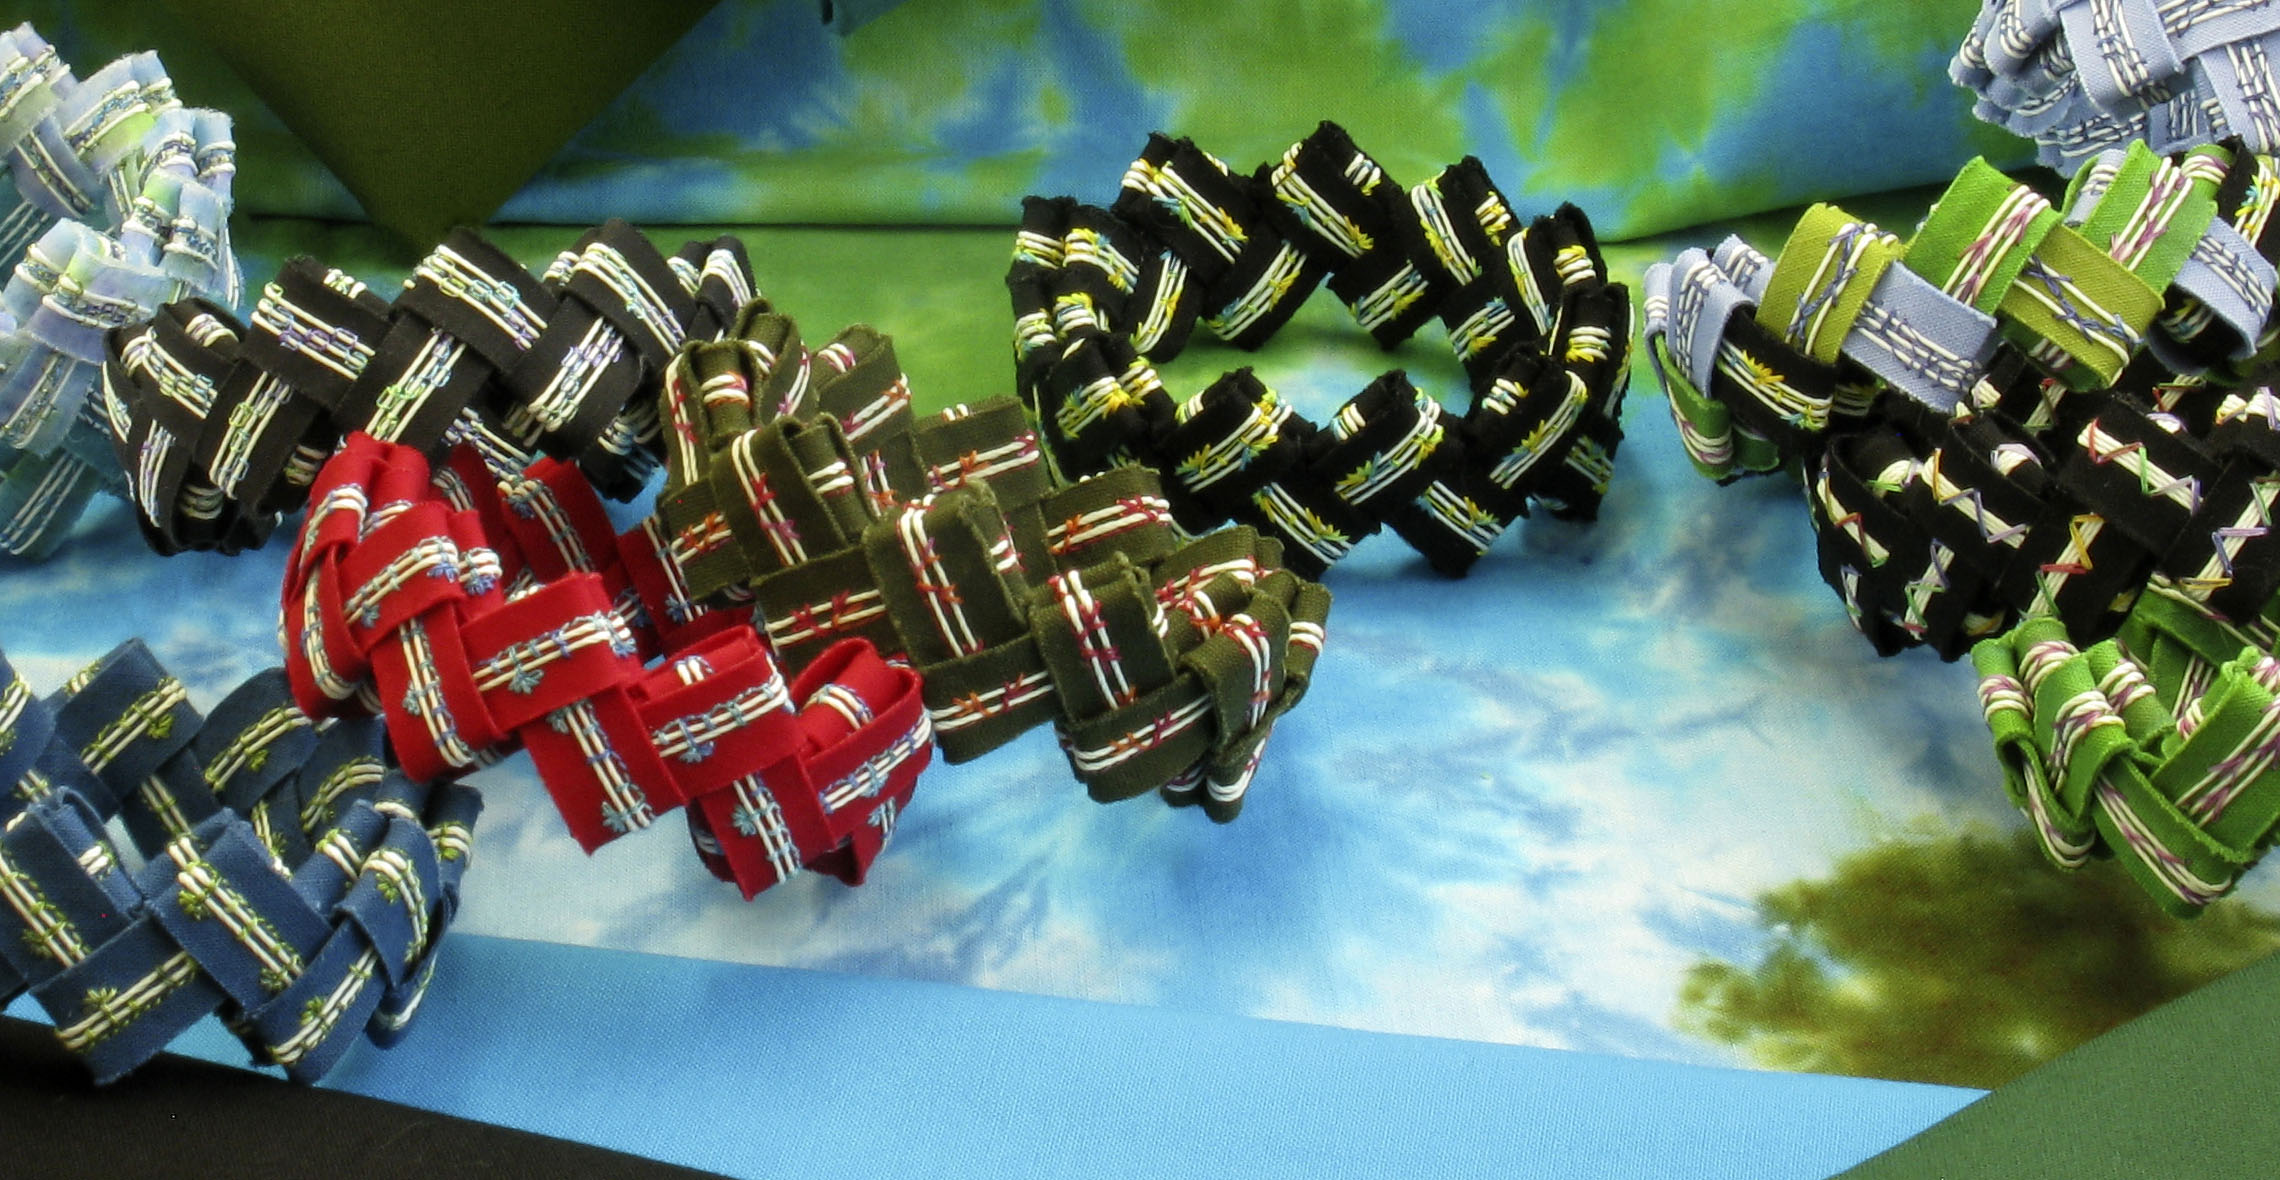
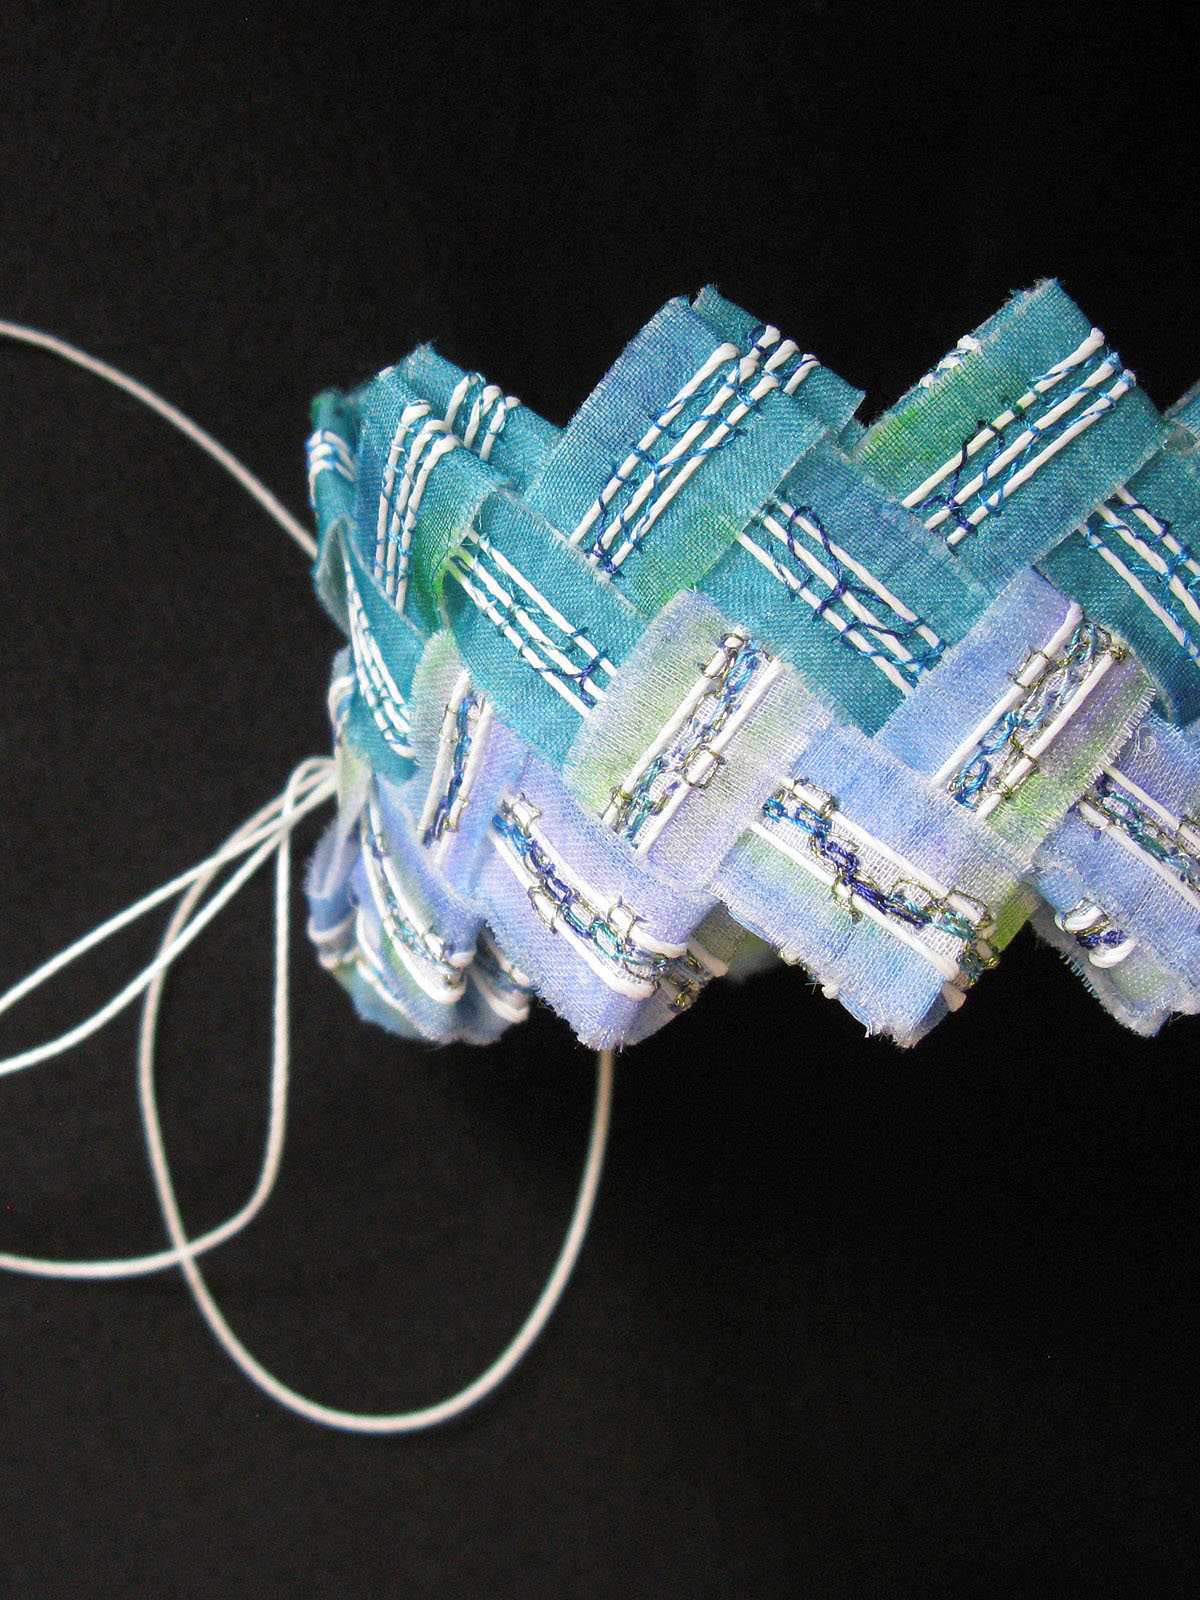
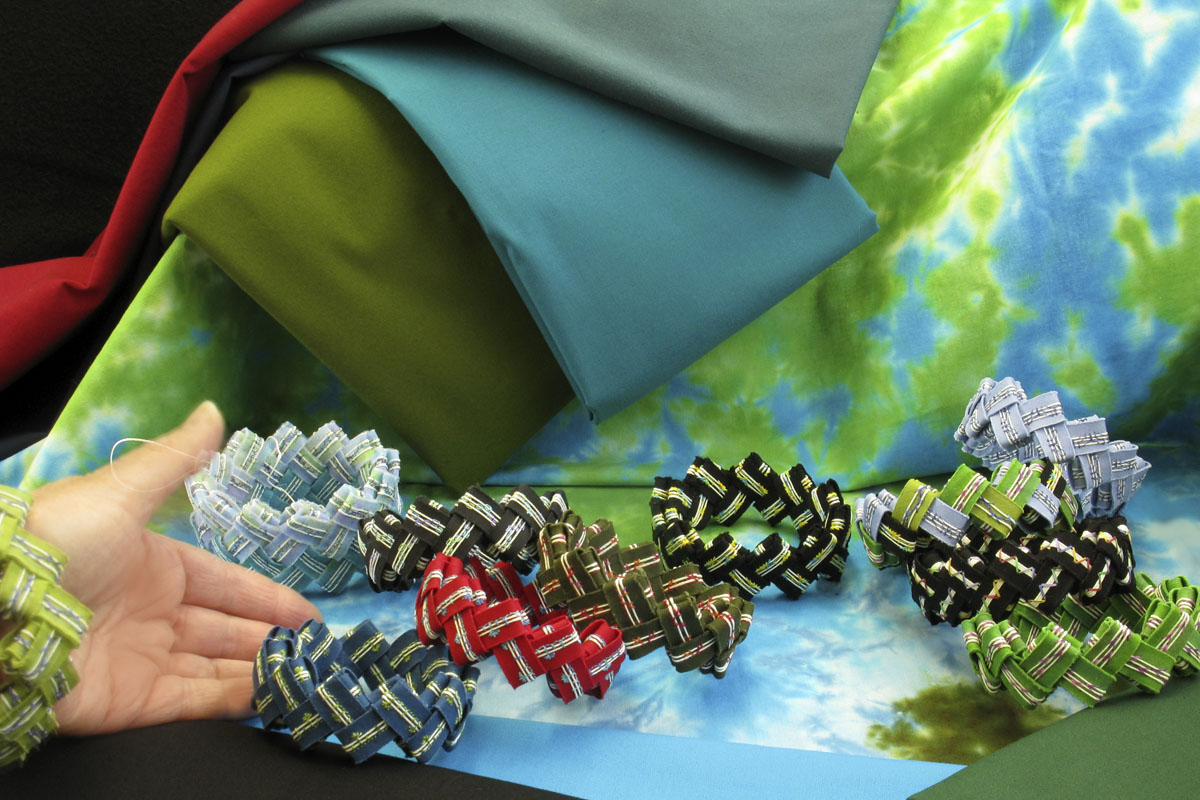
I love a little project in between big ones. Intriguing to create and wear, these bracelets feel very nice on the wrist. Swaying in the night, watch them glow! It’s pure fun putting together a selected stitch pattern, thread and fabric color, auditioning a link or two…then quickly seeing it all take shape. A cuff style is simply two bracelets laced together. Hard to stop at just one, I’ve included my own Stitch Pattern chart for download. It’s useful beyond bracelets to “couch” embellishment on a wide variety of projects, whether using SewGlow, cotton floss, pearl cotton, yarns, etc. Enjoy!
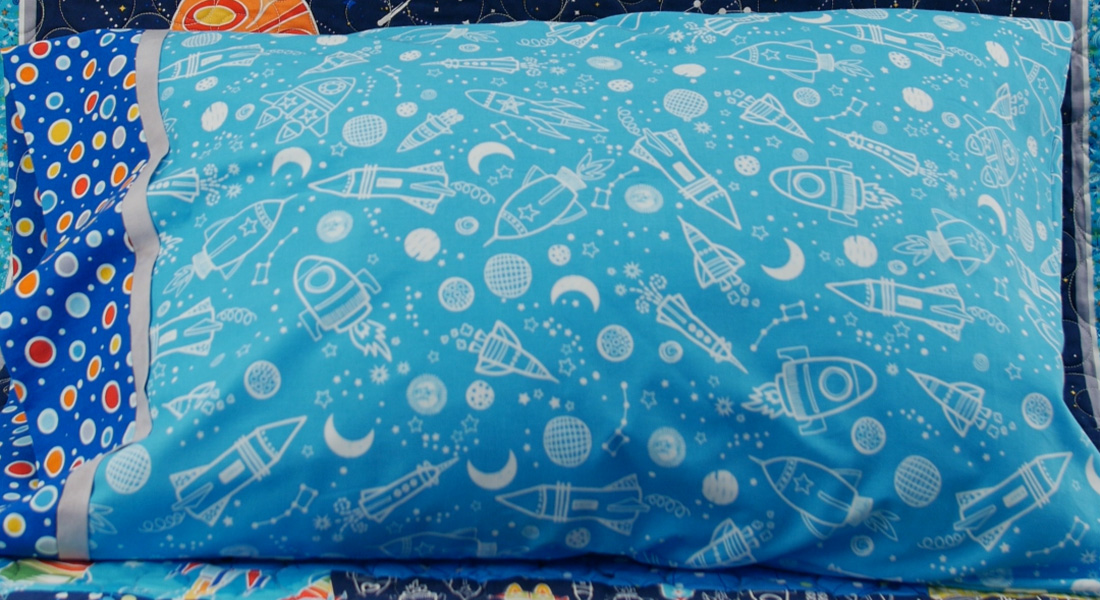
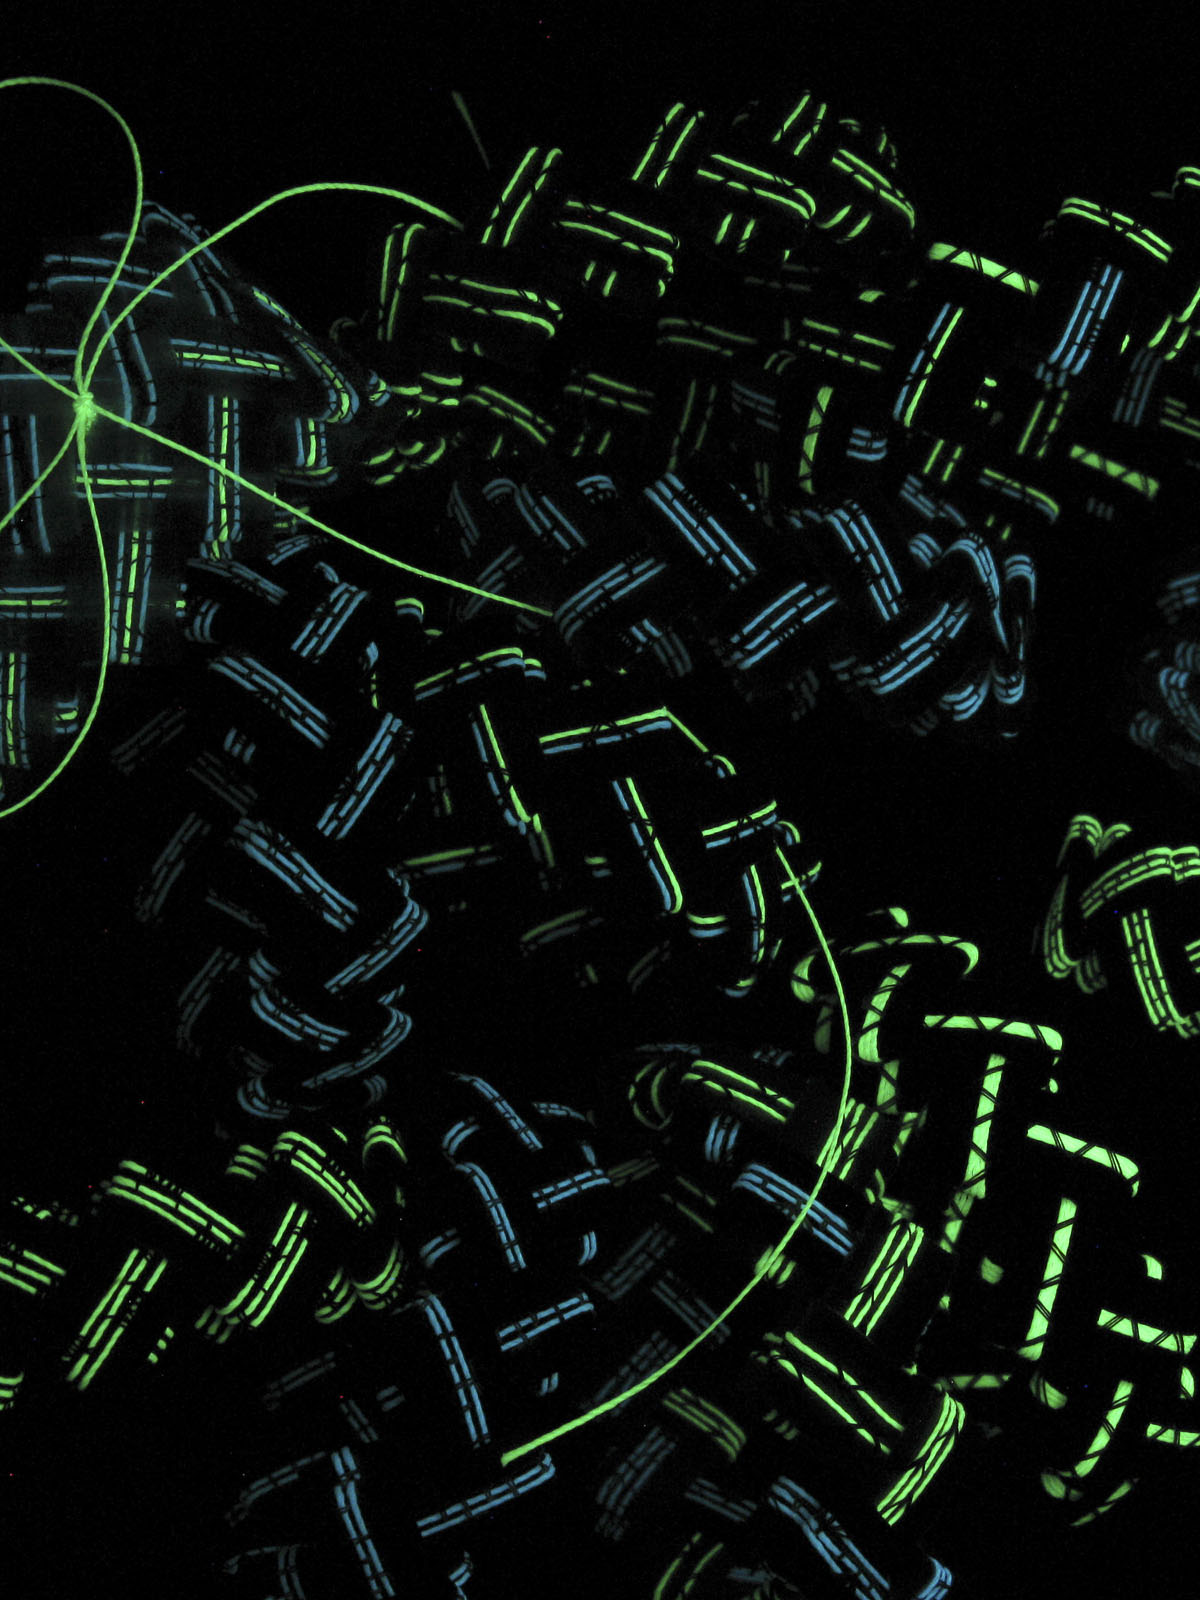
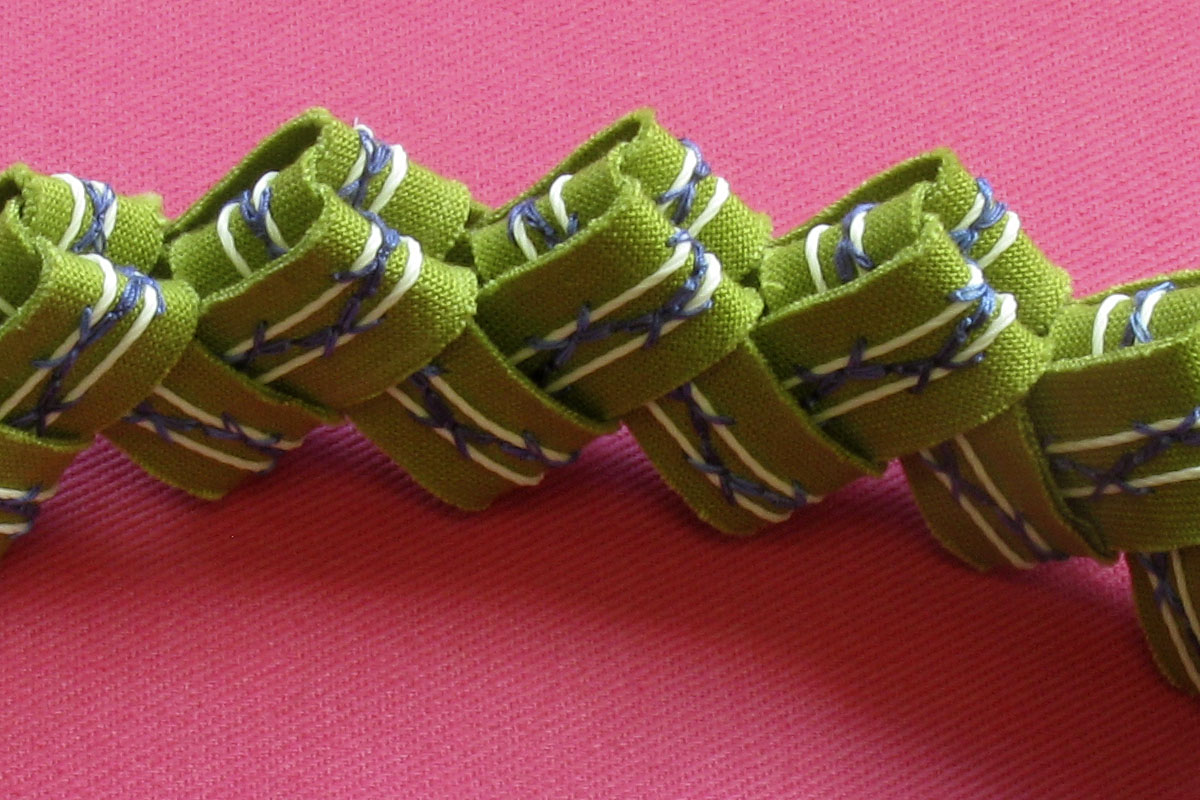
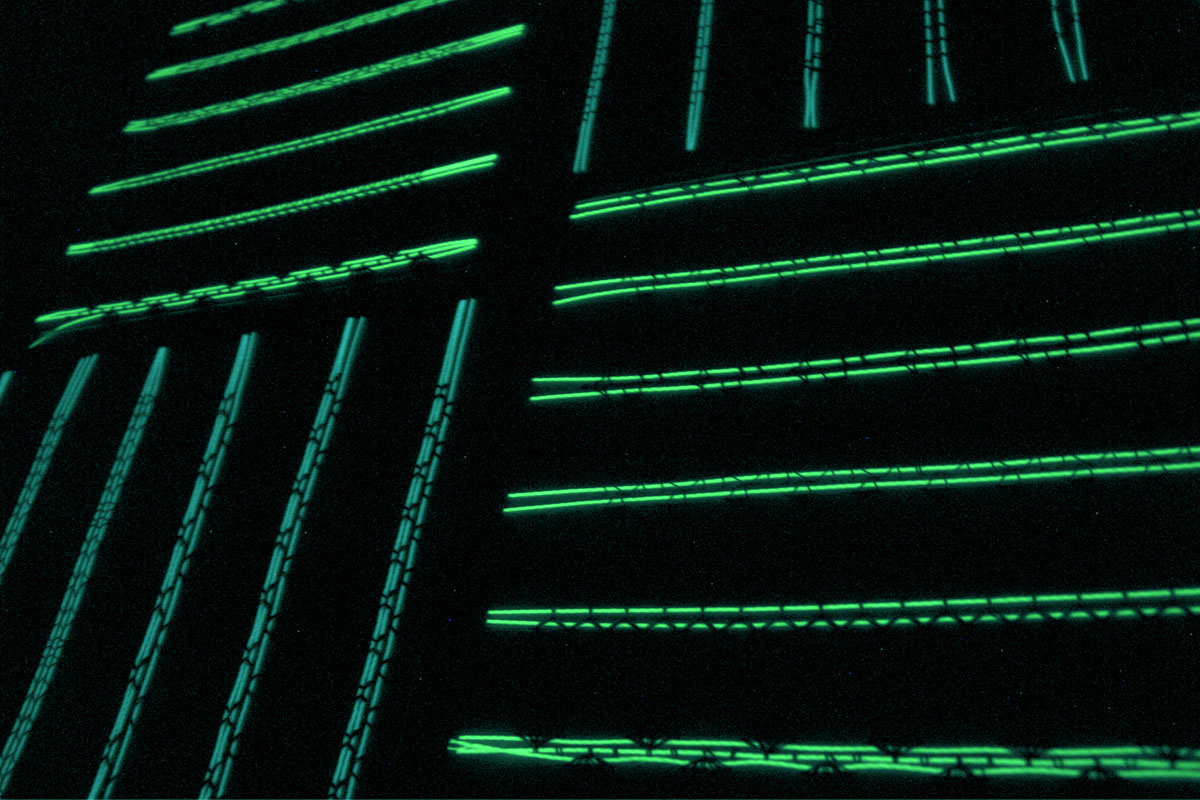
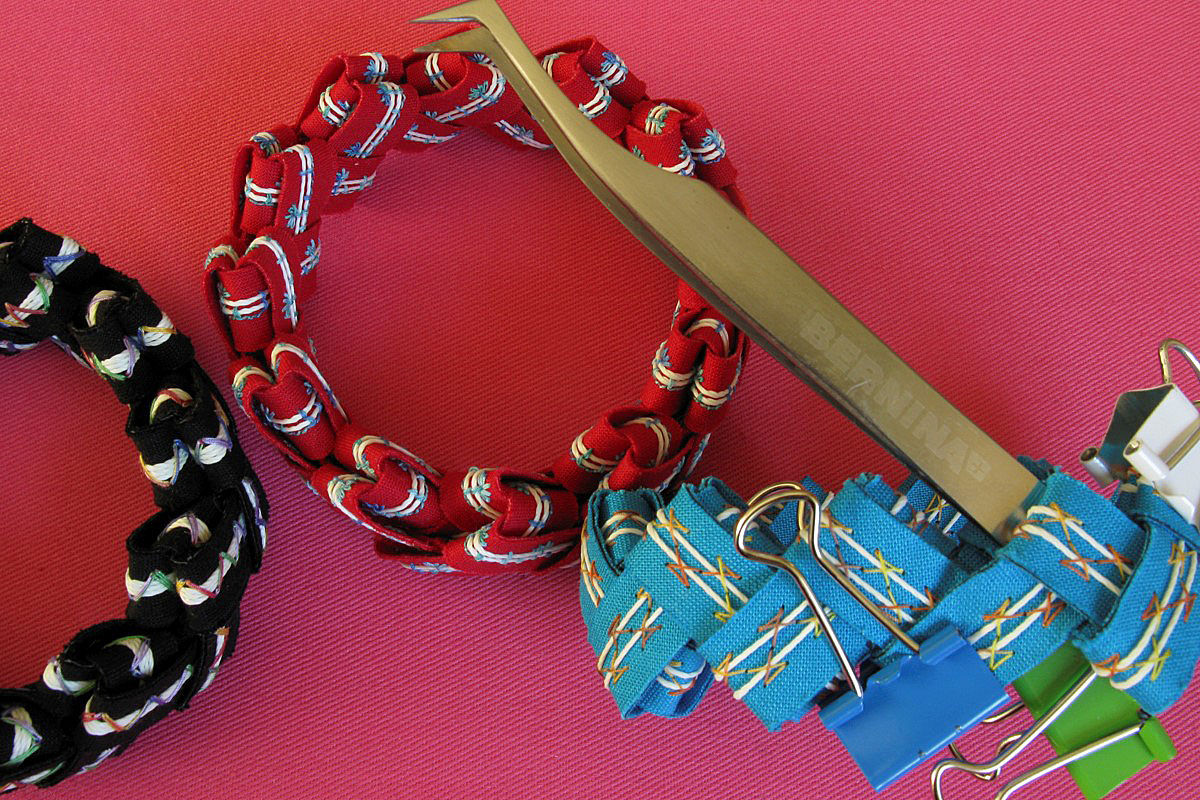
Couched SewGlow bracelets glow blue or green, patterned by the stitches holding it in place.
It’s truly simple…once you know how. Terrific for summer, cotton fabric is ideal for learning bracelet basics. After your first bracelet, machine time is under an hour, maybe closer to a half hour depending on stitch pattern and link number desired. Assembly is truly child’s play. Some of you may happily remember gum wrapper chains.
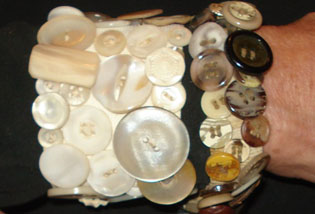
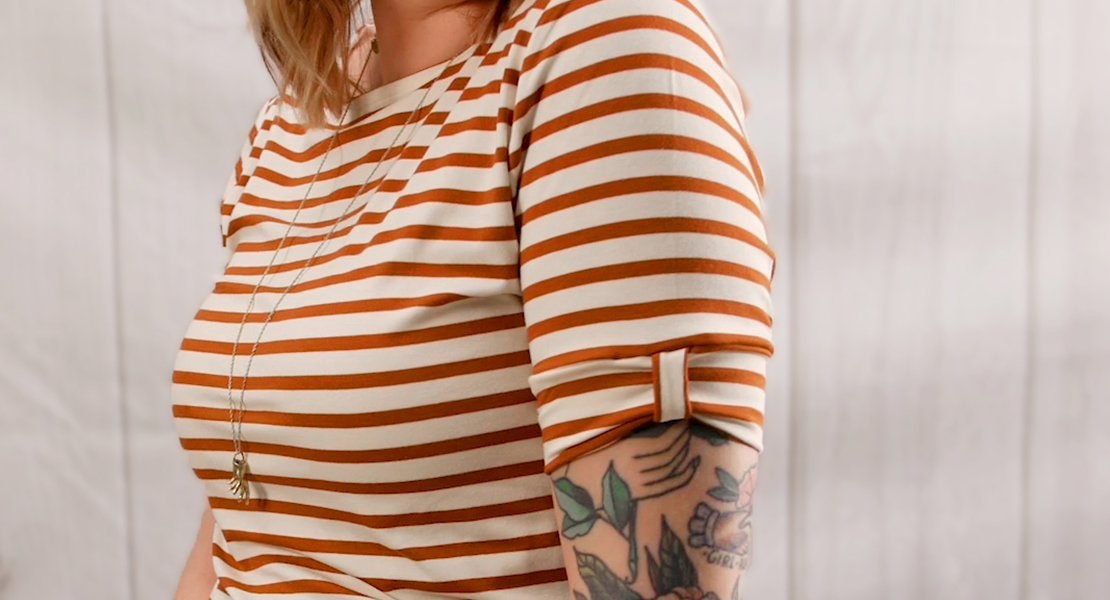
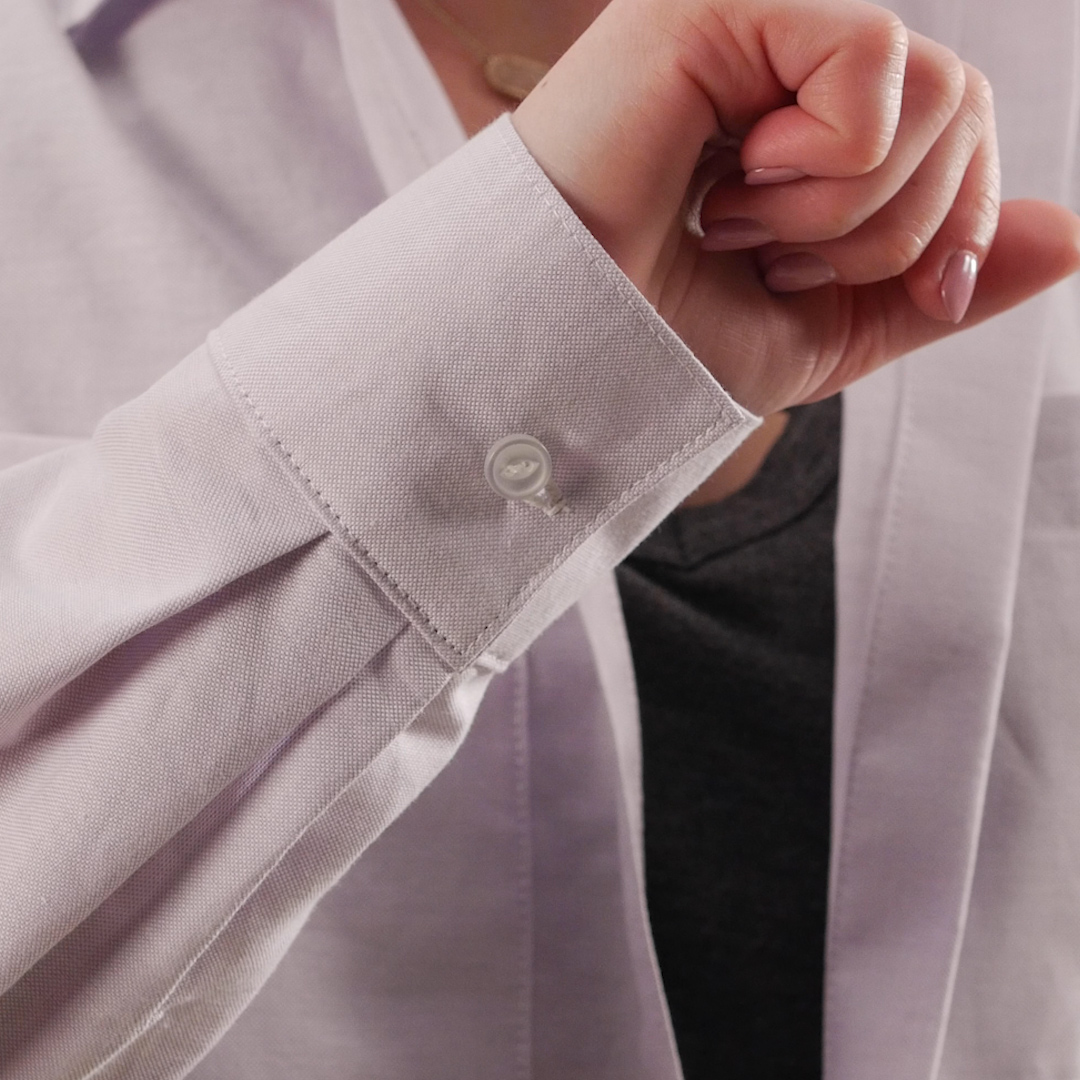
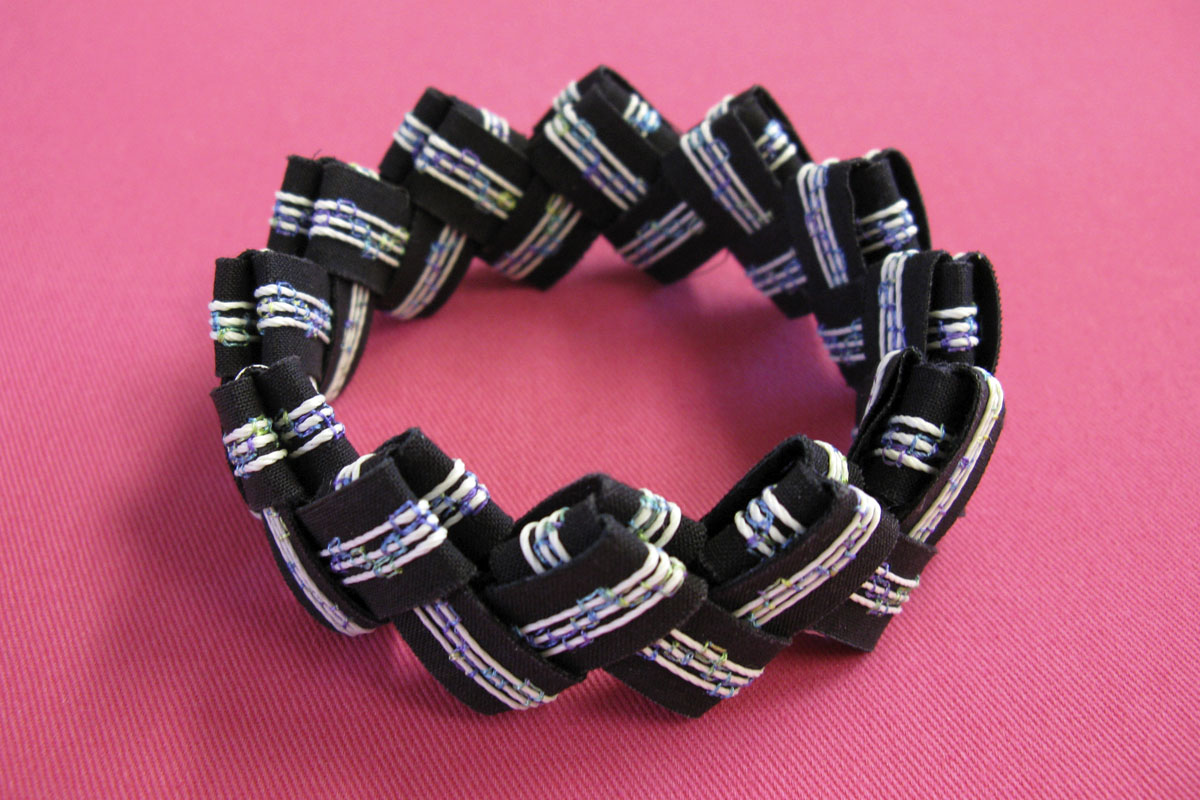
A bangle-like form brims with texture and tiny detail. I love how these compliment simple apparel.
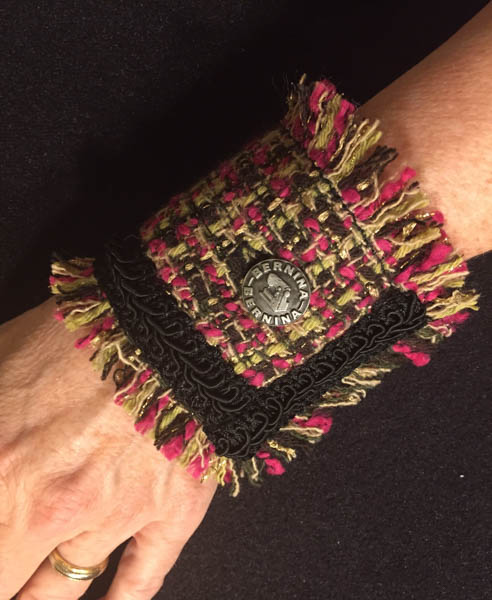
Take a really close look below. This early experiment led me to bias cut fabric and other improvements. Puzzle solved, here’s my favorite basic method for you! You can add to it.
For a little background, visit my recent post, SewGlow…an Experiment! A follow up post creates painted silk cuffs with this basic method.
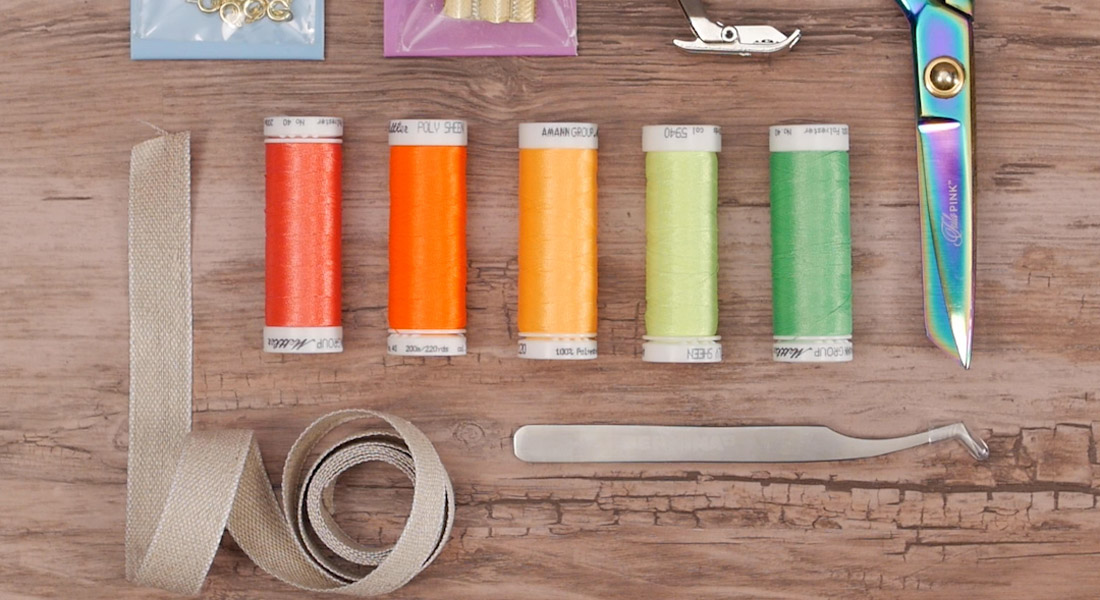
Materials to make a Summer Cuff Bracelet
- 3-groove cording foot #22
- Cotton fabric: black, dark-to-vivid, one fat or skinny quarter
- Heat and Bond Lite
- Cotton or Polyester thread, a little hand sewing – match your fabric
- OESD PolyMesh CutAway – black (beige for lighter colors)
- Superior Threads (I unspool a little on fabric, making sure every color shows up)
- SewGlow – white-to-green and/or white-to-blue
- Small cone @ 100 yards = thrifty U-turns consume 6″ per link, each strand; roughly 9 or 10 adult bracelets per small cone (half double, half triple style)
- King Tut or Fantastico or So Fine 40wt (1″ color repeats, variegated)
- Clover Chaco Liner, pen style white
- Topstitch or Cordonnet needle, size 90 titanium ideal
- stiletto
- thread snips
- tweezers
- hand sewing needle
- needle grabber
- Summer glow bracelet stitch pattern chart
- Summer glow bracelet bias cutting guide
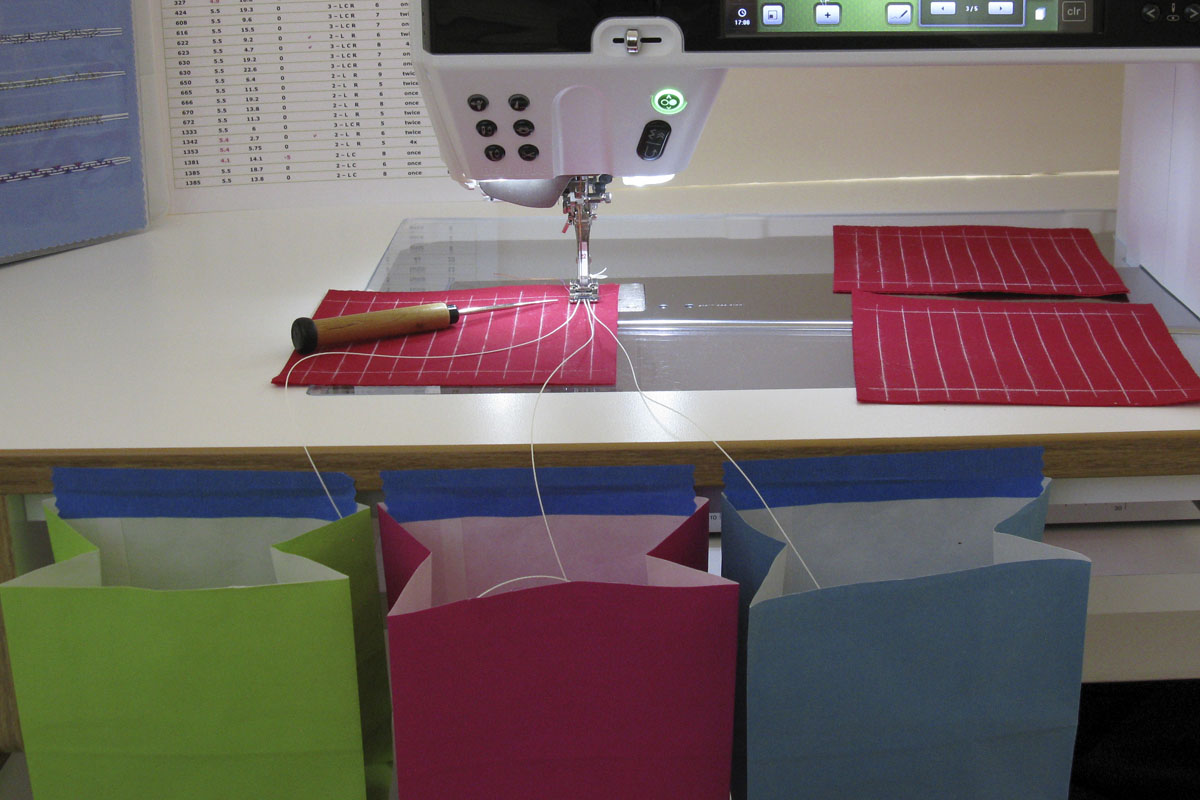
Smooth embellishment flow is essential. Spread bags farther apart, separate for bobbin access and/or tape to the machine shelf, etc.
Odds & Ends
- 3 bags, tape
- 3 mini paper clamps, assorted colors helpful
- thick cotton hand towel
Optional
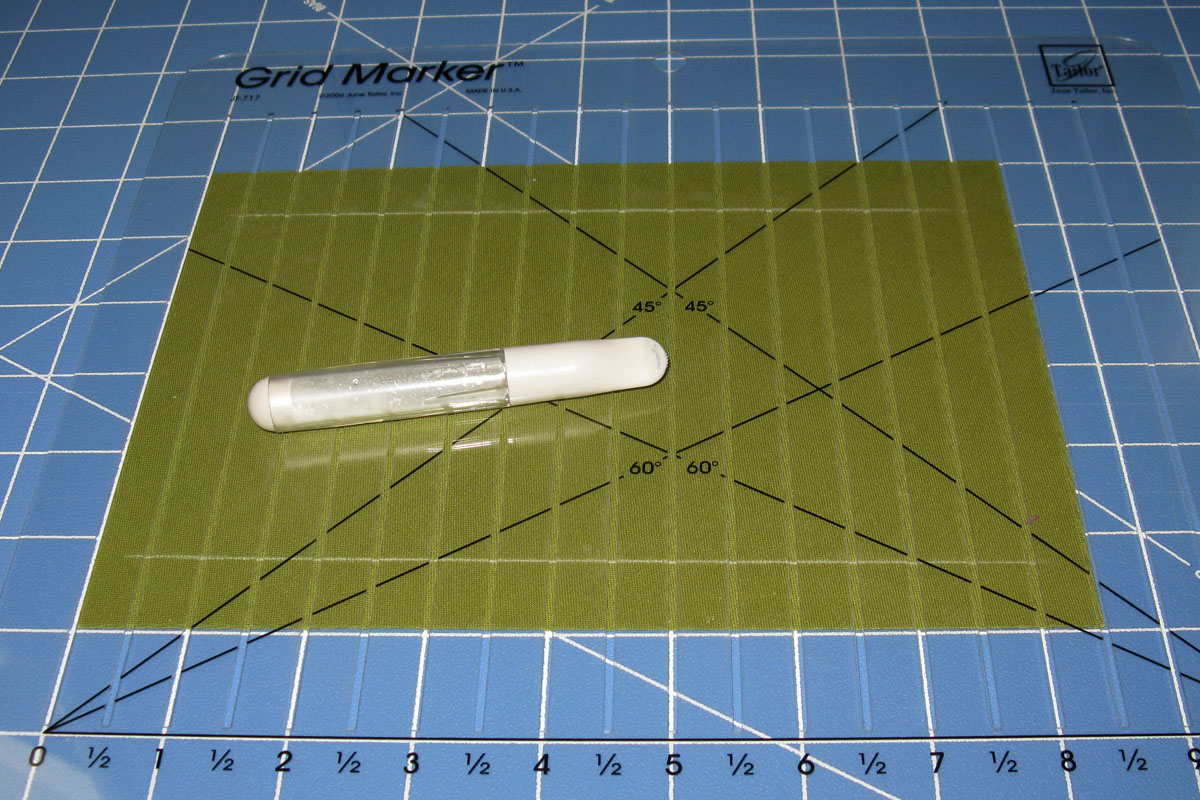
- June Tailor Grid Marker
- June Tailor Shape Cut
Size-to-Fit Bracelets
Directions and materials = yield 30 links (practice, any oops, extras for scrappy bracelets, etc.)
22, 24 or 26 links – various adult sizes, less for kids
Material Cutting
Here’s a lovely, tiny fray along link edges! Download the Fabric Layout for Bias Cuts Handout above.
Cut fabric:
6 pieces, each a bias cut 6″ square (from a Fat Quarter)
OR 4 pieces, each a bias cut 6″ x 8 ½” (from a Skinny Quarter)
Cut Heat ‘n Bond Lite – same basic shape as fabric:
6 pieces, each 5 ½” x 5 ½”
OR 4 pieces, each 5 ½” x 8″
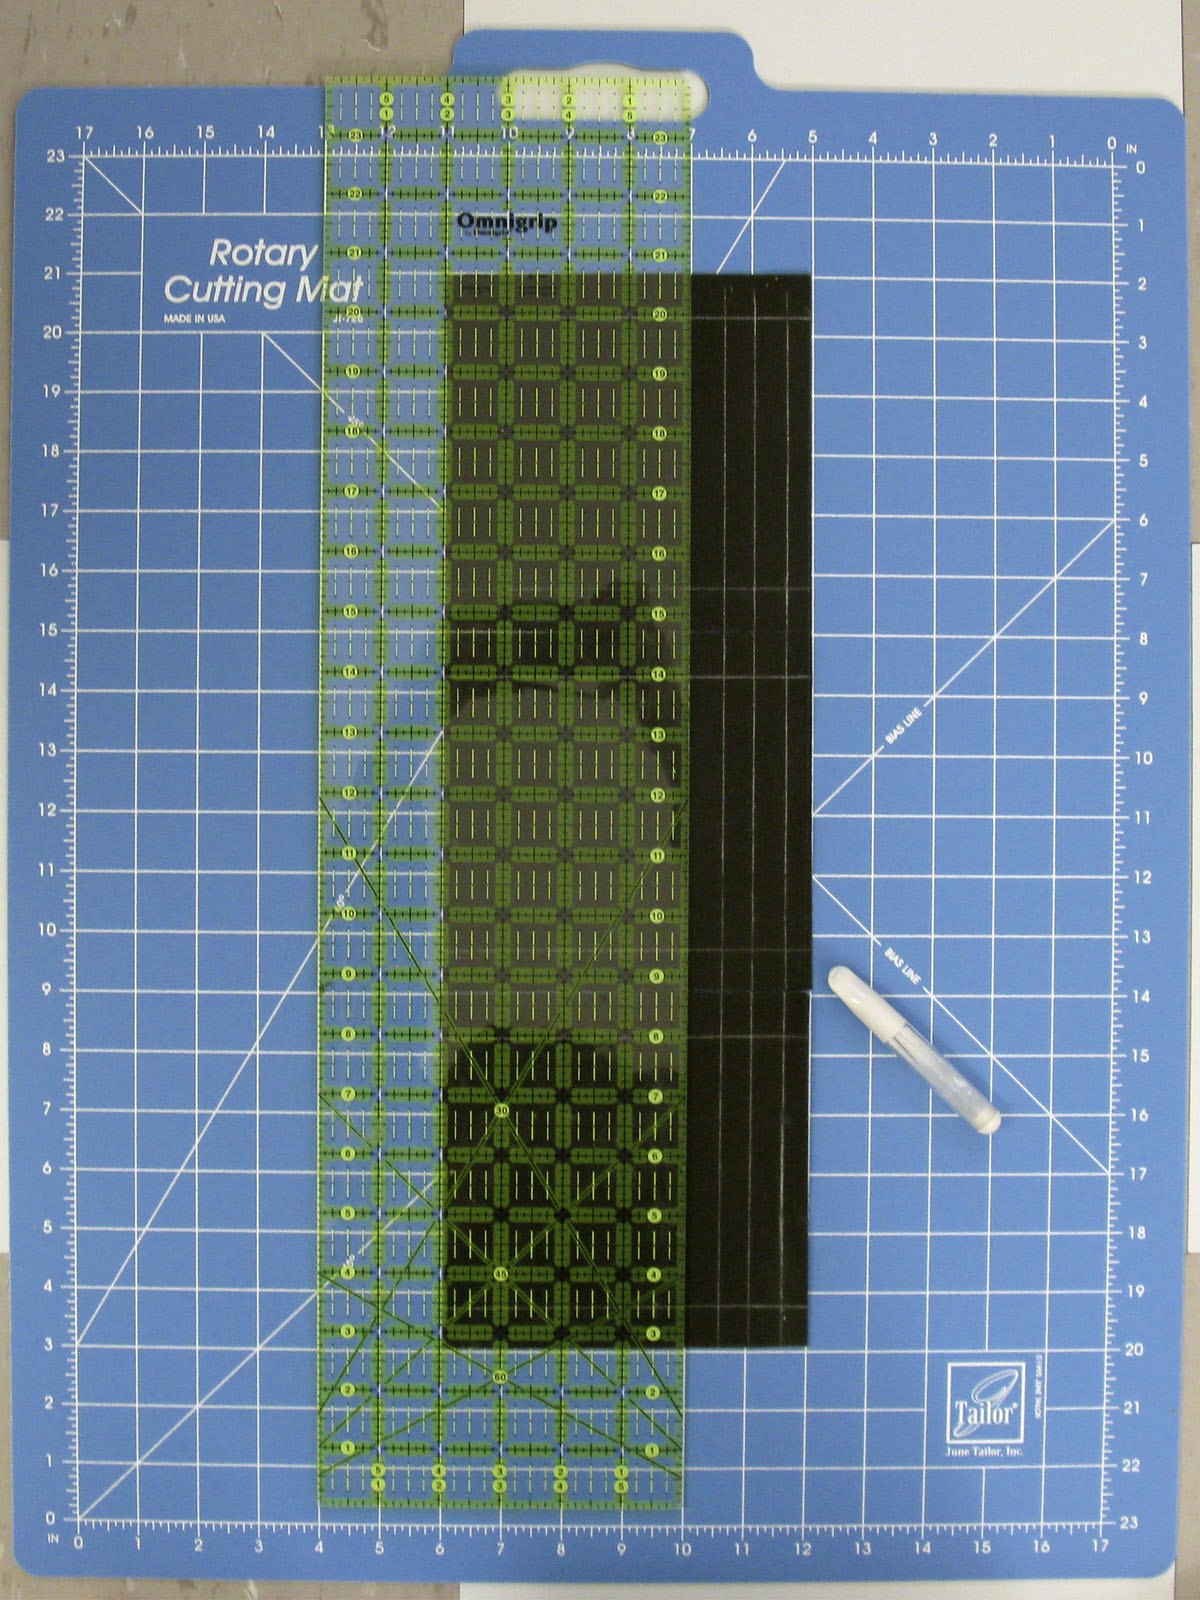
Cut OESD PolyMesh:
Lengthwise direction (as it off the roll) should end up lengthwise in links.*
Cut 5 ½” strip(s) off the roll as needed. That 5 ½” span is incredibly stable.
*Square cuts, note lengthwise direction with a chalk line near edge.
From your 5 ½” strip(s), cut (same size as fusible)
6 pieces, each 5 ½” x 5 ½”
OR 4 pieces, each 5 ½” x 8″
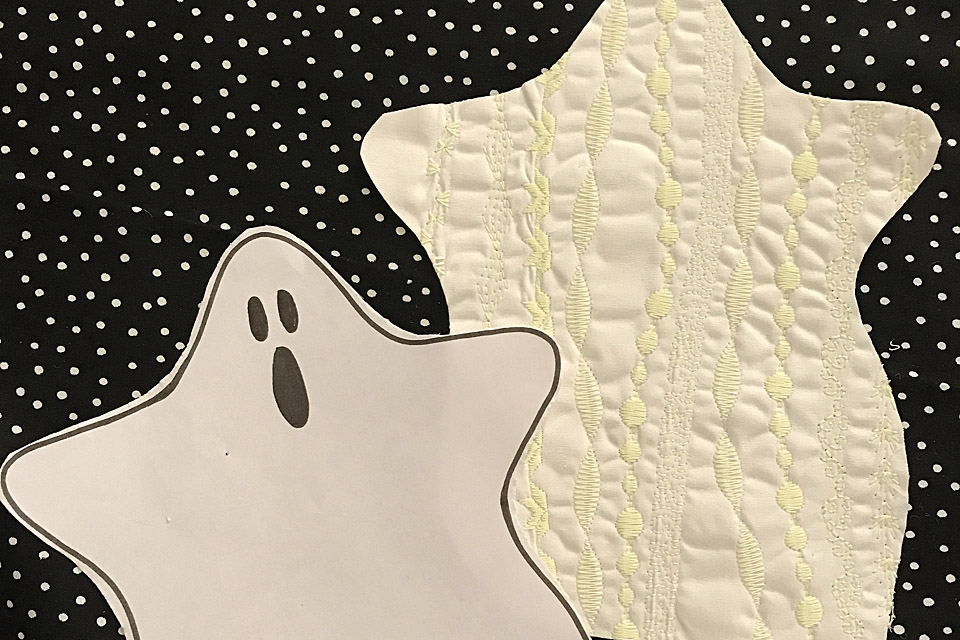
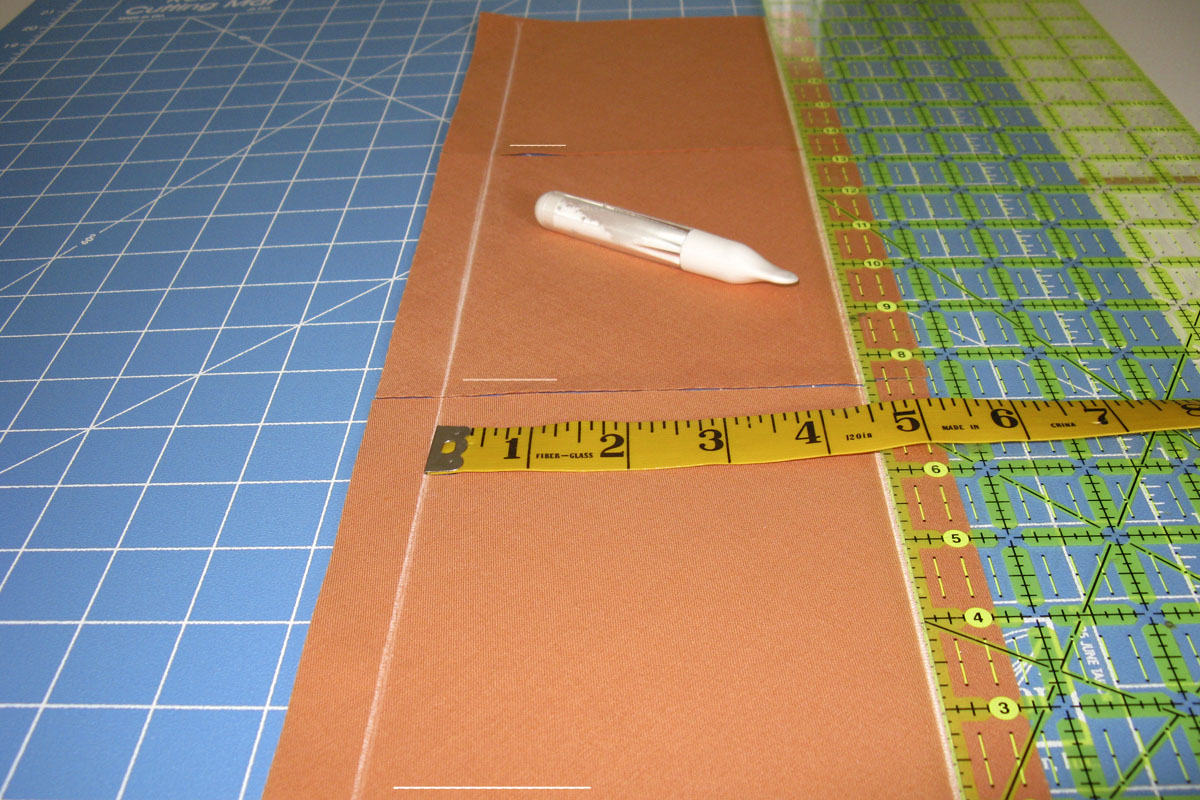
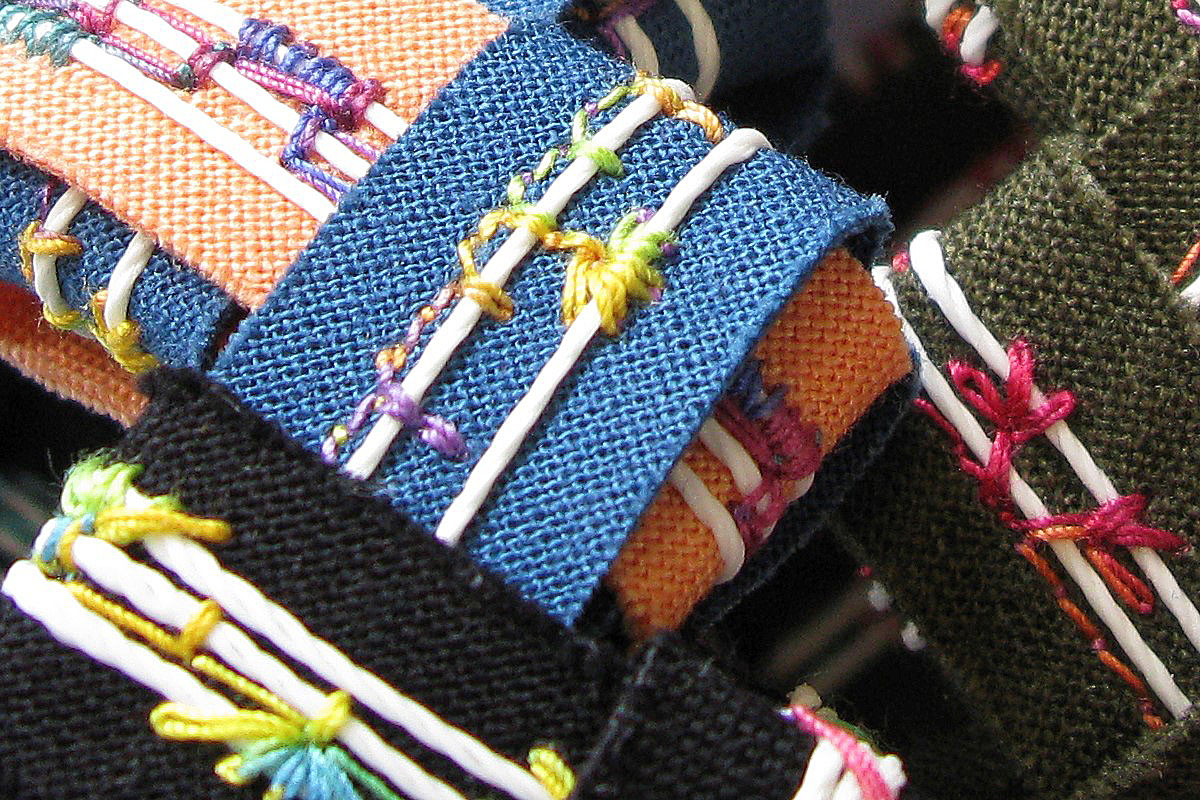
Polymesh black, below left, awaits use with vivid turquoise (lightest I would go using black). Beige Polymesh can be seen with already-fused orange fabric.
Basic Bracelet Steps
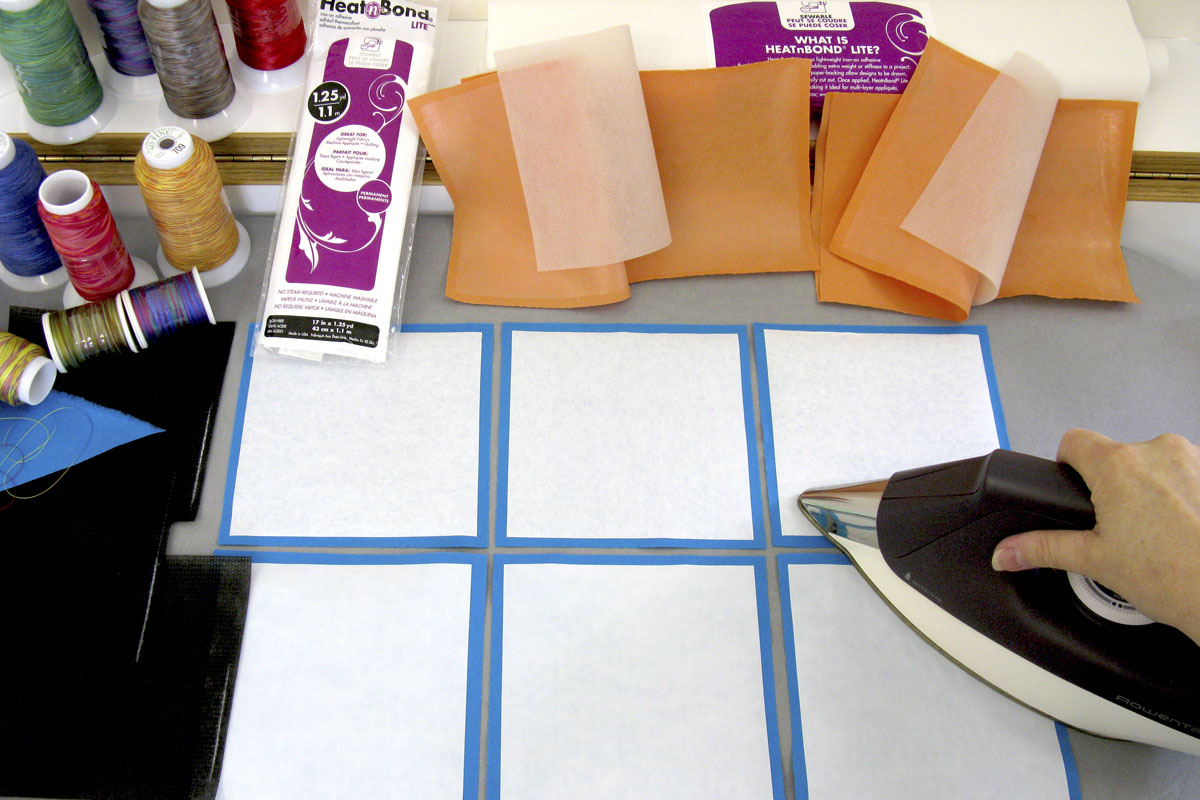
1. Fuse and Mark Fabric
Press fusible (manufacturer directions- medium heat or cooler) paper side up, one to each fabric piece.
Cool …then peel papers.
Center Polymesh on shiny fusible (chalk line vertical on squares).
Brush chalk off Polymesh squares.
Top with remaining fabric, shiny side down (replace Polymesh chalk mark on top).
Fuse sandwich, flip over, repeat.
Using squares? Rotate so Polymesh length is now horizontal.
Align 6″ sides, squares or rectangles, forming a neat vertical column on cutting mat.
Aligning ruler to mat, mark vertical lines 4 ½” apart (margins about ¾” each).
Rotate all fabric pieces, so your first two chalk lines are top and bottom. Using mat line/ruler aligned, mark ½” link intervals. It’s fine if left/right margins are a tiny bit off.
Avoid chalk smudging:
Right handed marking begins on right.
Left handed marking begins on left.
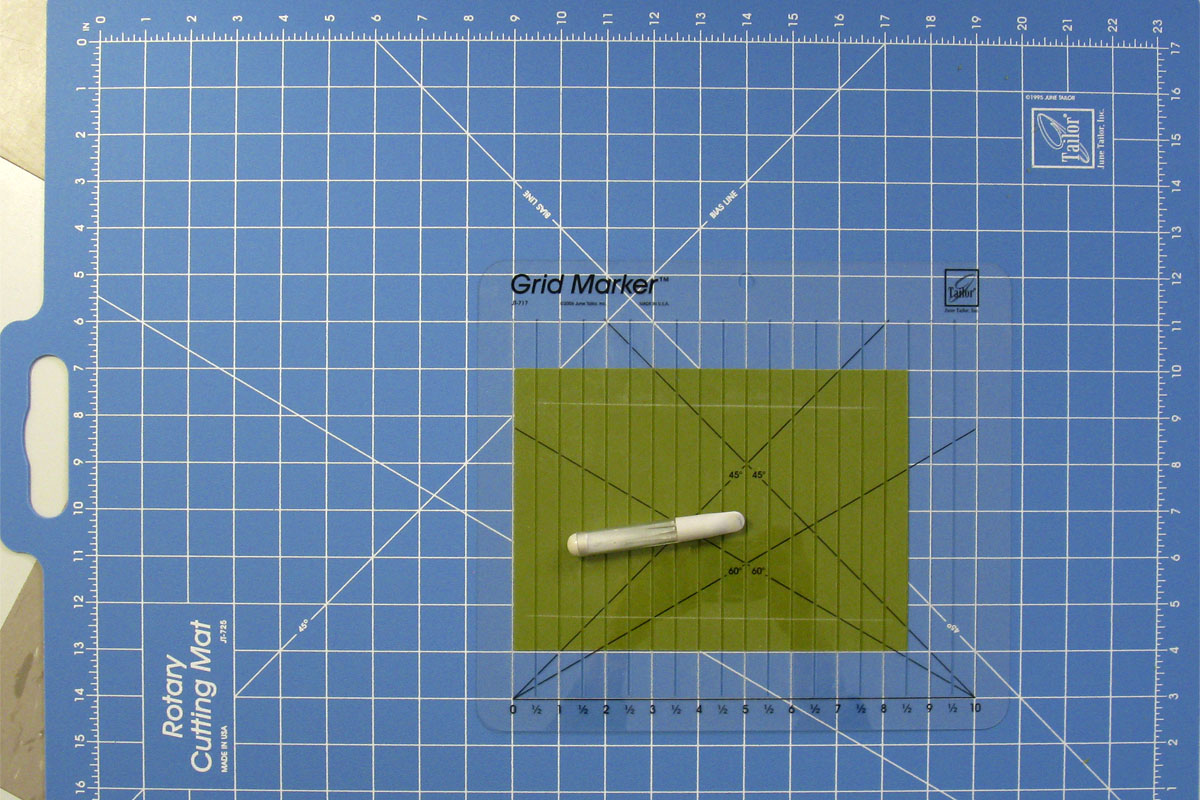
Fabric and Grid Marker aligned to mat, accurately mark 30 links in under three minutes. Grid Marker helps mark a variety of shapes.
Materials yield 30 links (10 per square, 15 per rectangle). In the future, you can custom cut fabric for any link number desired. Or always sew 30 for scrappy bonus bracelets.
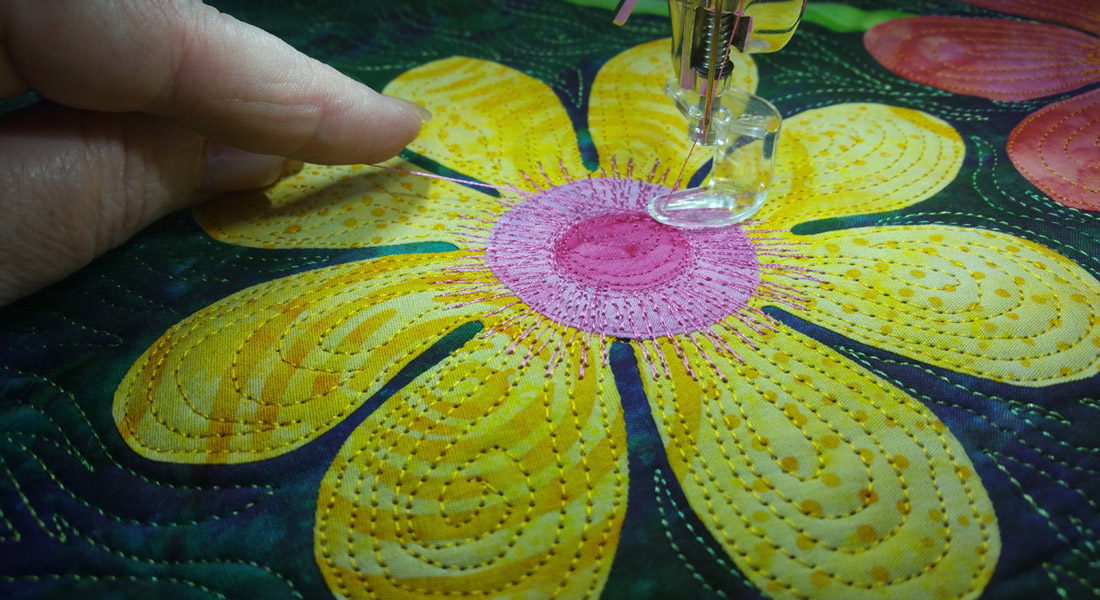
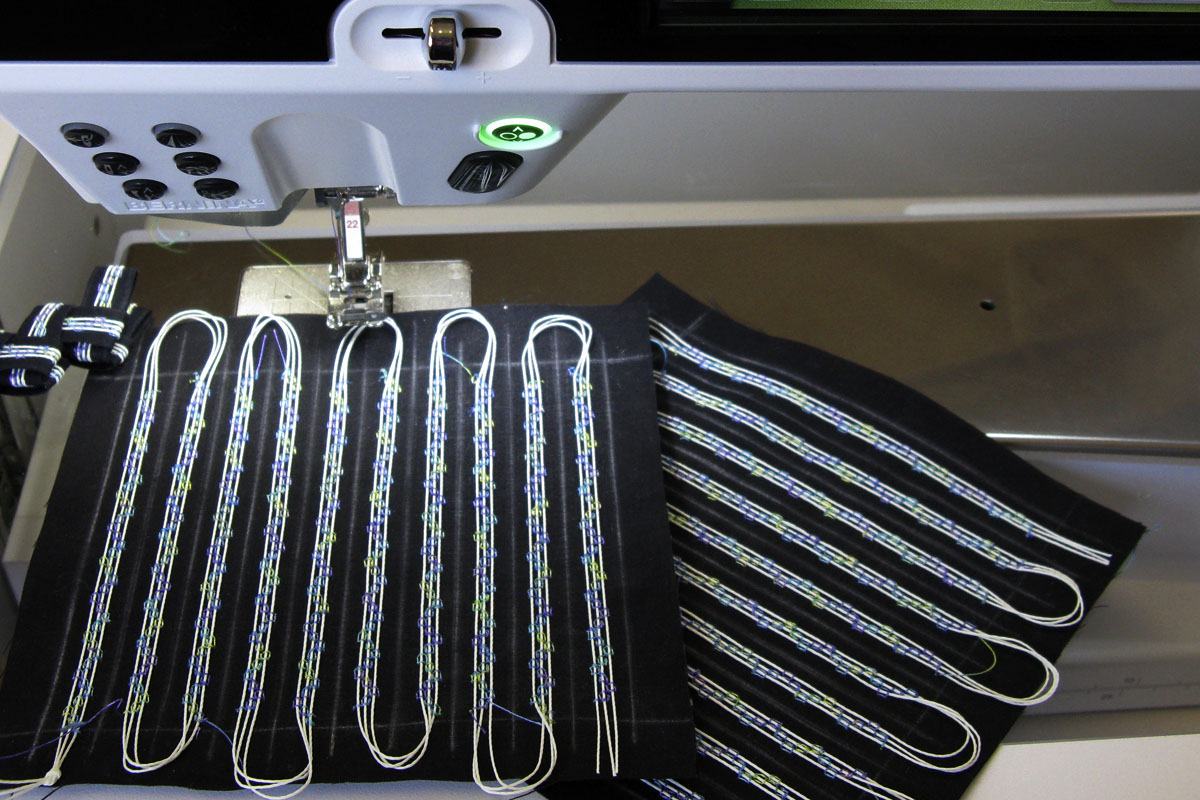
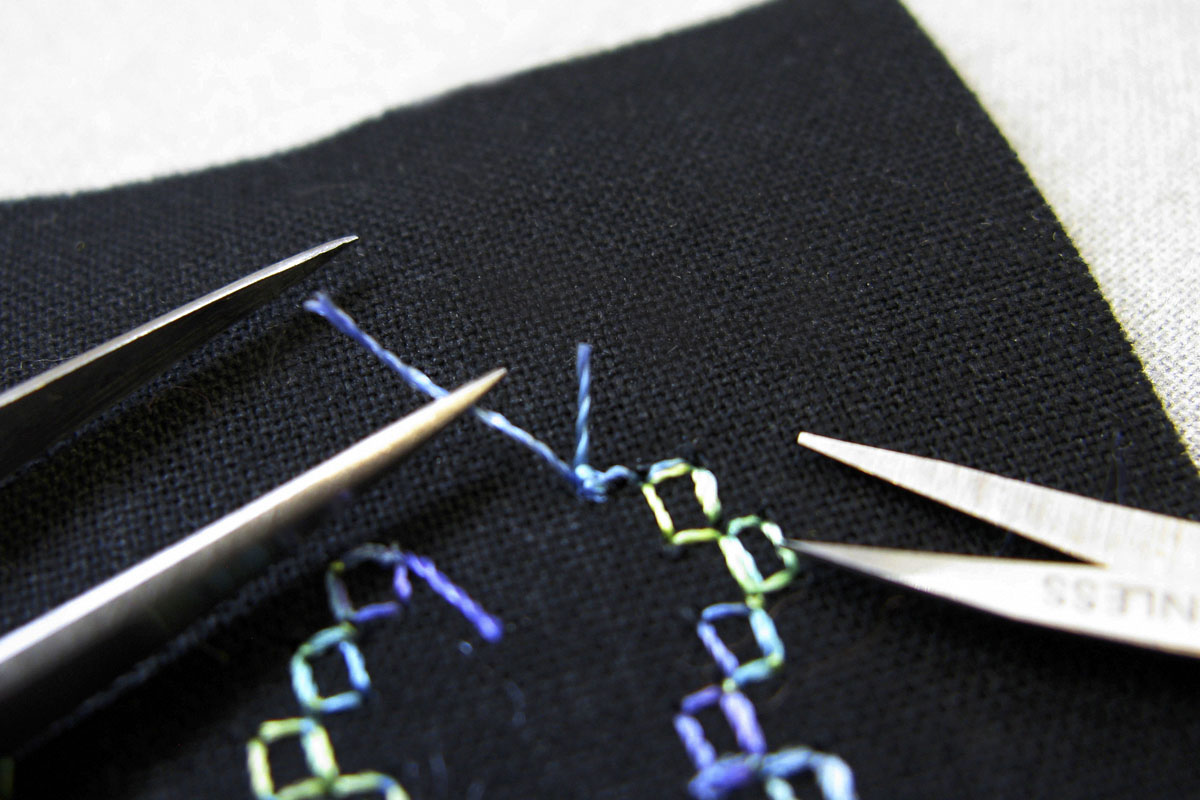
2. Stitch Patterns
The word “couch” in sewing, always makes me smile. I picture SewGlow laying down happily relaxed on its base fabric, a little oblivious to all the colorful stitching going on around it.
I’m link-centering the SewGlow, watching rounded “toes” evenly overlap chalk lines. The needle quietly finds its spot between SewGlow strands.
While testing/adjusting patterns, I conserved SewGlow using cotton floss scraps. Floss is floppy, thick for bracelet folding and sadly absent glow, but results are colorful, textural and very nice for ….well, something.
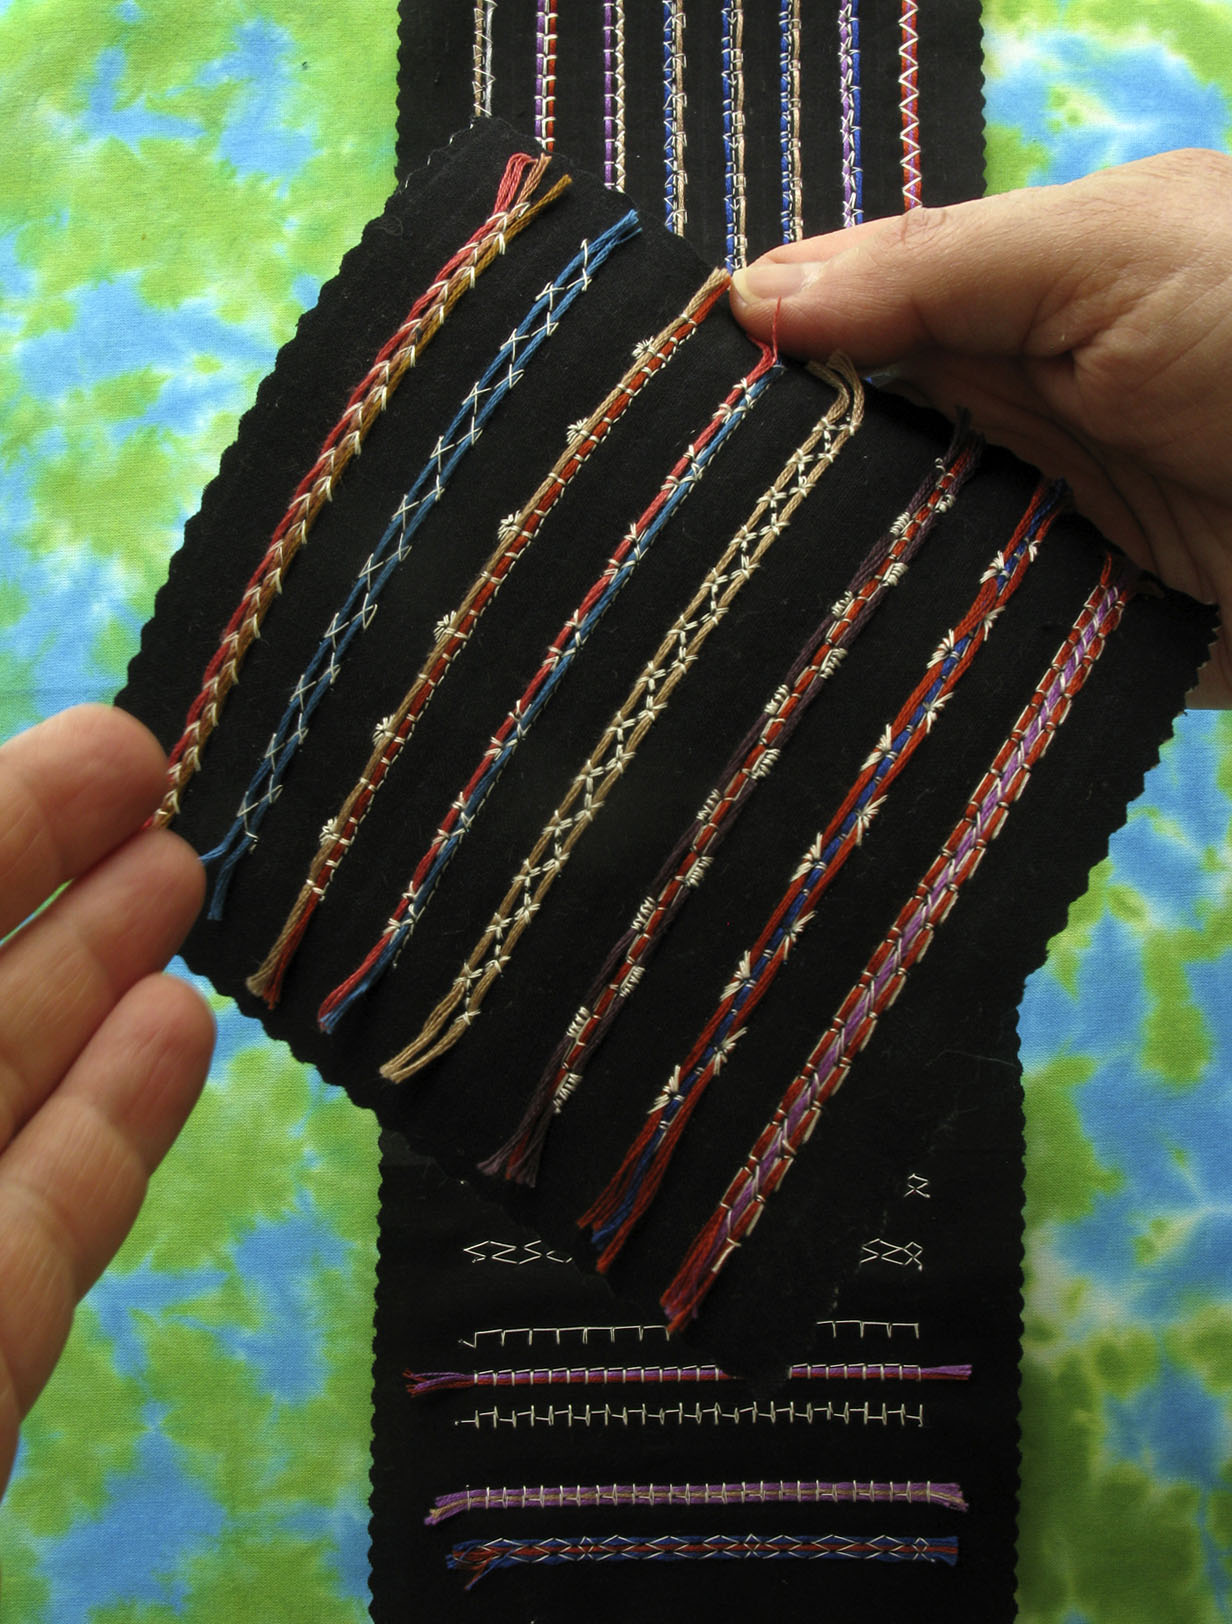
I just love all the tiny, adjustable patterns hiding inside my BERNINA.
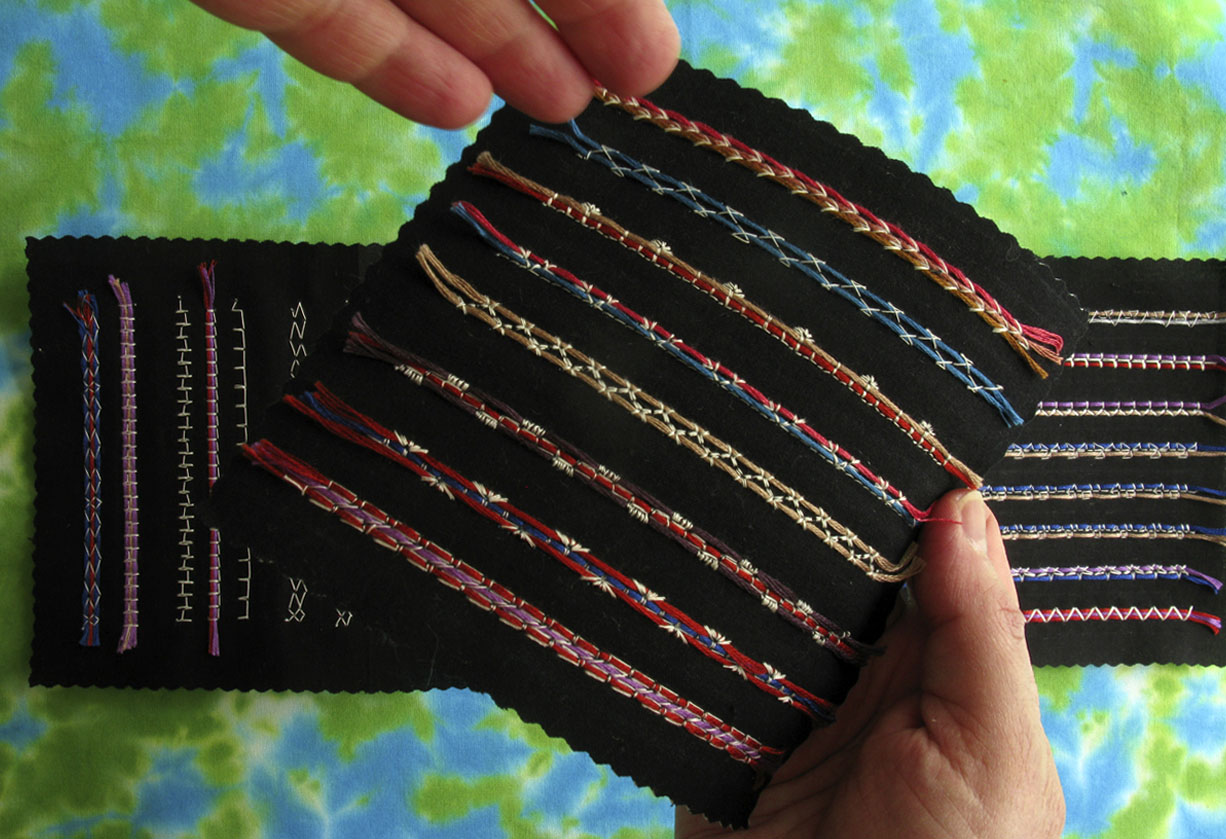
Download my stitch out chart with the link above so you can jump right in. I used max number SewGlow strands for samples. Use fewer if desired. Example: Stitch #327, two strands L and R is lovely.
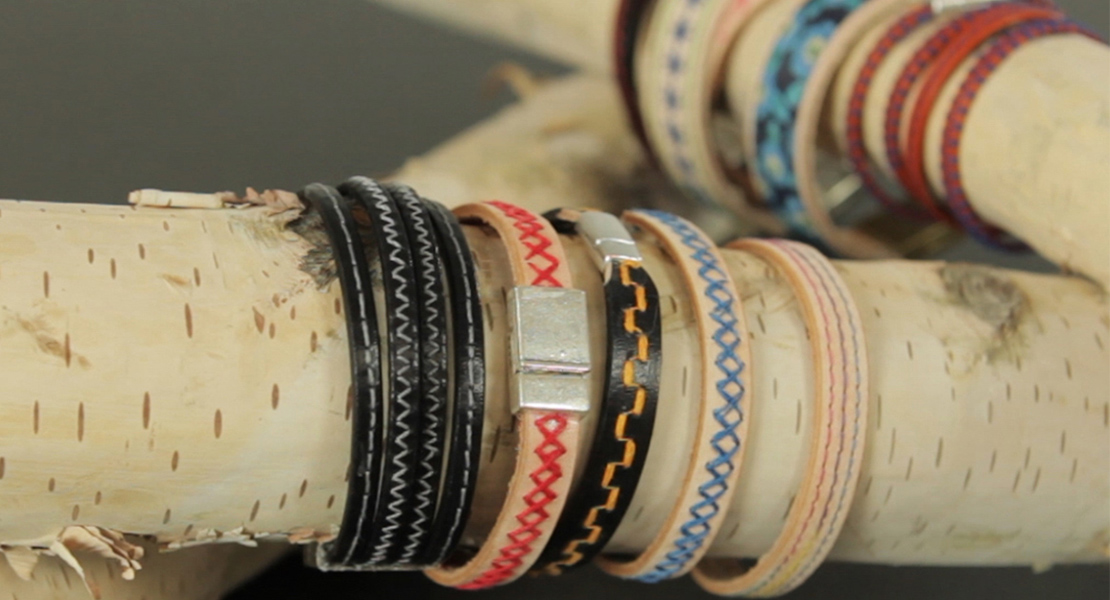
All product models have Triple Zig-Zag (a favorite glow pattern of mine) and Honeycomb, #7 and #8 below.
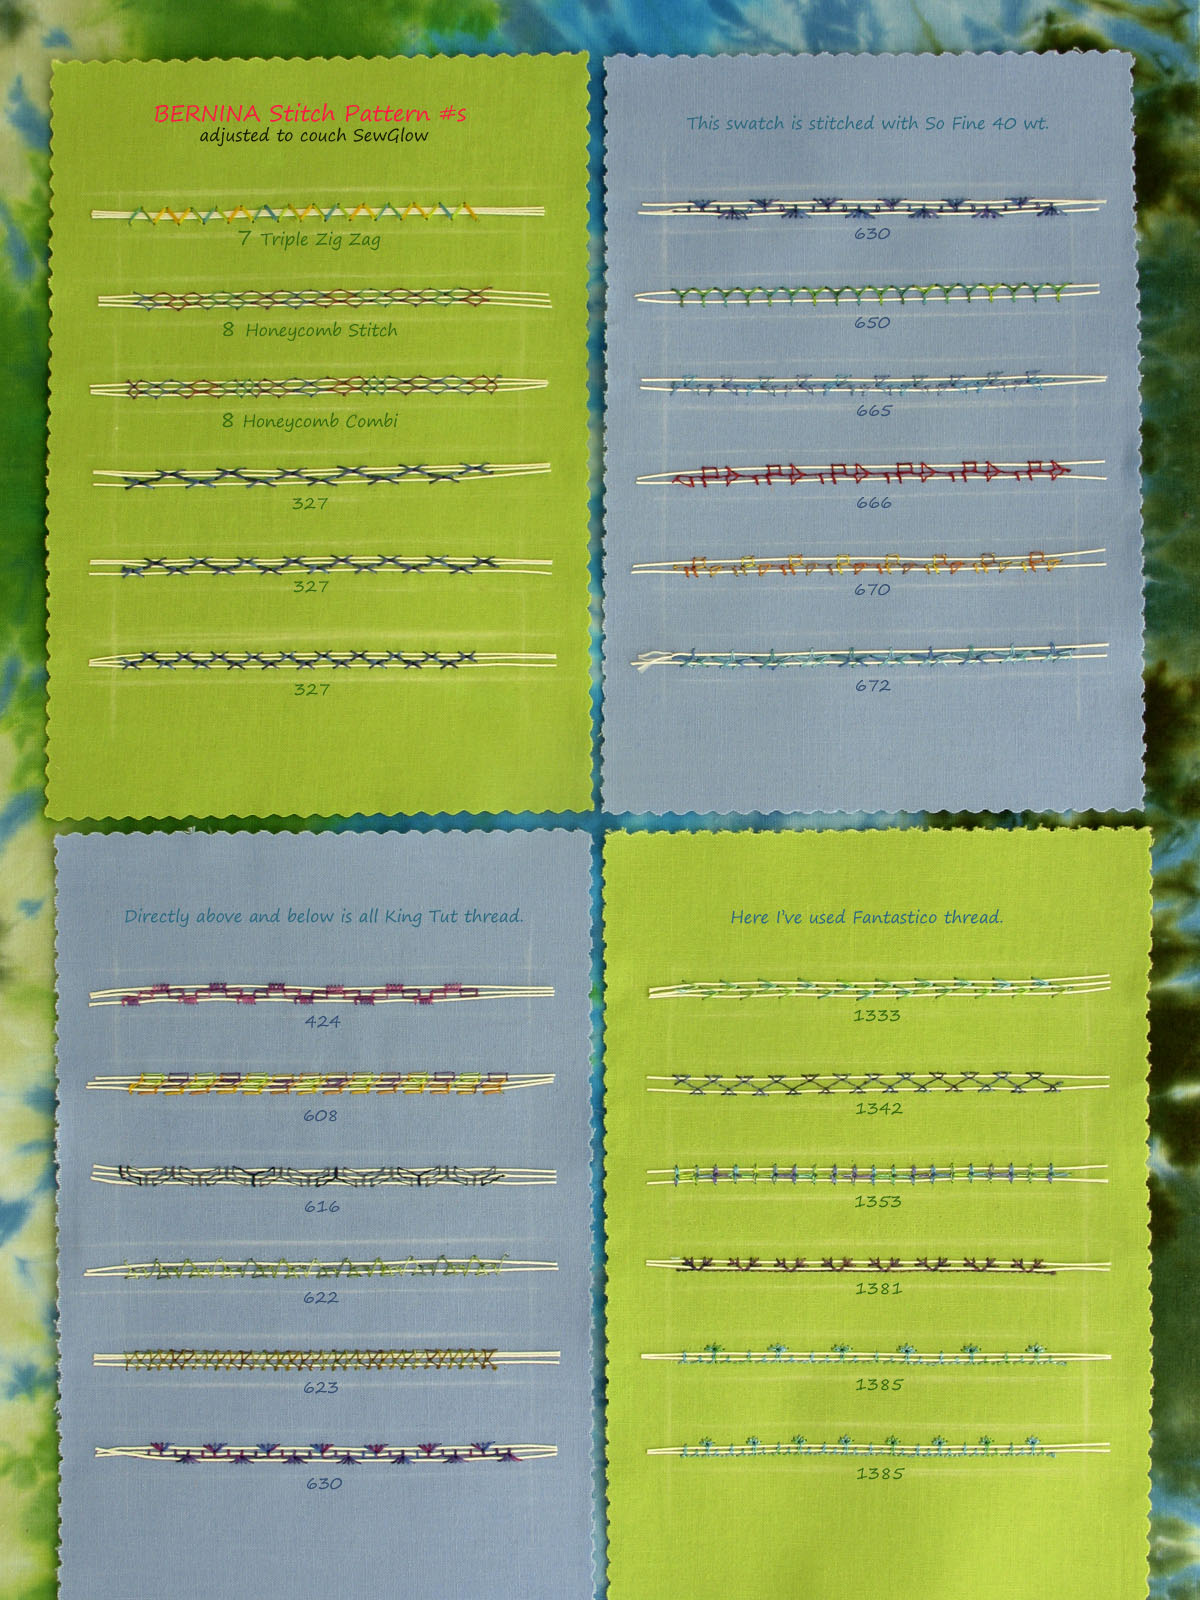
These Stitch Pattern numbers are consistent with current BERNINA 5, 7 and 8 Series models. I typically adjust length (show more SewGlow) and width/needle position to generally avoid piercing SewGlow. A pattern exception that pierces but retains excellent stitch quality is #616. Enter into Personal Folders to keep at your fingertips! Glow patterns vary, each intriguing.
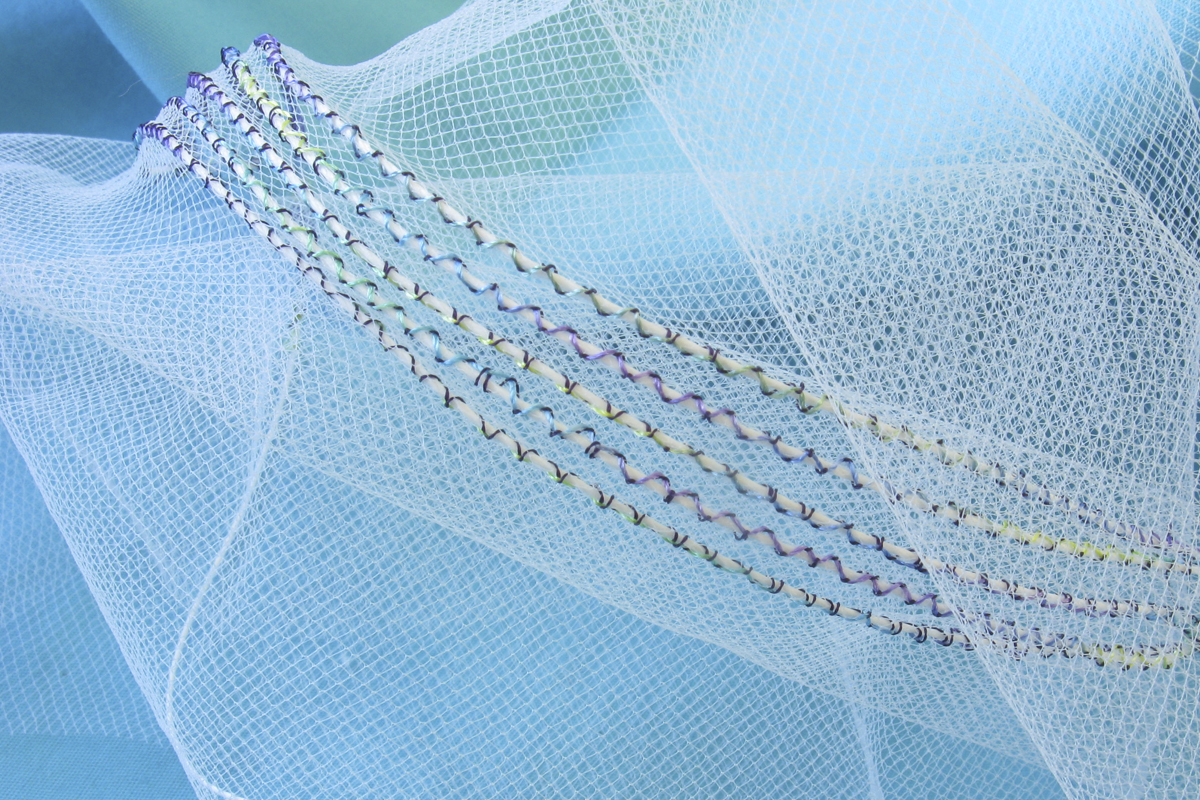
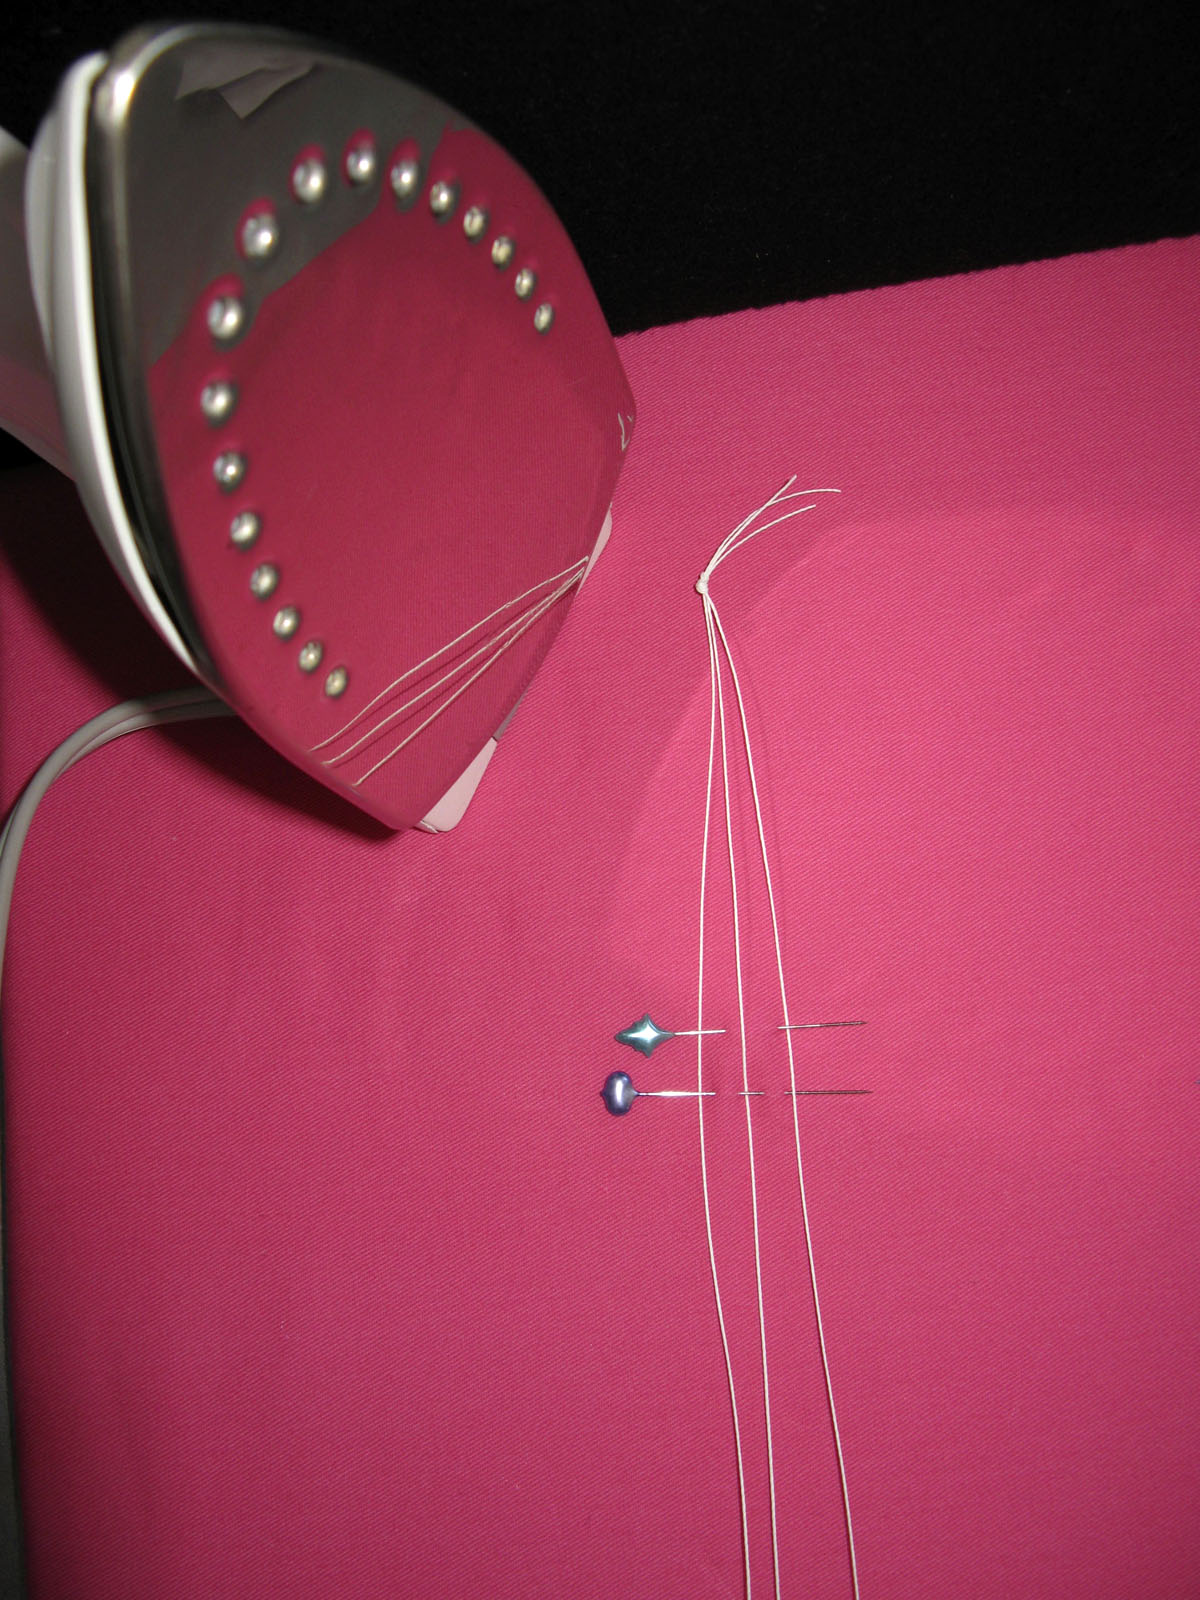
3. Prep SewGlow
“Relax” strands.
Preheat iron between synthetic and silk.
Cut 5 ½ yard length(s) of SewGlow per strand.
Knot together at one end.
Place strands in separate “puddles” on floor.
Add a couple of pins to ironing surface (next photo).
Place the soleplate on strands (after pins, before knot).
Using alternating hands or working quickly with one, steadily pull SewGlow out from under the iron …don’t let it sit.
Glow color appearing intensely when heated? Turn down heat.
Not smooth? Slide slower and/or turn up heat.
You may prefer relaxing stands individually.
A travel iron works fine too.
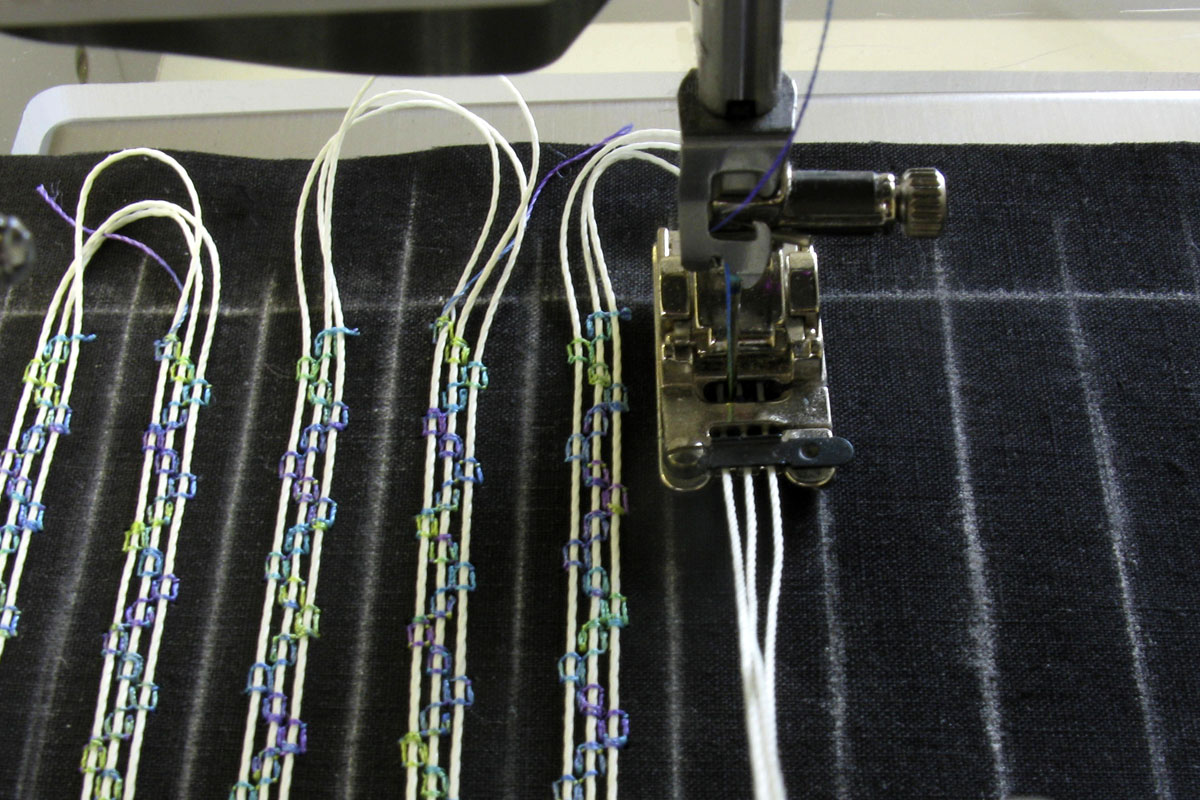
SewGlow knot behind foot, tuck opposite cut ends down into bags and then the mid-section. Set speed control for amazing quality decorative stitching.

4. Sew 30 Links
Wind same top thread on your bobbin (jumbo wind 25% – 30%). Its wt. supports upper thread as it wraps over SewGlow. You can use default settings for all patterns.
Loosen bobbin tension slightly (I move one setting left of center on the BERNINA 880). After sampling, make sure your pattern repeat corresponds to chart; or hit clear if saved.
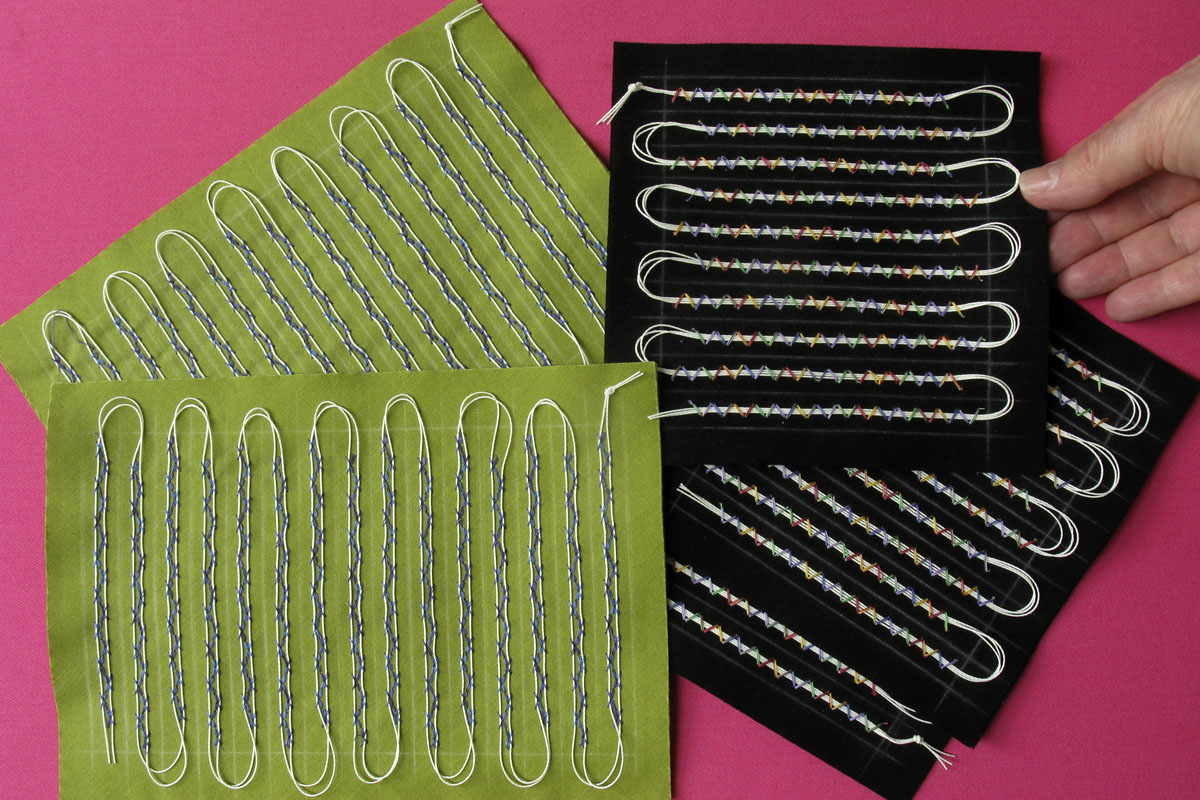
I didn’t think much about U-turn loop size here.
Keeping U-turn loops on the fabric has its rewards. The next stitch begins nicely and…
Thrifty U-turns save up to 30″ per SewGlow strand! See what’s left over at the end.
Use a reduced measurement for your next bracelet. Recycle.
6″ SewGlow remnants form extra links. 24″ is enough for a trail tail… a simple bow tied to a bracelet’s link.
A little vintage feeling is emerging here. It’s fun to think of grouping patterns and colors.
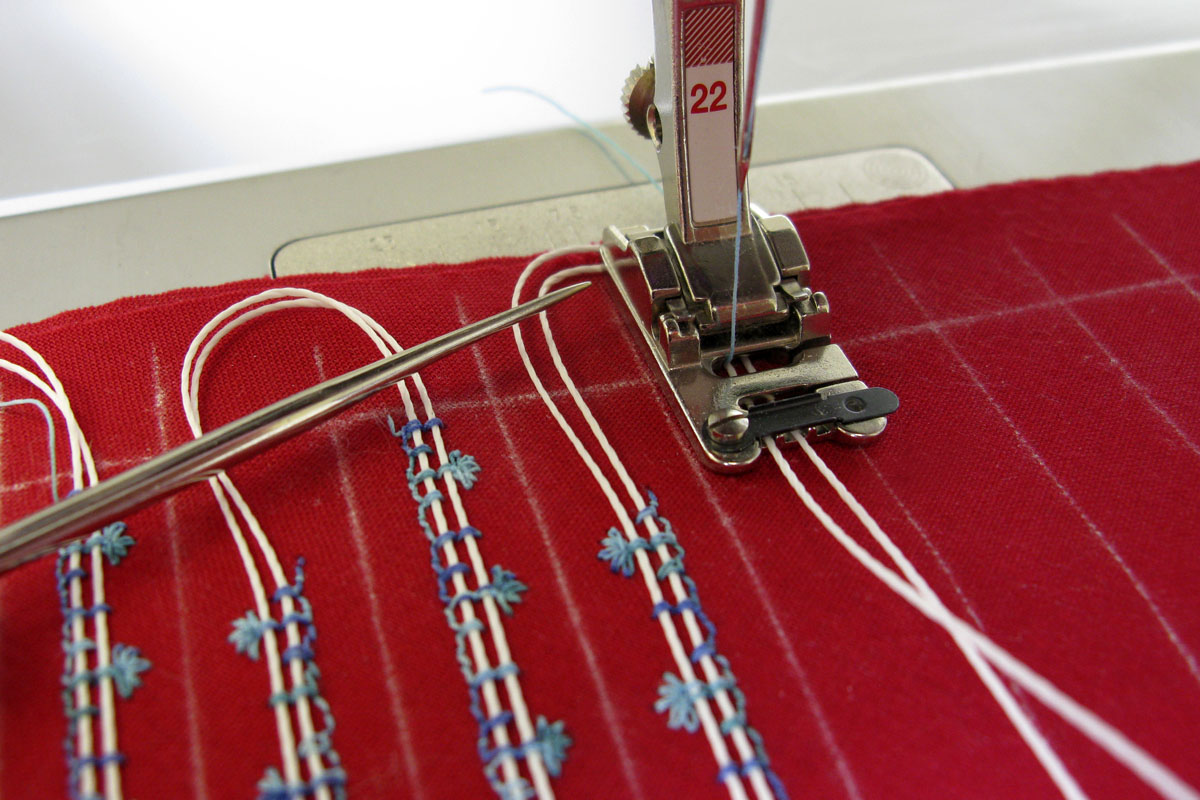
U-Turn Sewing Method
Audition a couple of patterns on scraps. Ready?
Needle down.
Watch foot not the needle.
Use your preferred knot style (in place or in a line).
Beginning top right hand column, just below chalk line, select foot placement plan to use consistently. Select a foot position and stick with it. Could be:
Along left chalk line.
Or right chalk line.
Centered, watching toes.
Centered SewGlow, with a visual cue.
Below top chalk line, tie-on and then stitch link. Tie-off before bottom chalk line.
TIPS:
Cut top thread. Wait for cutting mechanism completion.
Raise foot and needle.
Grasp SewGlow in front and pinch SewGlow to fabric behind foot at link start.
Pull fabric back until its edge just clears the feed dog opening.
Lift SewGlow well above table in front and rotate fabric counterclockwise (strands remain in foot and loop “flips”
Reposition foot. Pull up cut end of top thread.
Adjust SewGlow loop size if needed, stiletto handy, by sliding SewGlow in grooves.
You can “floss” or stretch SewGlow front-to-back of foot to further separate strands.
This ensures a nice start each time.
TIP: Weaving is easiest if SewGlow is couched to within about ½” before chalk lines.
Solutions:
Increase distance below chalk line balancing excess.
Sew beyond Pattern Repeats, select Clear and Pattern Start for next link.
Stitch zig-zag prior to tie-off.
Sew manually… but don’t pass the finish line before tie-off!
Fill fabric. Tie-off final link.
Clip SewGlow at foot front. Re-knot.
Aligning strands to bags, replace in foot grooves.
Repeat.
Complete 30 links.
5. Clip and Slice
1. Holding tails taut with tweezers, clip to less than 1/8″.
2. Sewn links face down in the towel, press sandwiches firmly using medium heat.
3. Cool completely before moving.
4. Level ruler, carefully cut:
a. using ruler and mat for accurate size (in lieu of chalk lines), cut links 4 ½” long (see red links next photo)
b. cut accurate ½” intervals, stitching centered as intended
Couched texture is slippery. Its height also causes ruler wobble.
Reposition freshly cut links to keep ruler level.
Work slowly, maintaining firm pressure between ruler and cloth.
Consistent and easy, Shape Cut sits level across all links. My Great Grandmother’s clothing iron holds it rock steady on this raised texture. Maybe that’s how a vintage feeling came to mind? 🙂 Have fun with themes.

Fabric is aligned to mat and then Shape Cut aligns to both. There’s full preview before your first cut.
Fused portion of ¾” trimmings are good for sewing extra links
Recycle random trimmings for future pattern tests
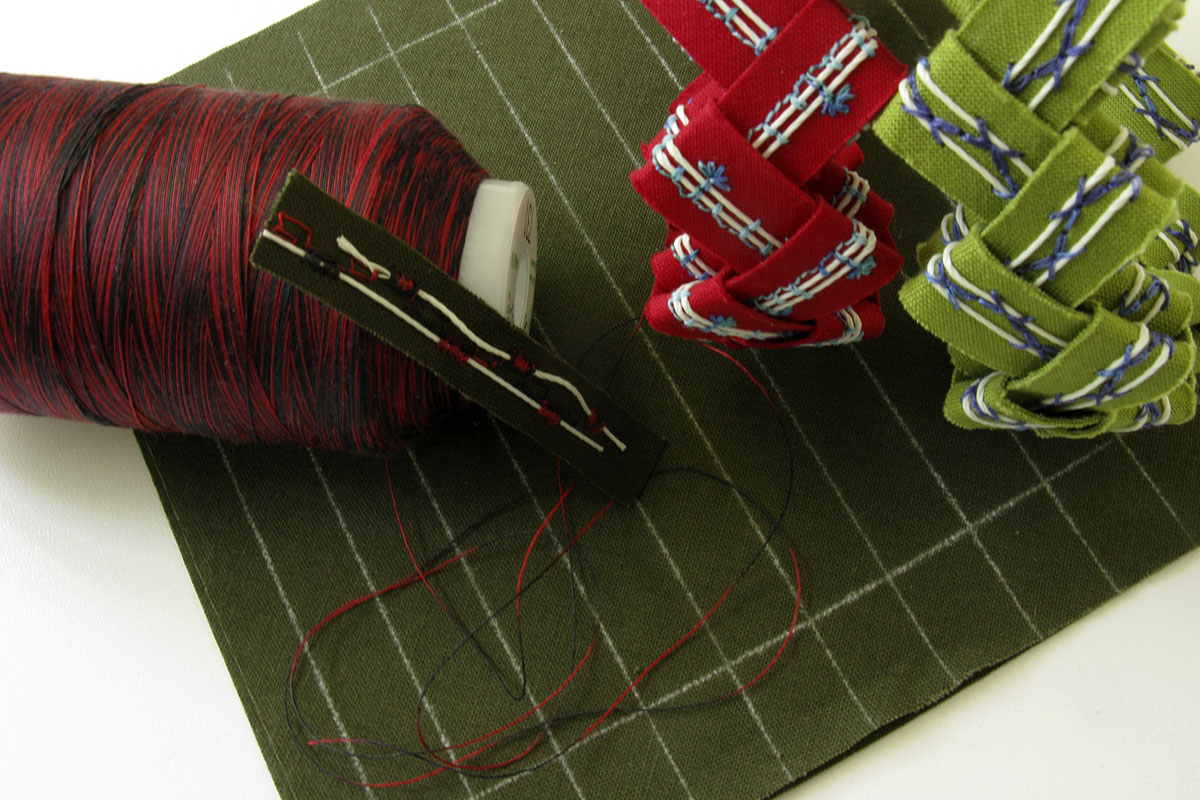
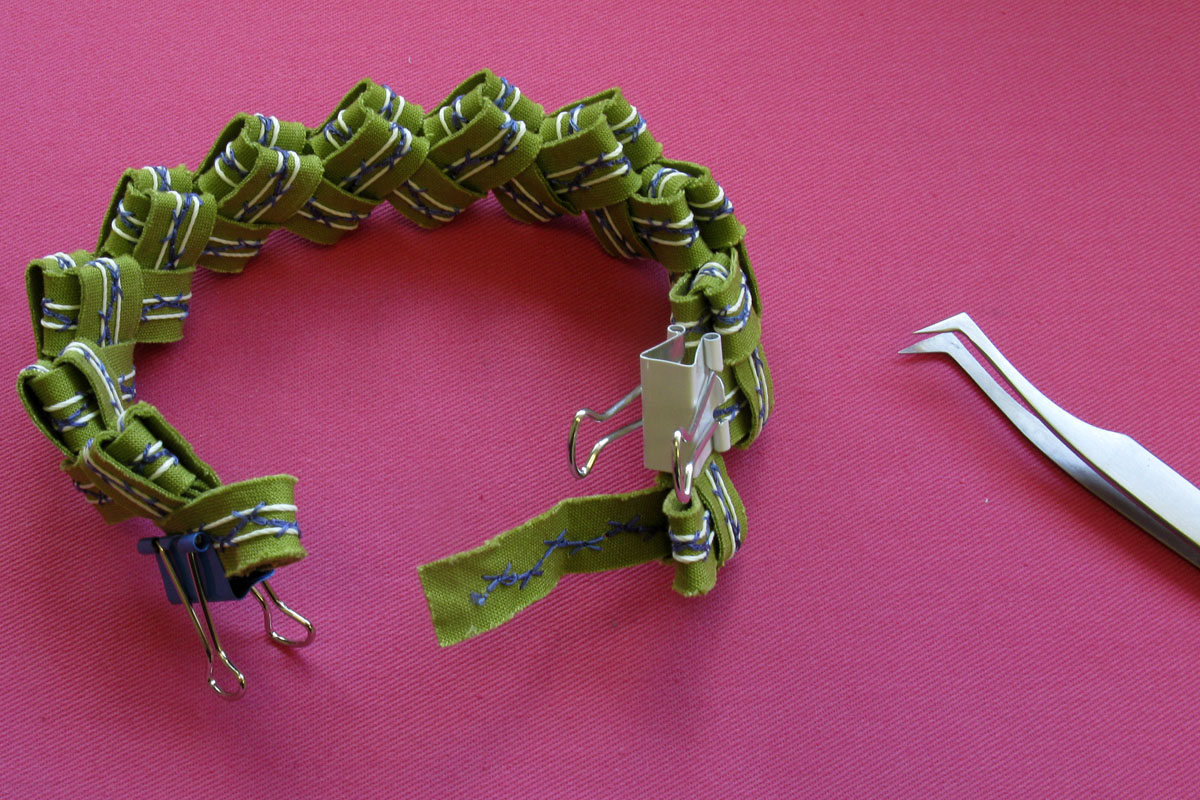
6. Assembly
Flip over asymmetric pattern links to audition woven effects.
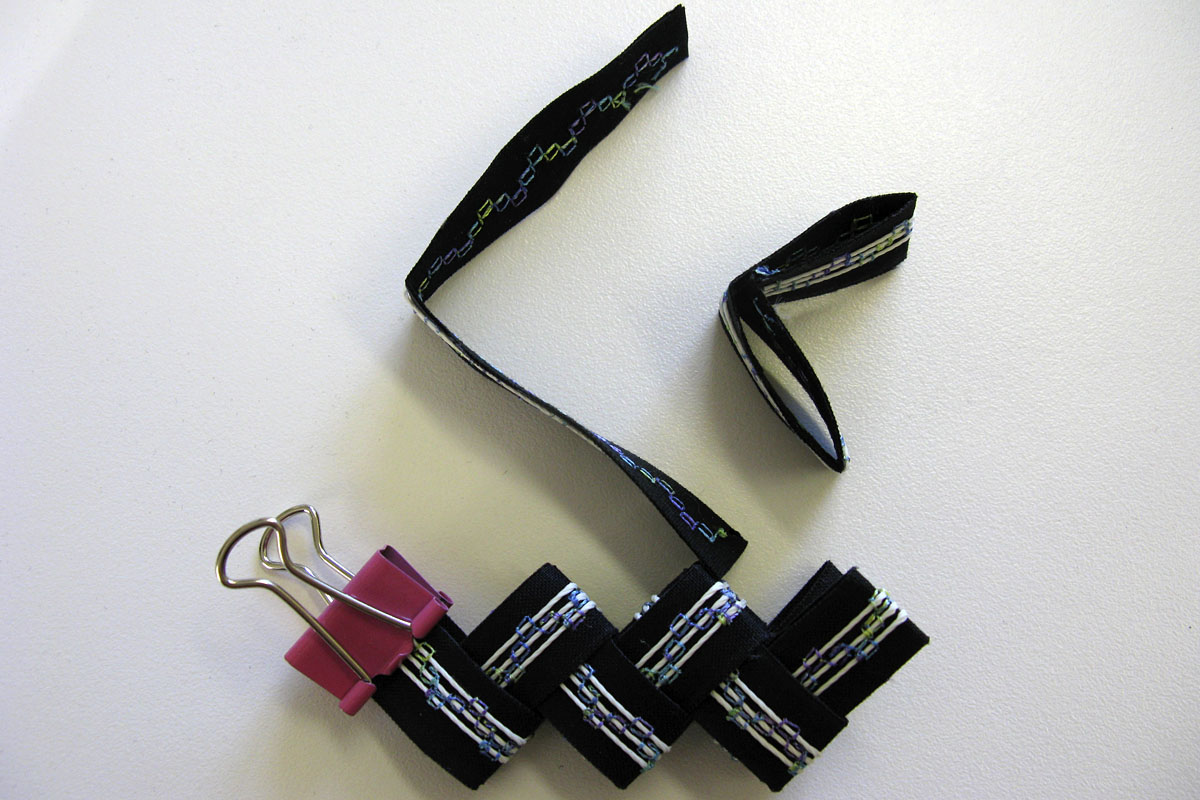
1. First link in hand:
-Half fold, finger press.
Quarter fold, bending both short ends inward to meet in crease.
Place mini clamp at half fold and leave it there ’til the very end.
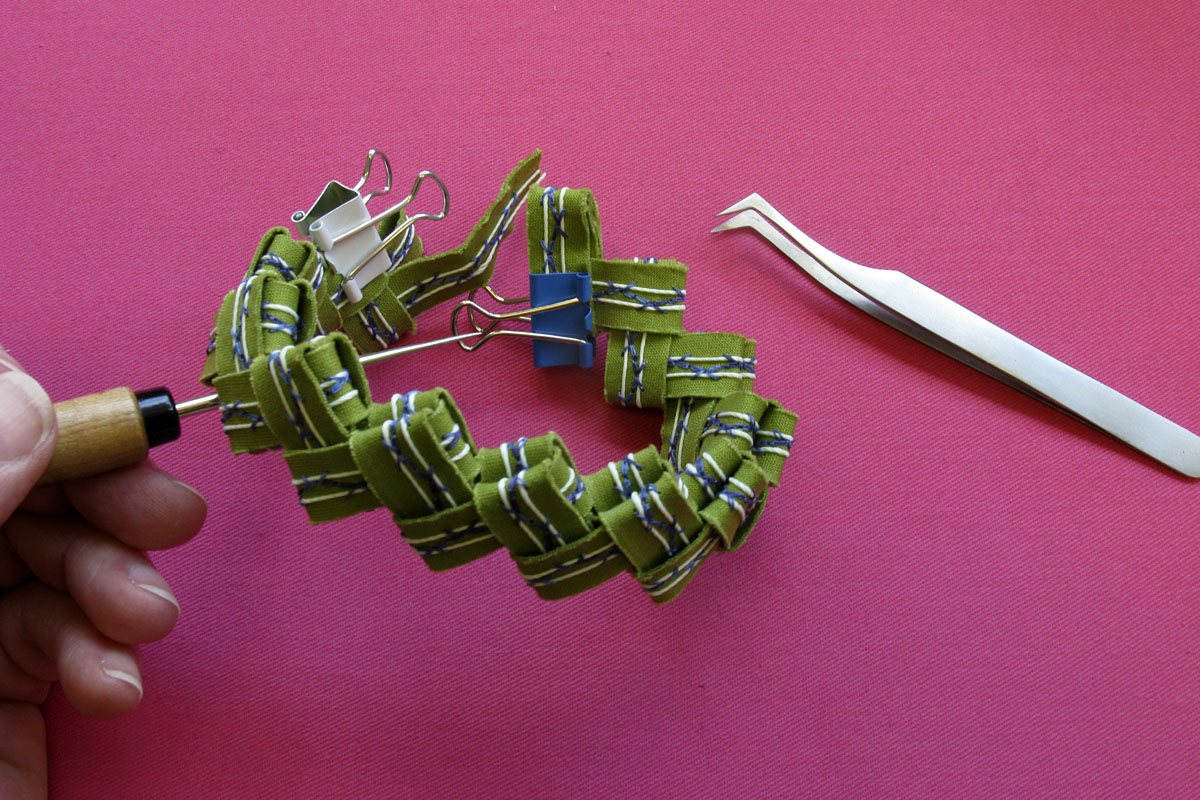
Tap open previously woven quarter folds so links insert more easily.
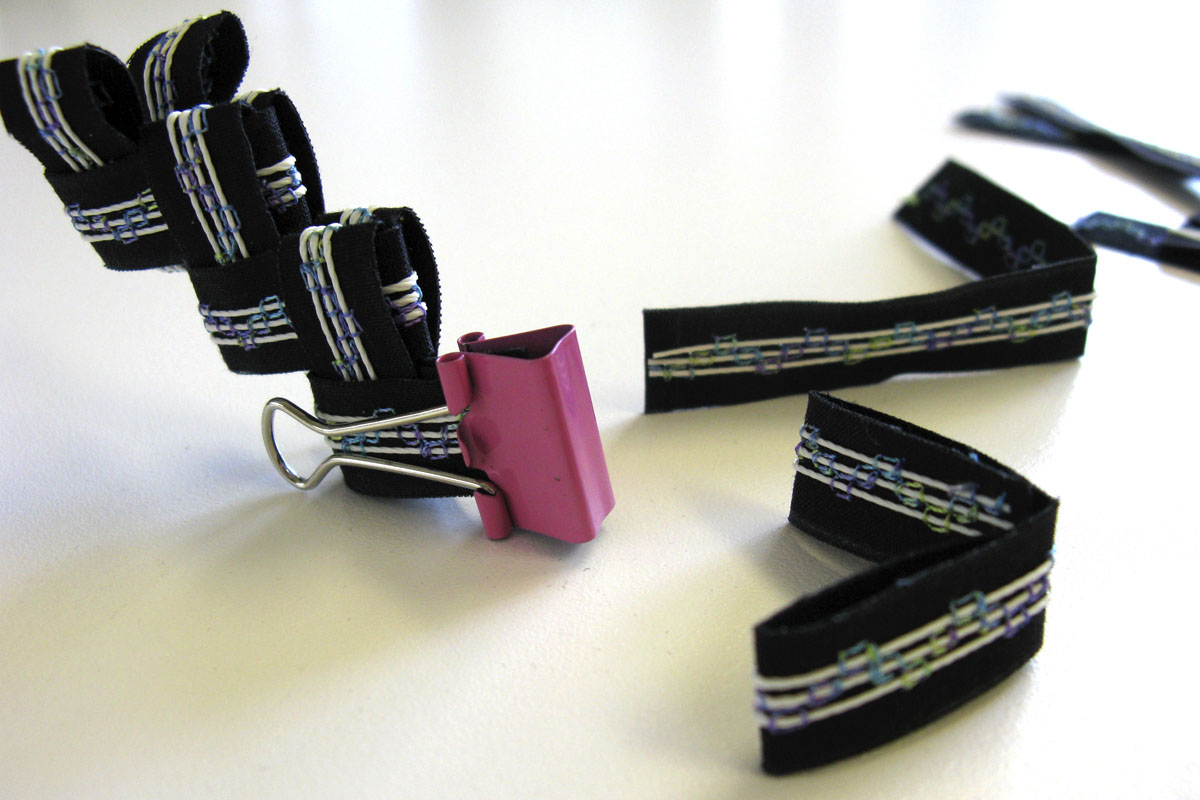
2. Remaining links:
Fold another link, half then quarter folds.
Slide newly folded link, quarter folds first into previous quarter folds.
Repeat, finger pressing folds well.
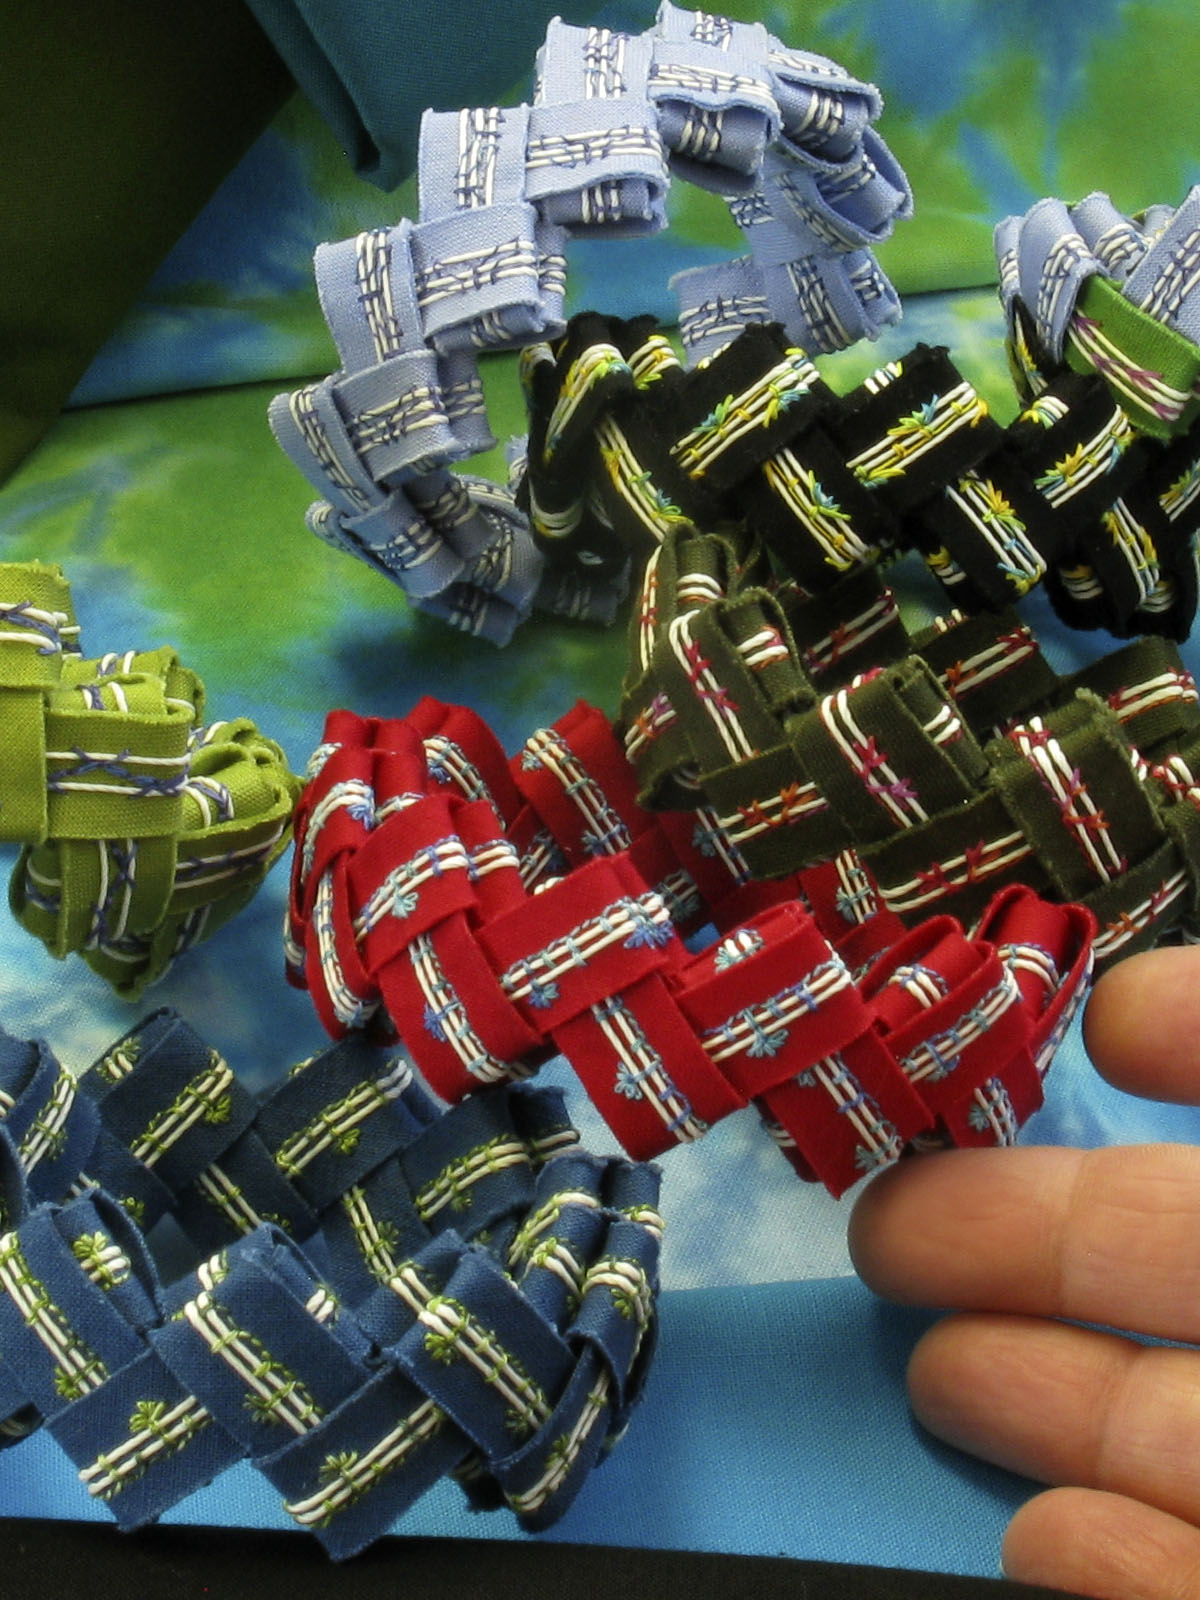
A zig zag pattern emerges.
Snug up while weaving.
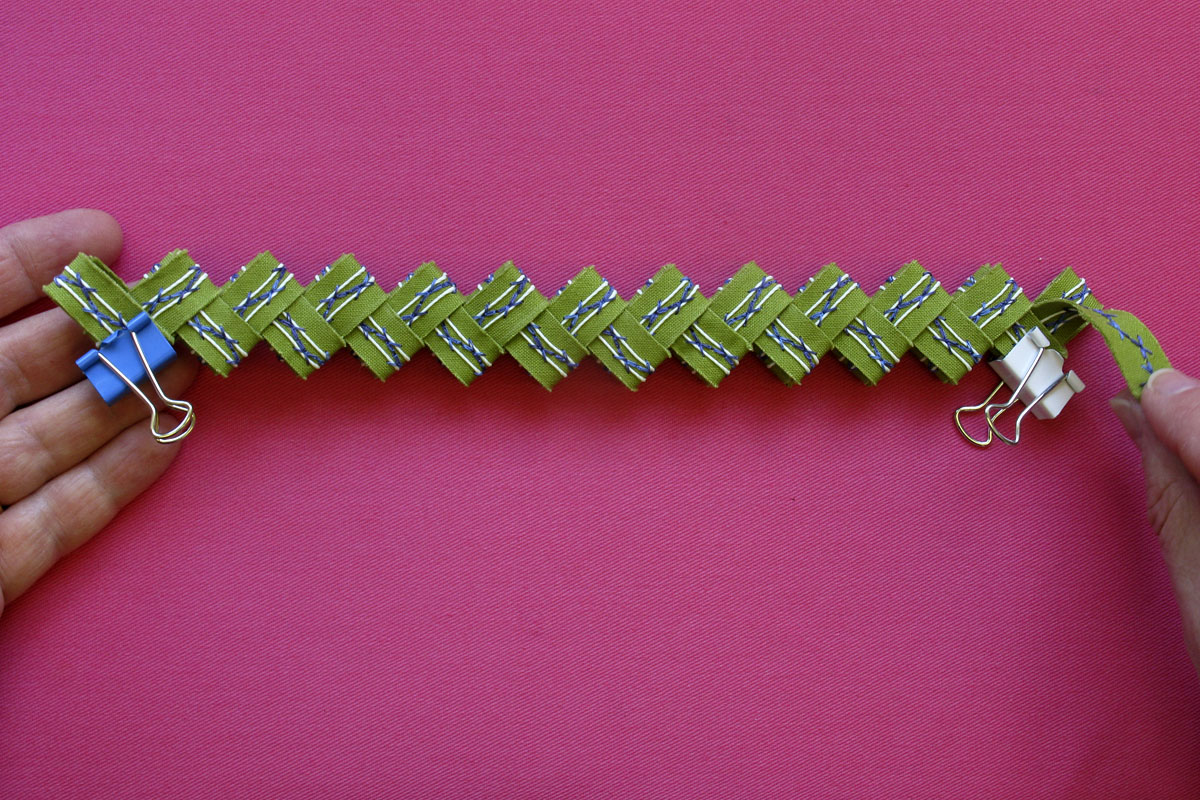
3. Even link numbers will close.
Drape (helper holds ends together) to preview fit.
If you do clamp together to try on…slide gently, move slowly.
General fitting guideline:
Wrist size 6 ¼” – 22 links
Wrist size 6 ¾” – 24 links
Wrist size 7 ¼” – 26 links
Countdown to Closure!
Once familiar, this takes about two minutes. Just follow along.
This example has 24 links, starting blue clamp remains on the first half fold made.
I place my favorite or “show side” down, if I have one.
1. Position in a line, start clamp on the left.

2. Move/place clamps to stabilize, comparing photo above and below.
Move start (blue) clamp to quarter fold.
Right, unfold the top quarter fold, last link.
Add contrasting finish clamp (white).
Untuck top quarter fold, noting where it was removed from. It returns there.
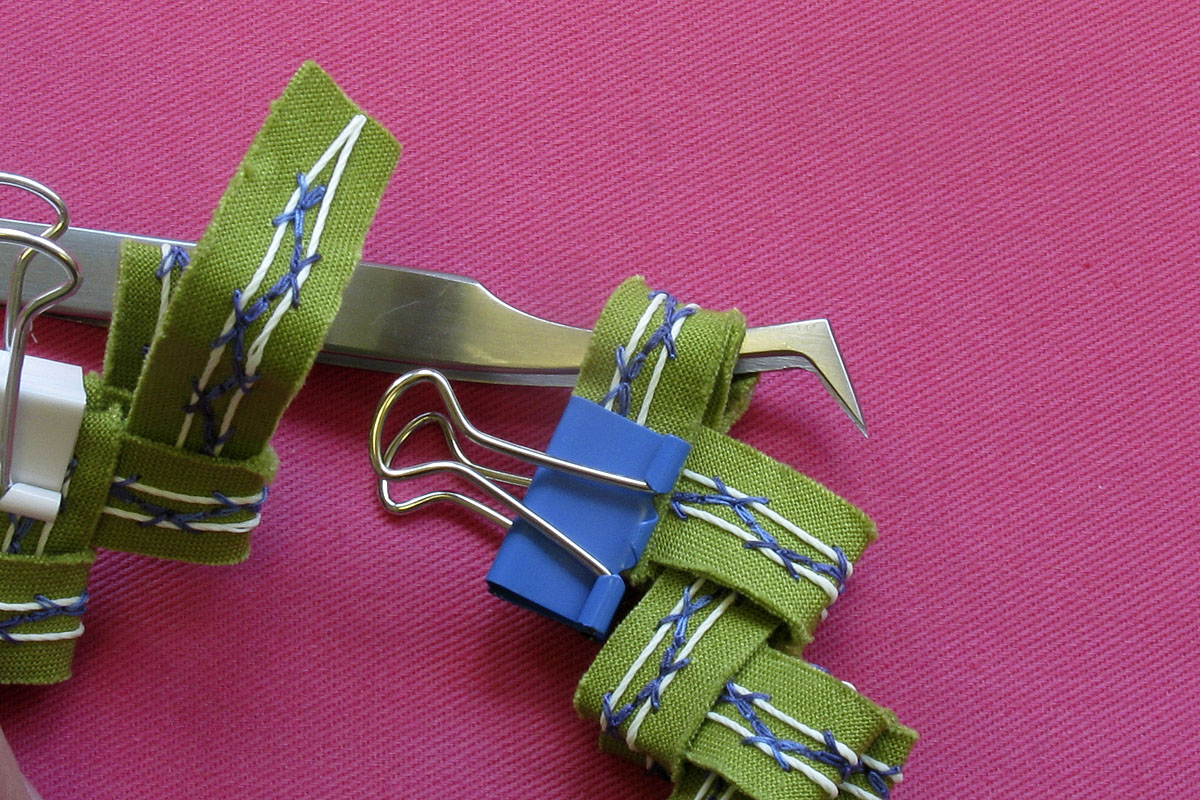
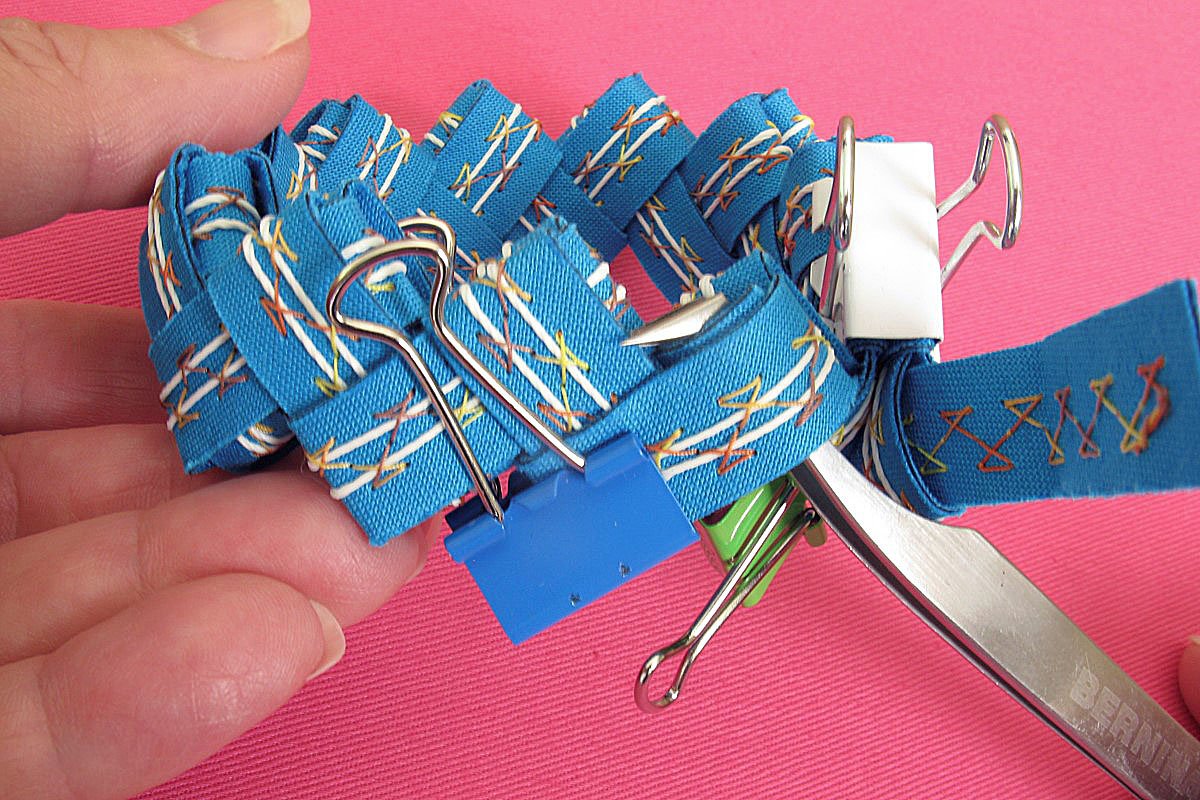
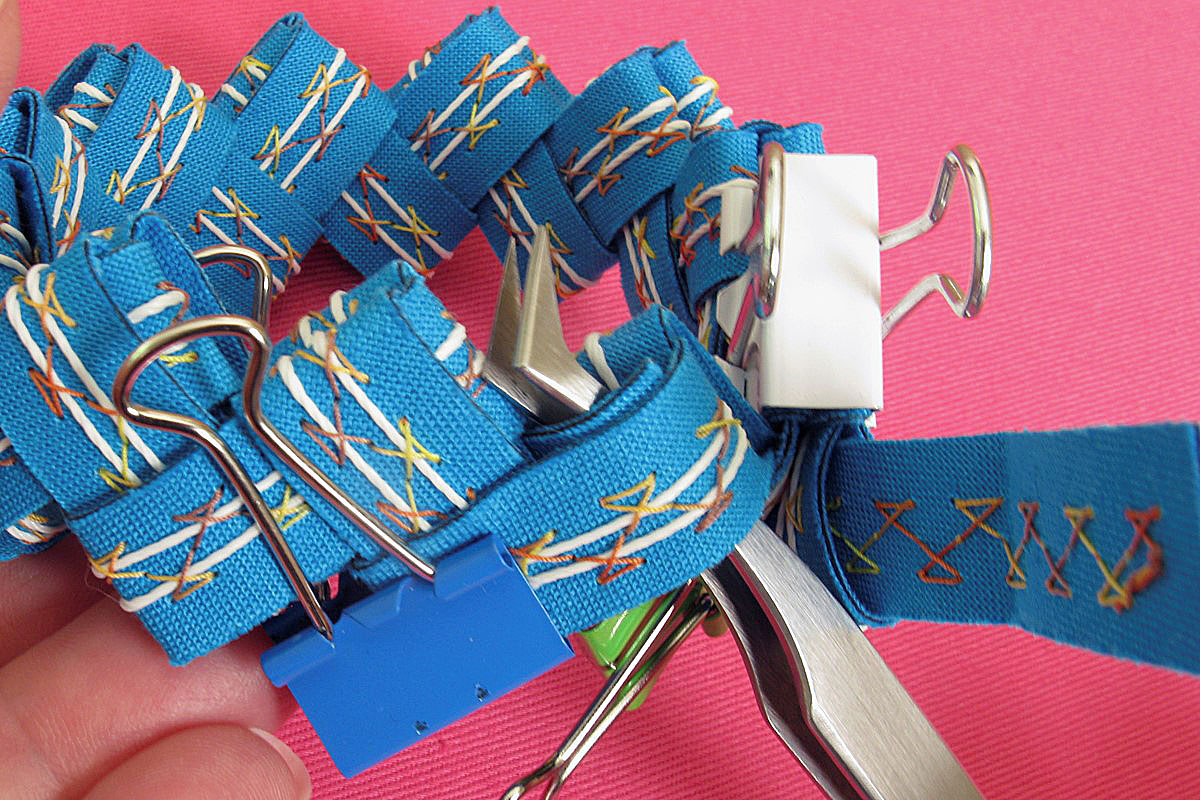
3. Form partial circle, opened link on the inside, tweezers handy.
Reposition for inside view.
4. Reach tweezers through first half fold, sliding in-between the two interior cut link ends.
Pull the link end partially through.
5. Reposition bracelet.
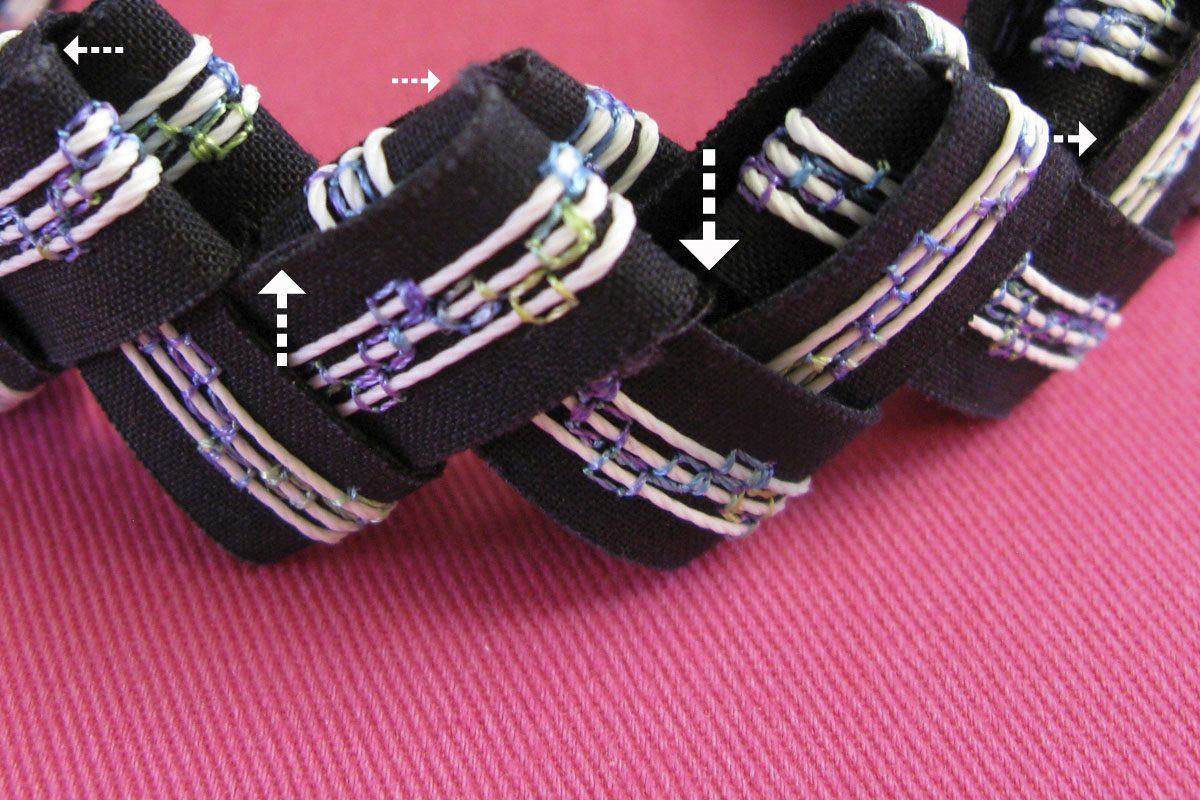
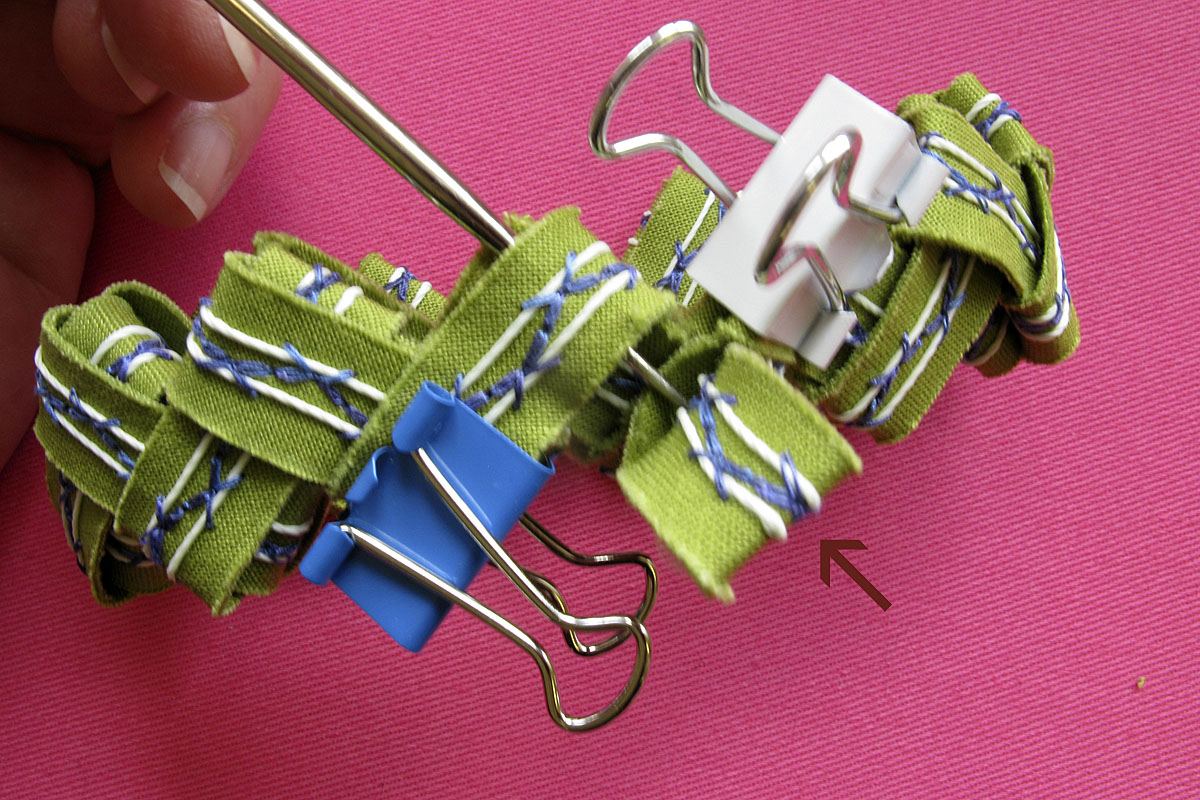
Move finish clamp (white) from its current position (orange arrow) over one link as shown.
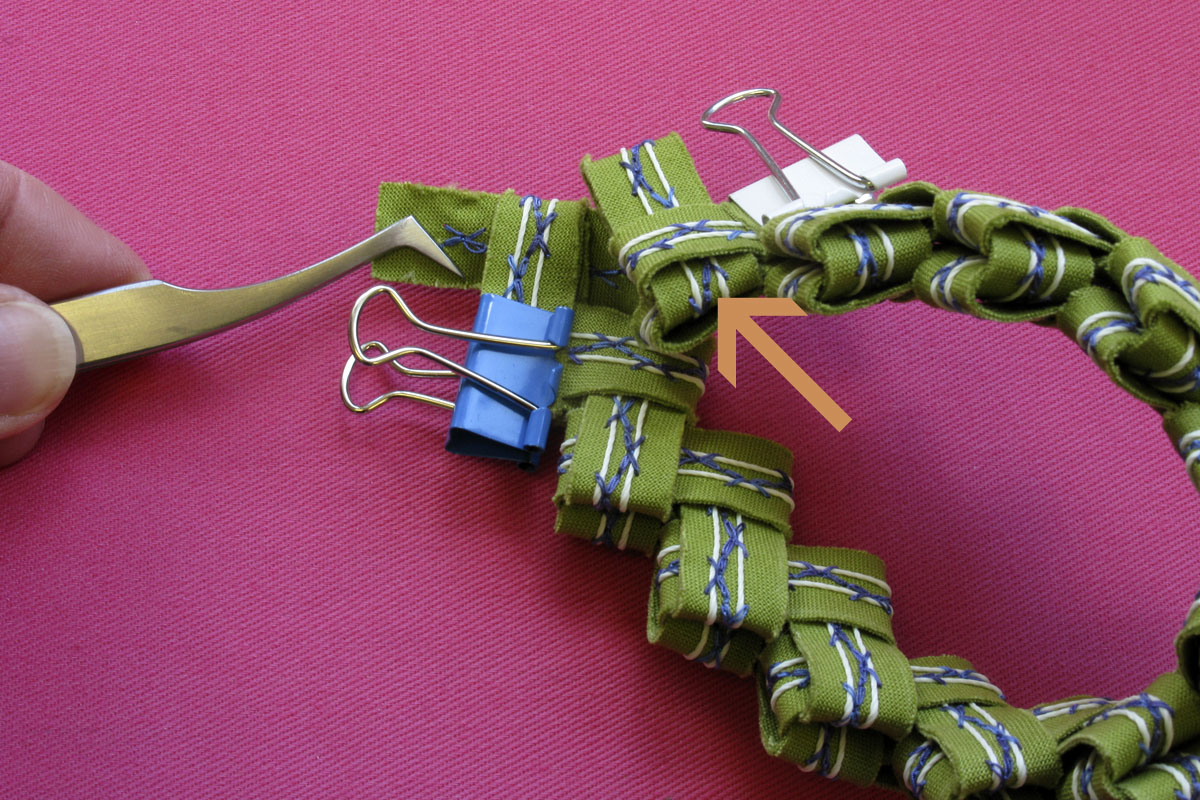
6. Adjust pulled-though amount to slightly more than ½” (above).
Fold where light green arrow points (below).
Tweezers close to end cut, tuck in where white arrow points.
Use tweezers’ back end to smooth out tiny fold inside.

Brown arrow indicates last quarter fold to open, overlap and return to its spot.
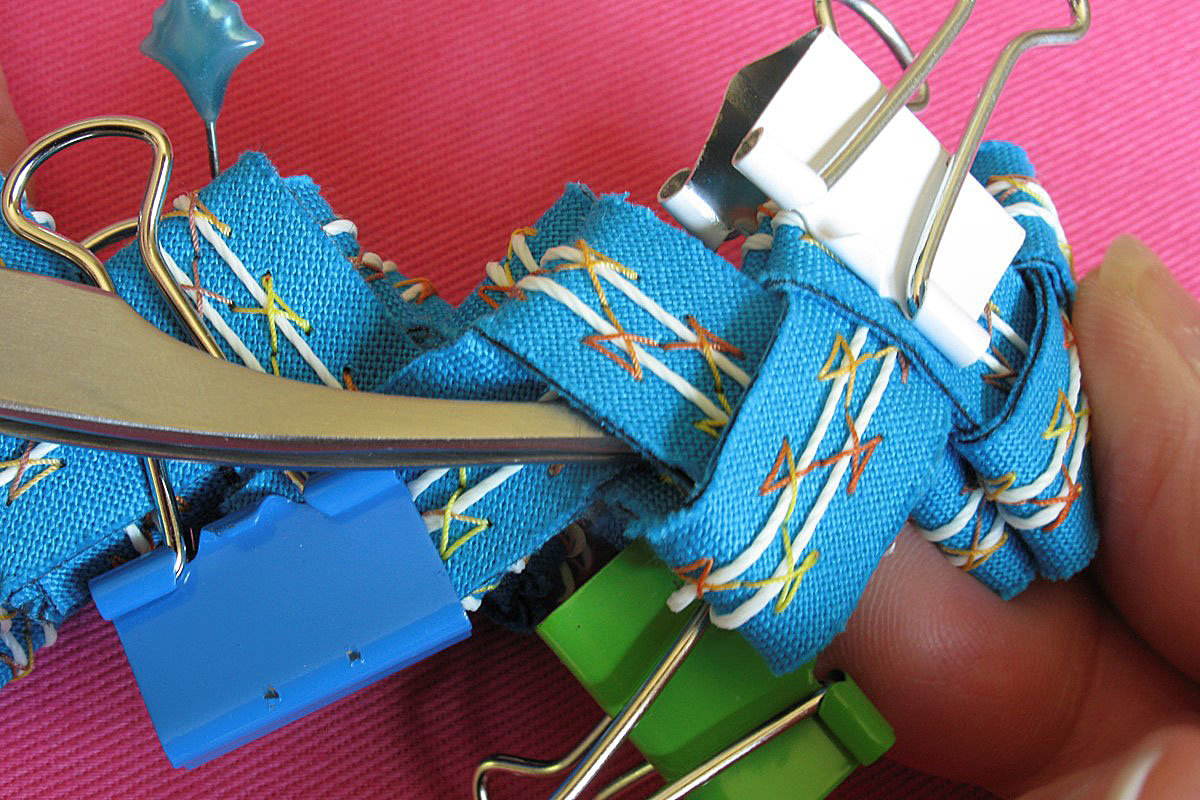
Bracelet above has only fusible, no Polymesh. It’s OK, but a bit delicate, not as firm.
Bracelet below, visually locate the layer of black Polymesh.
OESD Polymesh will ensure a crisp form, provide stability while stitching, prevent bias cut links from stretching, and enhance project durability.
7. Add third clamp:
Move handles up on starting clamp (blue).
Bend base of the newly opened link over to the right.
Secure where previous link end was just tucked back in using third clamp (green).
8. Tweezers turned for better grasp, introduce link end to its proper path. Usually, I can only pull it a little ways in. I gently remove tweezers and then enter from the side.
Take care not to stretch any nearby links. Clamps help.
Once the link end reenters its original location, a tweezer back helps to tuck/stuff the link end (and SewGlow) smoothly into its original location.
As the joined area begins to feel free of lumps, remove clamps. Continue gently using same maneuver, inserting back end of tweezers into adjacent links too. All link joins should feel the same to the fingertips.
Observe all edges. There should be no cut ends showing. If you see one, reposition clamps for stability nearby, then use tweezer tips and back end to reposition in its hiding place.
Beautiful edges, reshaped as a circle, all tucked in …just don’t stretch it. Instead, compress its circular shape. Your bracelet is now pristine, crisp and beautiful. Let’s secure it that way, using a method to preserve its fresh appearance.
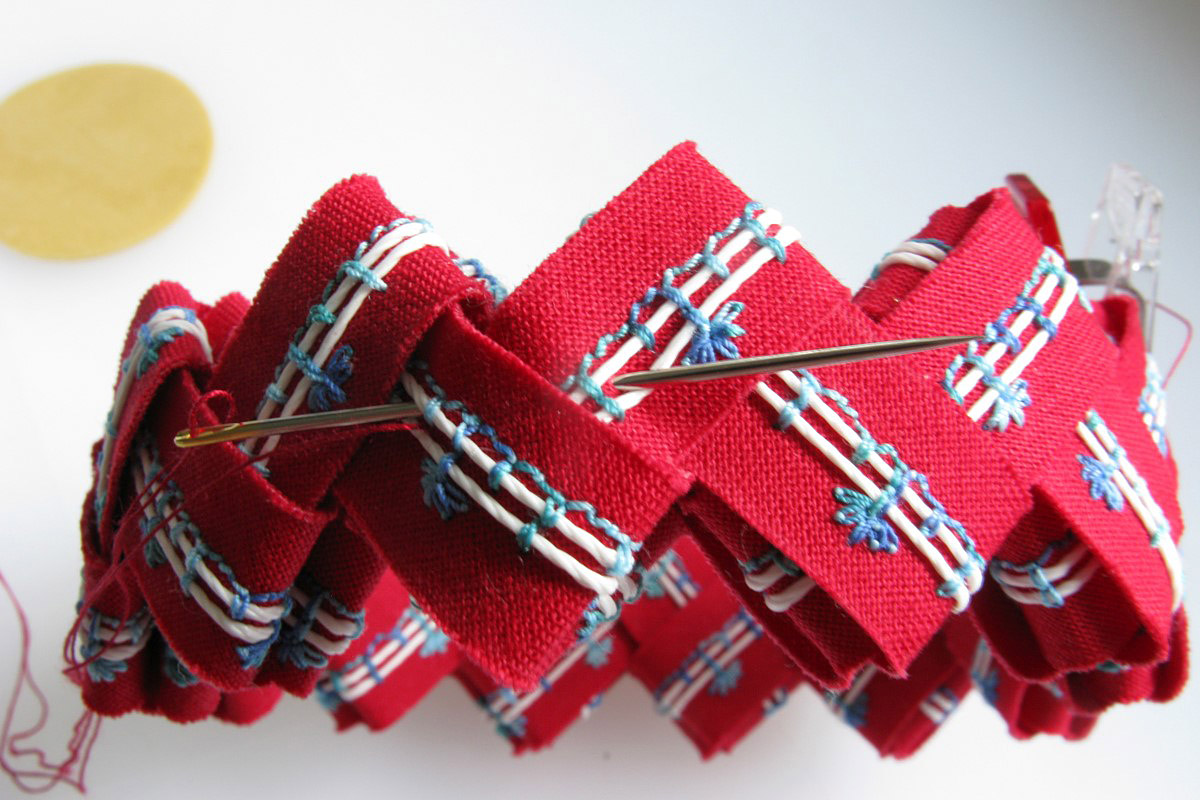
Hand Stitching
It’s easy. I repeat one little thing over and over, both sides. It stabilizes woven construction while Polymesh stabilizes individual links. Altogether it’s quite sturdy, but handle as you would any artisan item …with a little care.
Basic Path
See my needle? It’s nearly horizontal. Only a little angle is needed to emerge mid-pattern to mid-pattern, always near the previous link. Emerge not closer than below, saving a little room for backstitching.

My left handed path travels counter-clockwise. Just insert the needle how you naturally would. You can travel around either way.
TIPS:
Use needle grabber.
Wonder Clip or clamp notes beginning link …surprising how “invisible” this is!
Rotating through, hold bracelet links snugged up together, right angles, firmly folded.
Keep everything tucked in.
Avoid splitting machine stitched thread or SewGlow strands with needle.
Tie-on:
needle up through one link layer of an outside bracelet link, emerging somewhere inside the stitch pattern, small knot below
take a tiny back stitch, hiding in the pattern, popping up just below where your needle first emerged
repeat taking a second full backstitch as final securing stitch on this first link
Next:
1. reinsert the needle as if to begin another backstitch, same link, then emerge mid-pattern on the next link over (photo above)
2. backstitch once on this new link (moving back toward the previous link)
Repeat steps numbered 1 and 2 once around all outer links and again on your first link.
Needle and thread still connected, gently turn bracelet inside out.
Guide the needle through to go around again.
Complete the circle and move to the next link.
Tie off with multiple back stitches, bury thread and clip thread tail.
Gently invert bracelet back to its original position, reshaping into a fine circle to enjoy.
There’s lots of room to personalize basic bracelets however you like. You can even bag sewn links for an assembly party with friends. Scrappy bracelets are intriguing too.
Have fun and come back to We All Sew for my follow up post, adding an extra layer of pizzazz.
It includes:
easy silk painting
silk sewing tips
double pattern stitching
lacing for artsy cuff styles
Stitch Designer pattern-share