Zippered Rulerwork Bags
Hey everyone! My name is Amanda Murphy. I’m a Benartex fabric designer, author with C&T Publishing, pattern designer, and BERNINA Quilting and Longarm Spokesperson, and I’m so pleased to be back here today sharing a little rulerwork project with you!
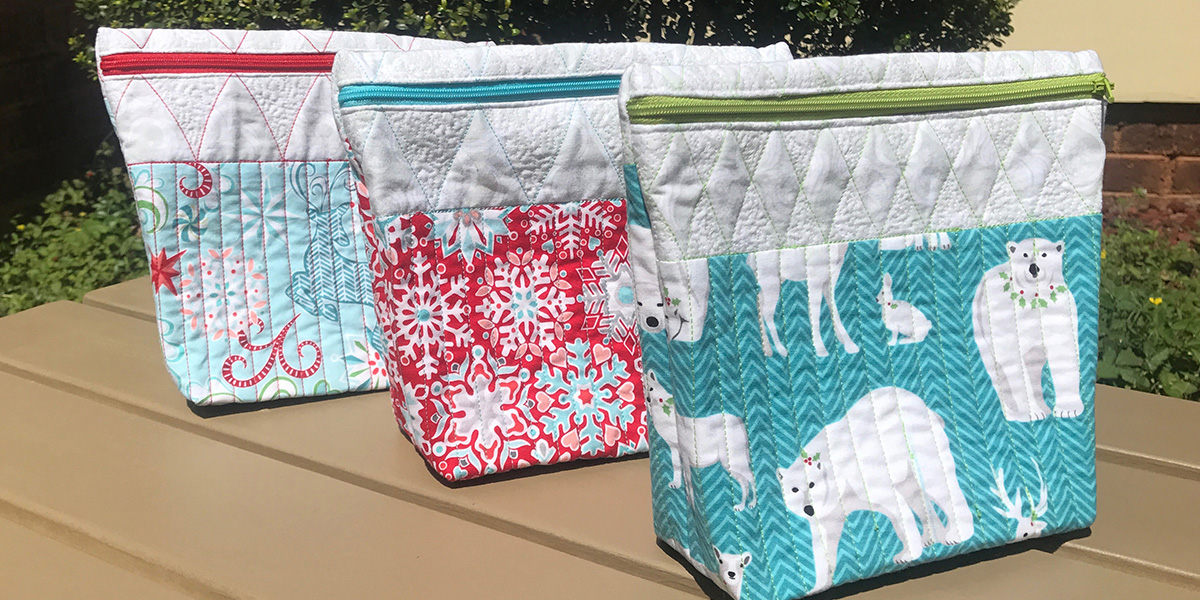
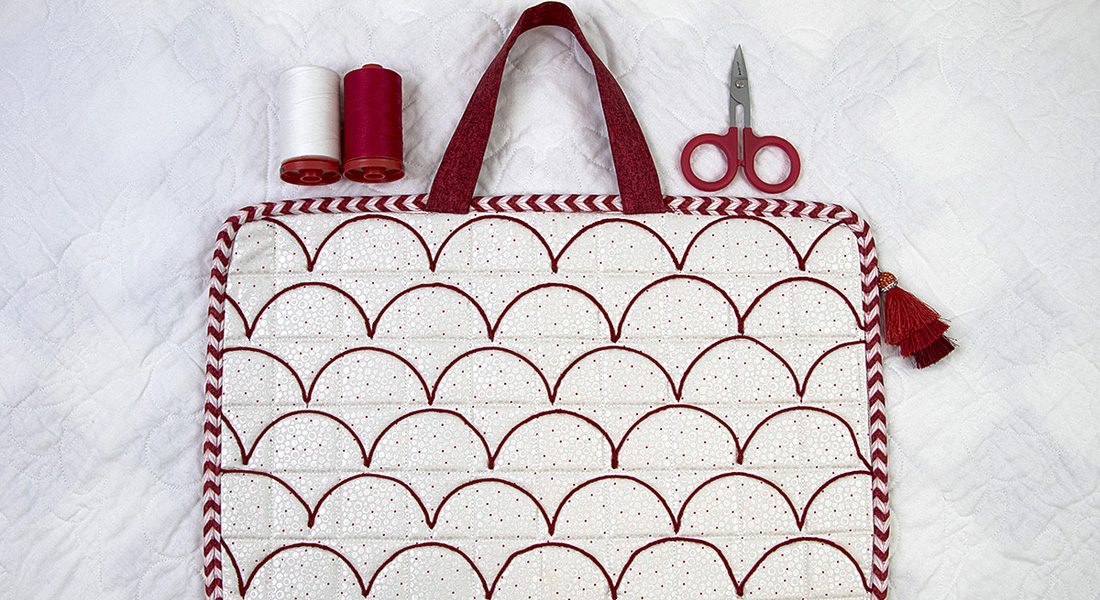
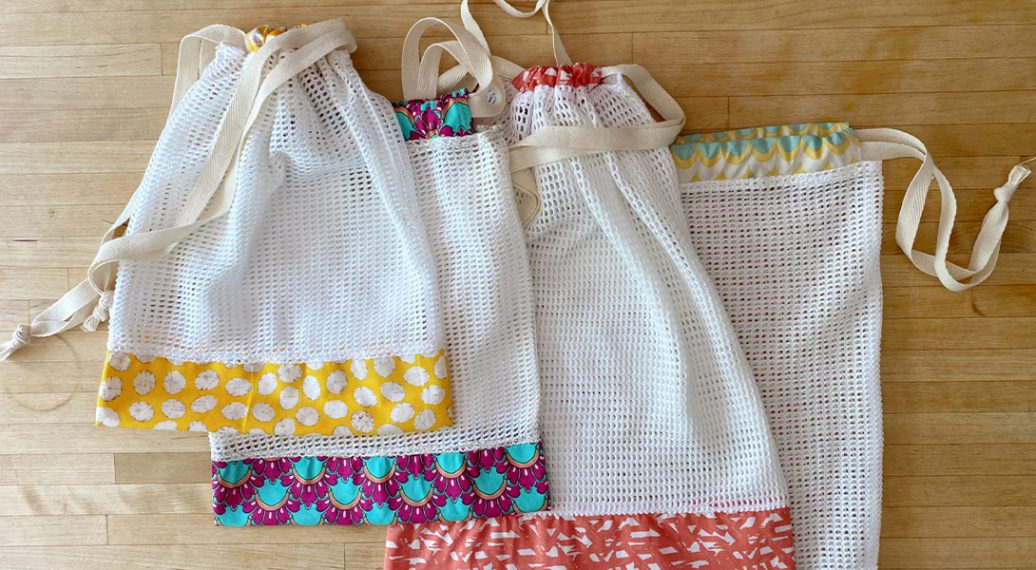
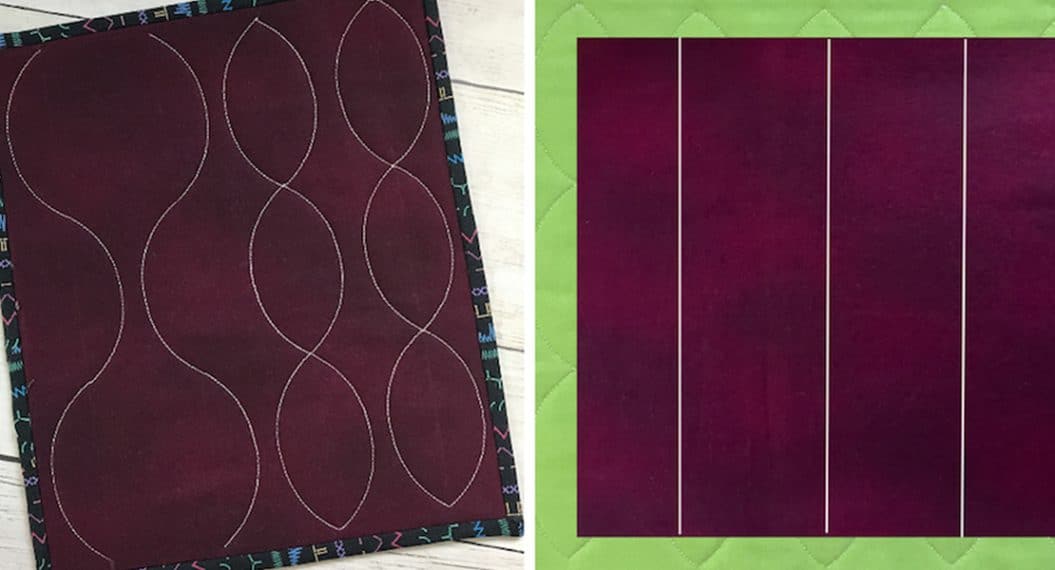
BERNINA Zippered Rulerwork Bag, featuring Nordic Holiday, by Amanda Murphy for Contempo Studios of Benartex.
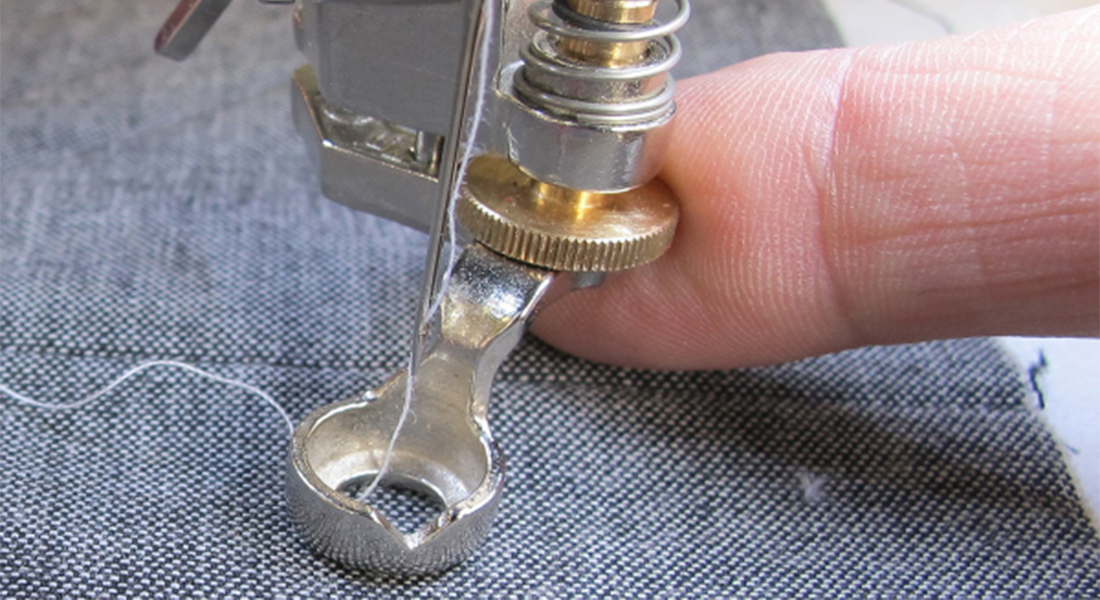
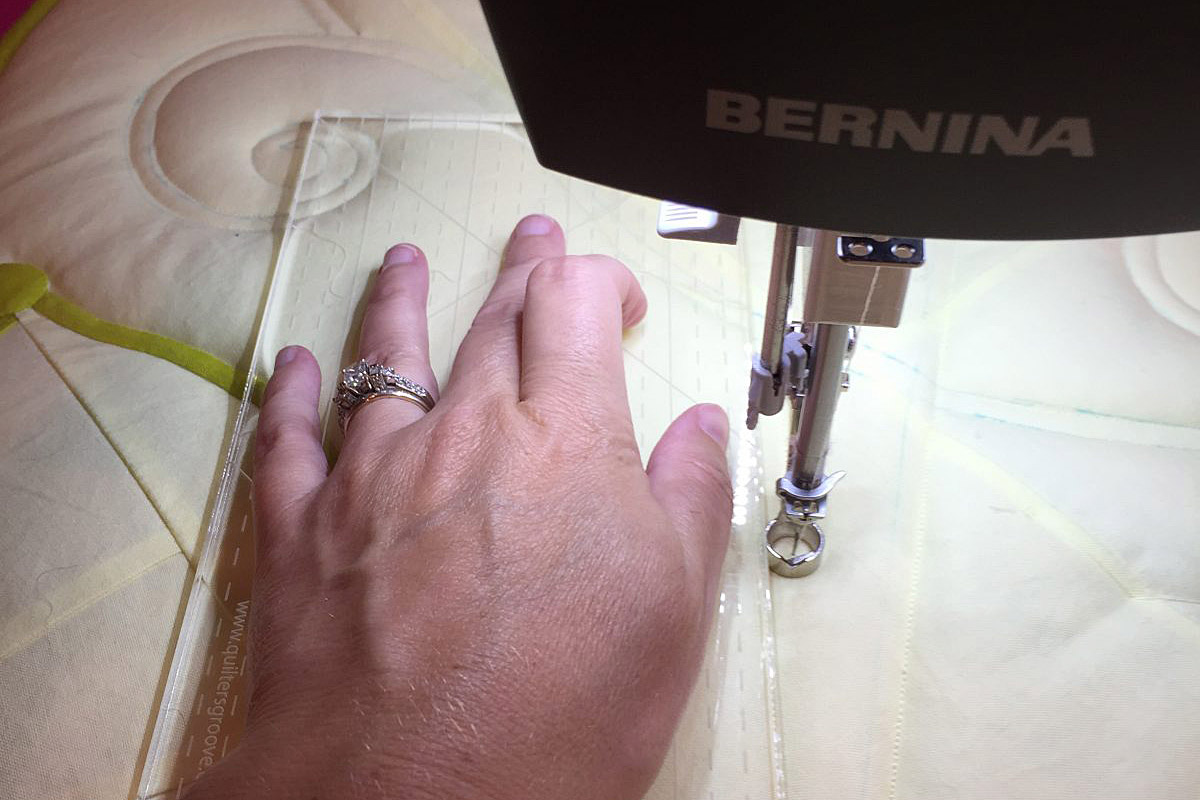
One of my favorite parts of my job is visiting dealers and teaching students about how they can make use of the absolutely amazing technology we have on our BERNINA machine! Lately, I’ve really enjoyed getting to see what you all are doing with there BERNINA Adjustable Ruler foot #72. For those of you who haven’t discovered this wonderful tool yet, it can make hard-to-quilt things like smooth curves and circles MUCH easier—plus it virtually eliminates the need to rotate your quilt top!
Let me show you how the BERNINA Adjustable Ruler foot #72 foot works on a domestic machine:
Once you get the hang of moving the ruler under the machine the sky is the limit! Rulers come in all shapes and sizes. The BERNINA Rulerwork sets are great to get you started—and they are just the tip of the iceberg!
Today, I’m showing you how you can make Zippered Rulerwork Bags. They are fun and simple and a great way to practice your rulerwork skills. You can download PDF materials and directions for the full tutorial to create a BERNINA Zippered Rulerwork Bag.
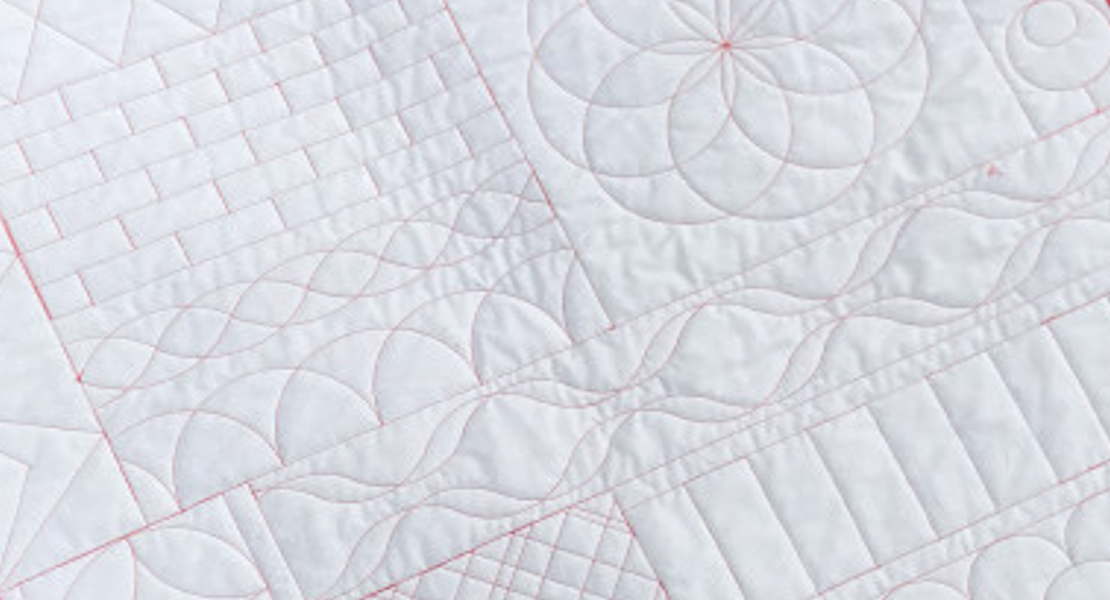
I pieced together a back and front rectangle as well as two accent rectangles and jumped into quilting. After quilting around the edge of the piece and “in-the-ditch” along the seams, I then used my ruler line to quilt parallel lines in the body of the bag, working from the center out.
I then used rulers to quilt something special in the accent areas.
I added a little free-motion quilting to accentuate the rulerwork.
Don’t forget to download the directions and, if you make a bag, show us what you’ve done. Post your project on instagram and tag @berninausa and @amandamurphydesign with the hashtag #weallsew!
For more free-motion quilting ideas feel free to join me on my Facebook Group and happy sewing!
Amanda
Used Products


What you might also like


15 comments on “Zippered Rulerwork Bags”
-
-
Hi Gloria! You can use this foot on your BERNINA 220. It is compatible with the following machine models: 1 Series – 130, 140, 145, 150, 155, 160, 165, 170, 180, 185
2 Series – 200, 215, 220, 230, 240
3 Series – 330, 350, 380
4 Series – 430, 440, 450
5 Series – 530, 550, 560, 570, 580
6 Series – 630, 640
7 Series – 710, 720, 730, 740, 750, 770, 780, 790
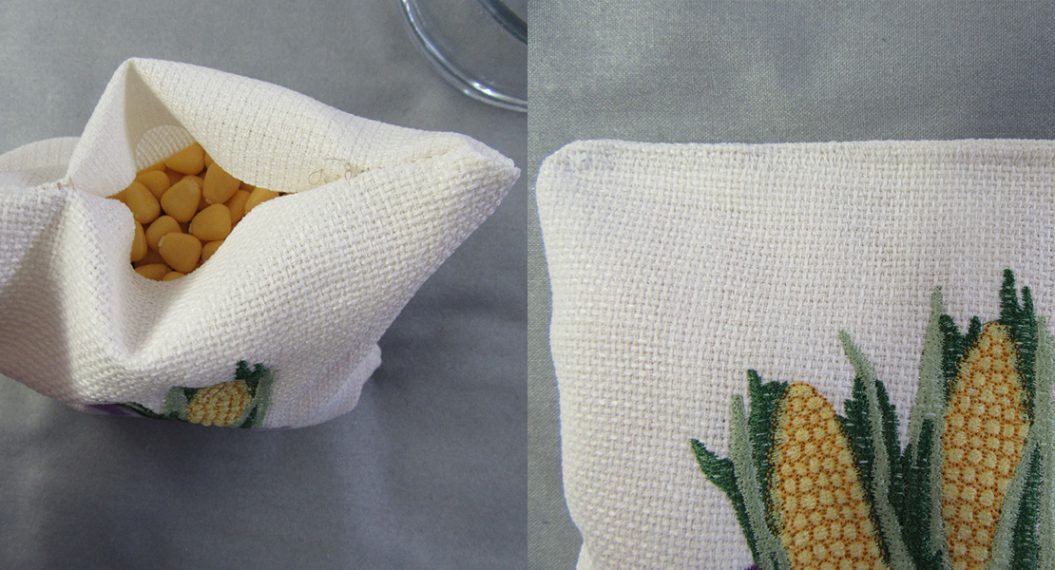
8 Series – 820, 830The bag doesn’t have handles because it is small – more of a cosmetics bag or pouch. I kept it simple so the rulerwork would be the focus.
Hope this information helps!-
Thank you for a wonderful tutorial Amanda. I don’t have a Bernina but am going to be buying rulers for my Janome. Can’t wait to try them. I love your little bag and am going to start on this afternoon. Again, thank you for show how easy it is.
-
Have fun!
-
-
Amanda,
I love your tutorial I will be making your darling bag… plus update your ruler compatable chart to include the 880.Thank you
-
Does it work on the Sterling 880?
-
Yes! That was an oversight – sorry!
-
-
And the 880 too!
-
Why isn’t the 880 listed. I have used it with my 880.
-
-
-
I made the bag today and had sew much fun with it. I embroidered my grand daughter’s name on the accent colour. When inserting the zipper, I used 1/4″ Steam a Seam just shy of the 1/2″ mark and fused the zipper in place. I love using this technique when I sew with zippers.
Thanks again for a wonderful pattern. I have pulled out more fabric to make a few more to tuck away for Christmas gifts.
-
That is a great tip and thanks so much for posting this! It makes my day!
-
-
I do not understand about sewing in the zipper. Please explain. Thank you. Barbee
-
Zippers can be challenging when you first encounter them, but if you can see them inserted in person it is a lot more easier to understand. I would suggest printing out the PDF and bring it, the zipper, and the quilted piece to your local BERNINA dealer. Together you should be able to conquer the steps in person.
-
-
I love my little thread snips that I have all over my quilting room, because I always need them close at hand!
-
I’ve downloaded the PDF instructions and it’s totally confused me. The piecing instructions show two large rectangles, for the front and back, and an accent piece at the top AND bottom of those rectangles for a total of four accent pieces, but the instructions only say cut two.
Or is one rectangle the piecing diagram and the next image for marking up? The instructions aren’t clear at.
Leave a Reply
You must be logged in to post a comment.

Thanks for the tutorial. Is the new ruler edge foot only for the new Bernina sewing machines? I have a 220, it wasn’t necessary to buy anything fancier because I also have a BabyLock Ellageo Embroidery machine, which I also use as a regular sewing machine when I am not embroidering.
Does this bag have no handles?