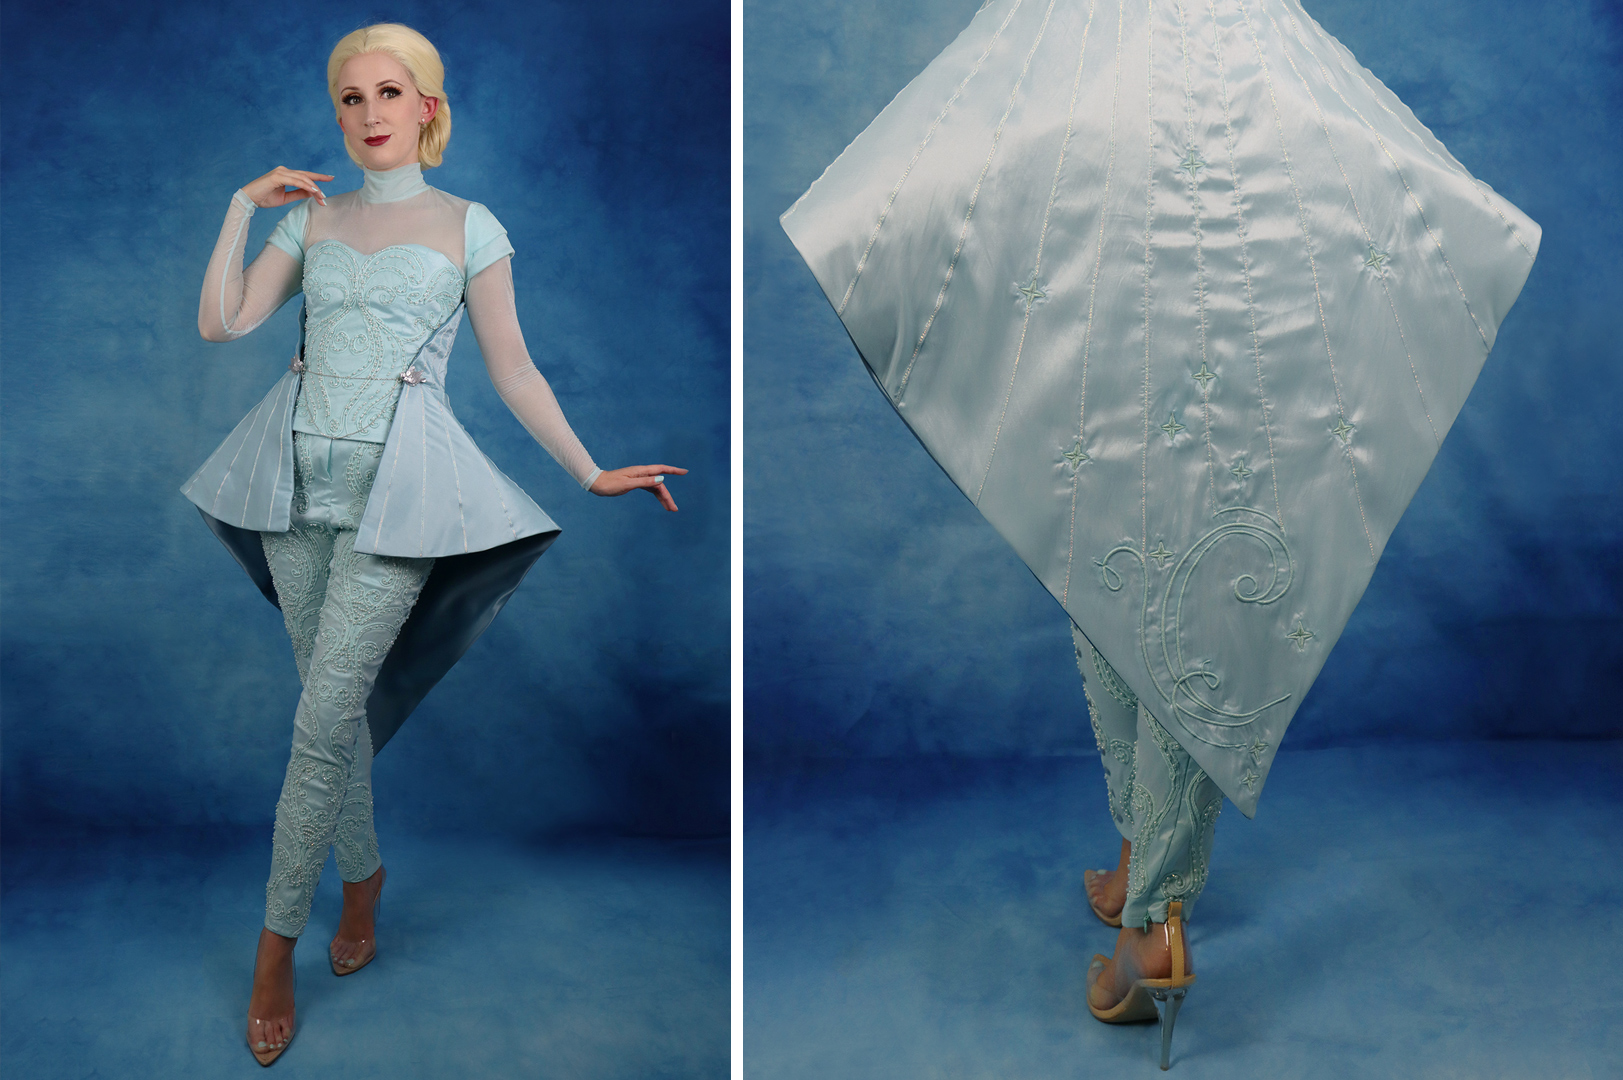
Creating the Peplum for a High Fashion Cinderella Cosplay
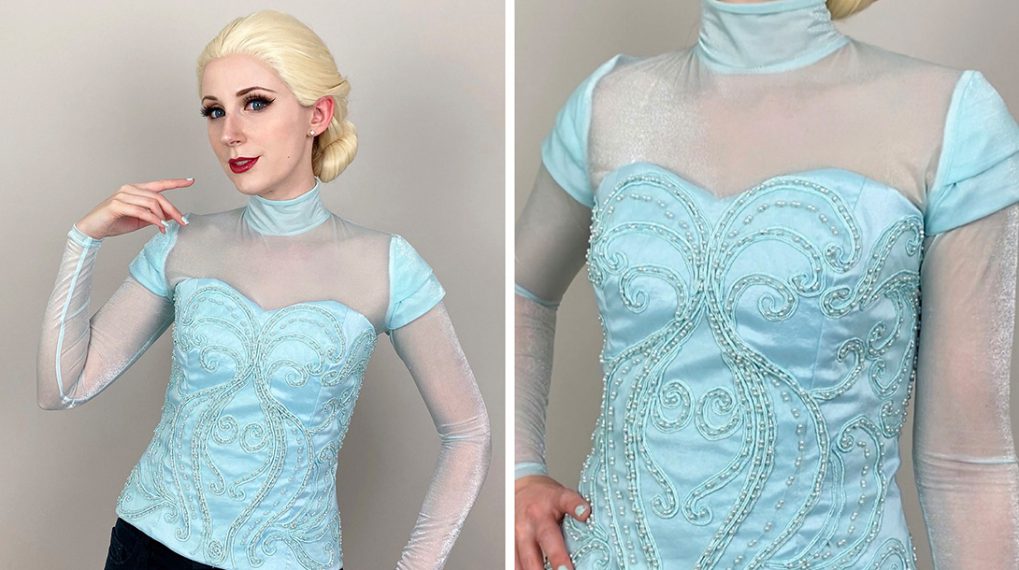
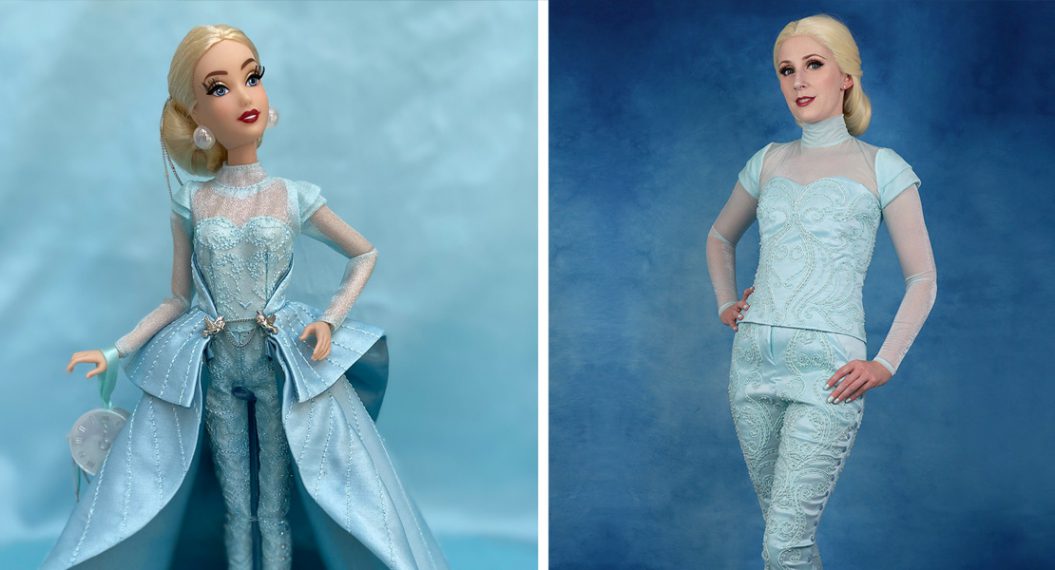
Hi, everyone! It’s Dessi-Desu and I am back with the next entry in my Cinderella cosplay project, inspired by her 2022 designer doll. In my previous post, I completed her base suit. For this blog entry, I will be starting work on her skirt with the peplum portion of her design.
Starting the Waist
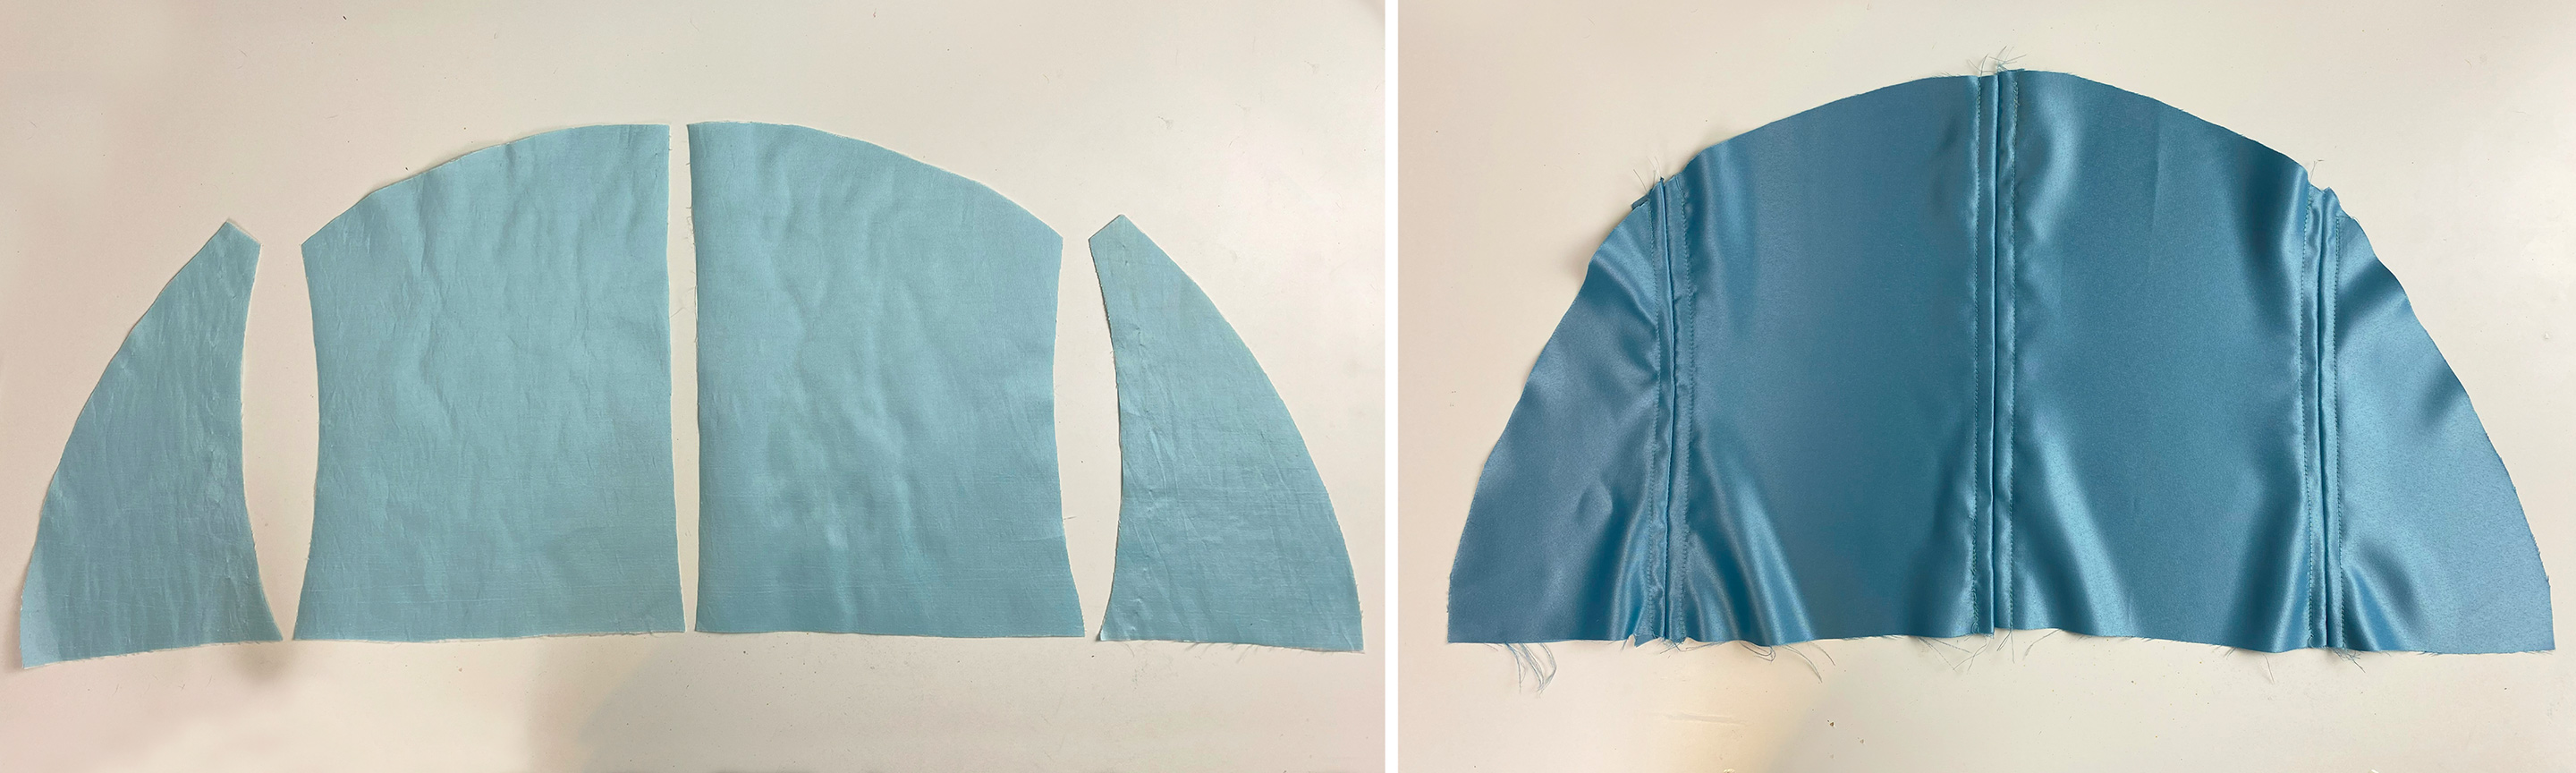
To begin the peplum, I started with the portion that will go around my waist. It consists of two back pieces with two front pieces that do not close in the front. The taffeta layer was also interfaced with a fusible interfacing and boning channels were added to my satin lining for more structure.
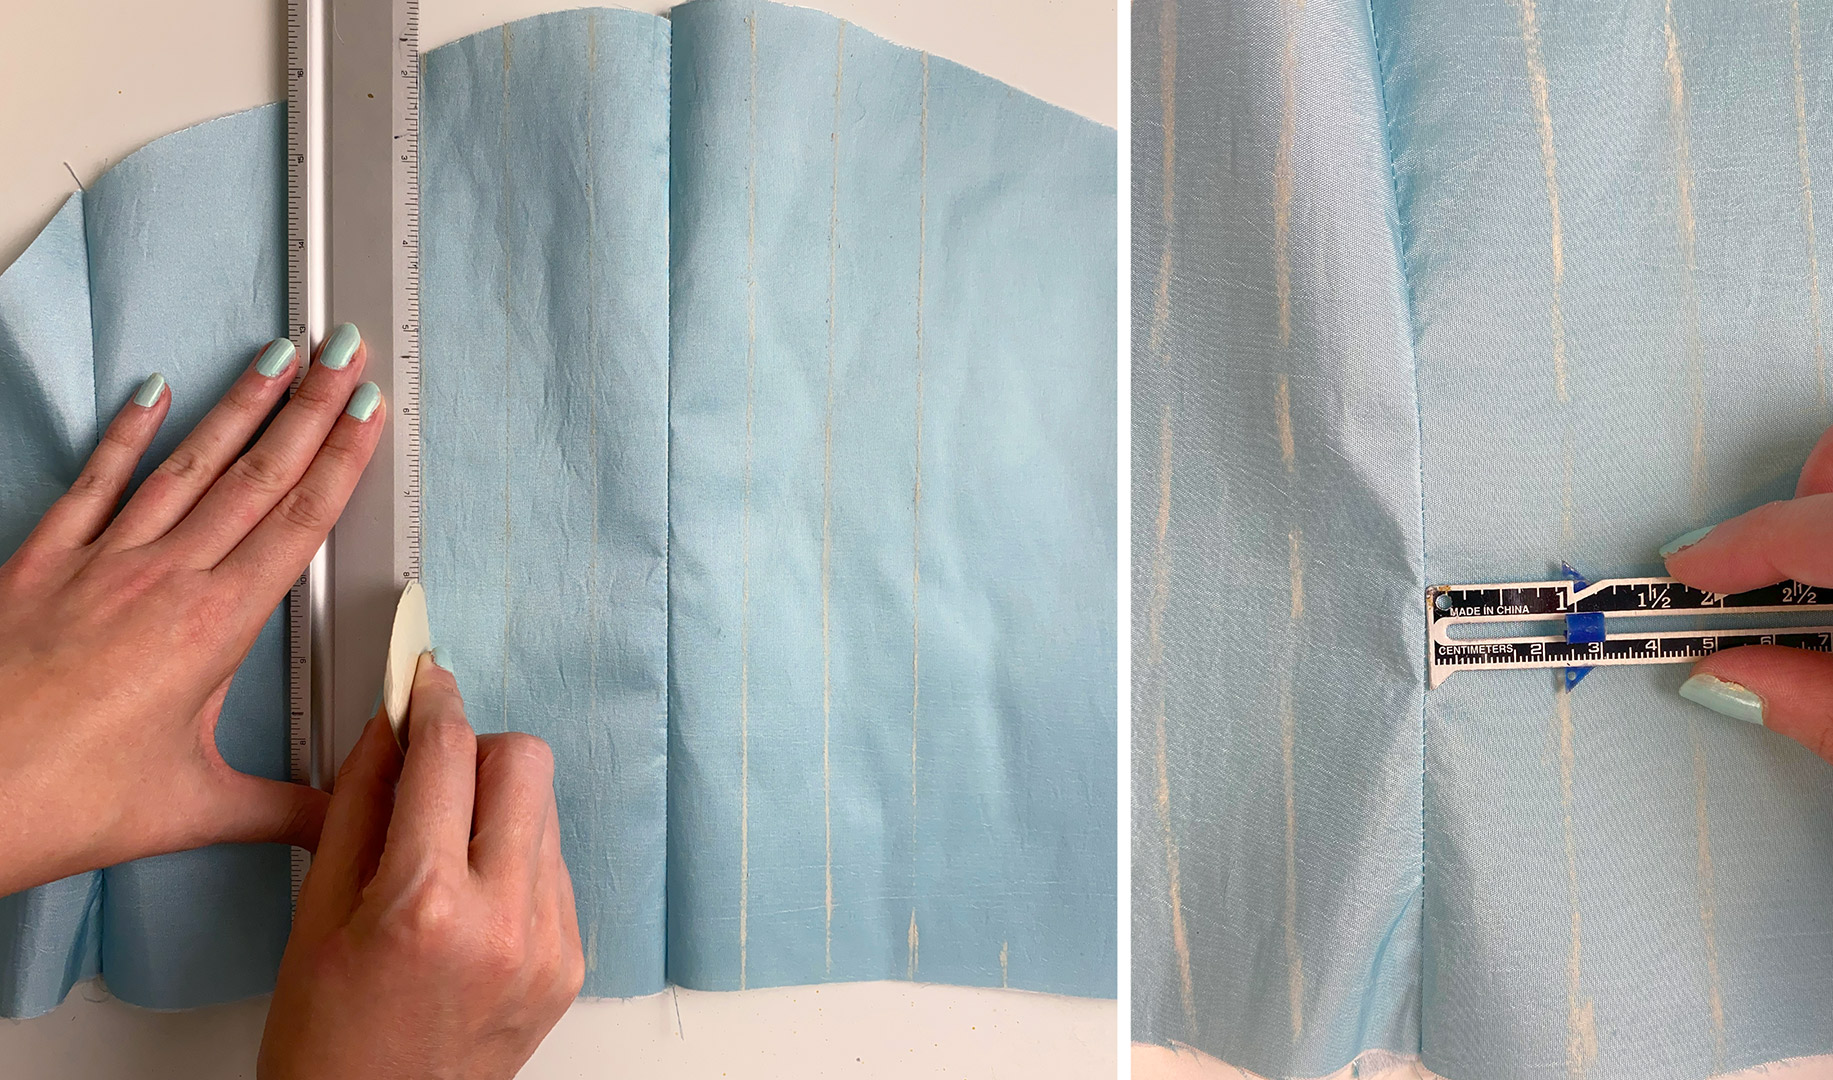
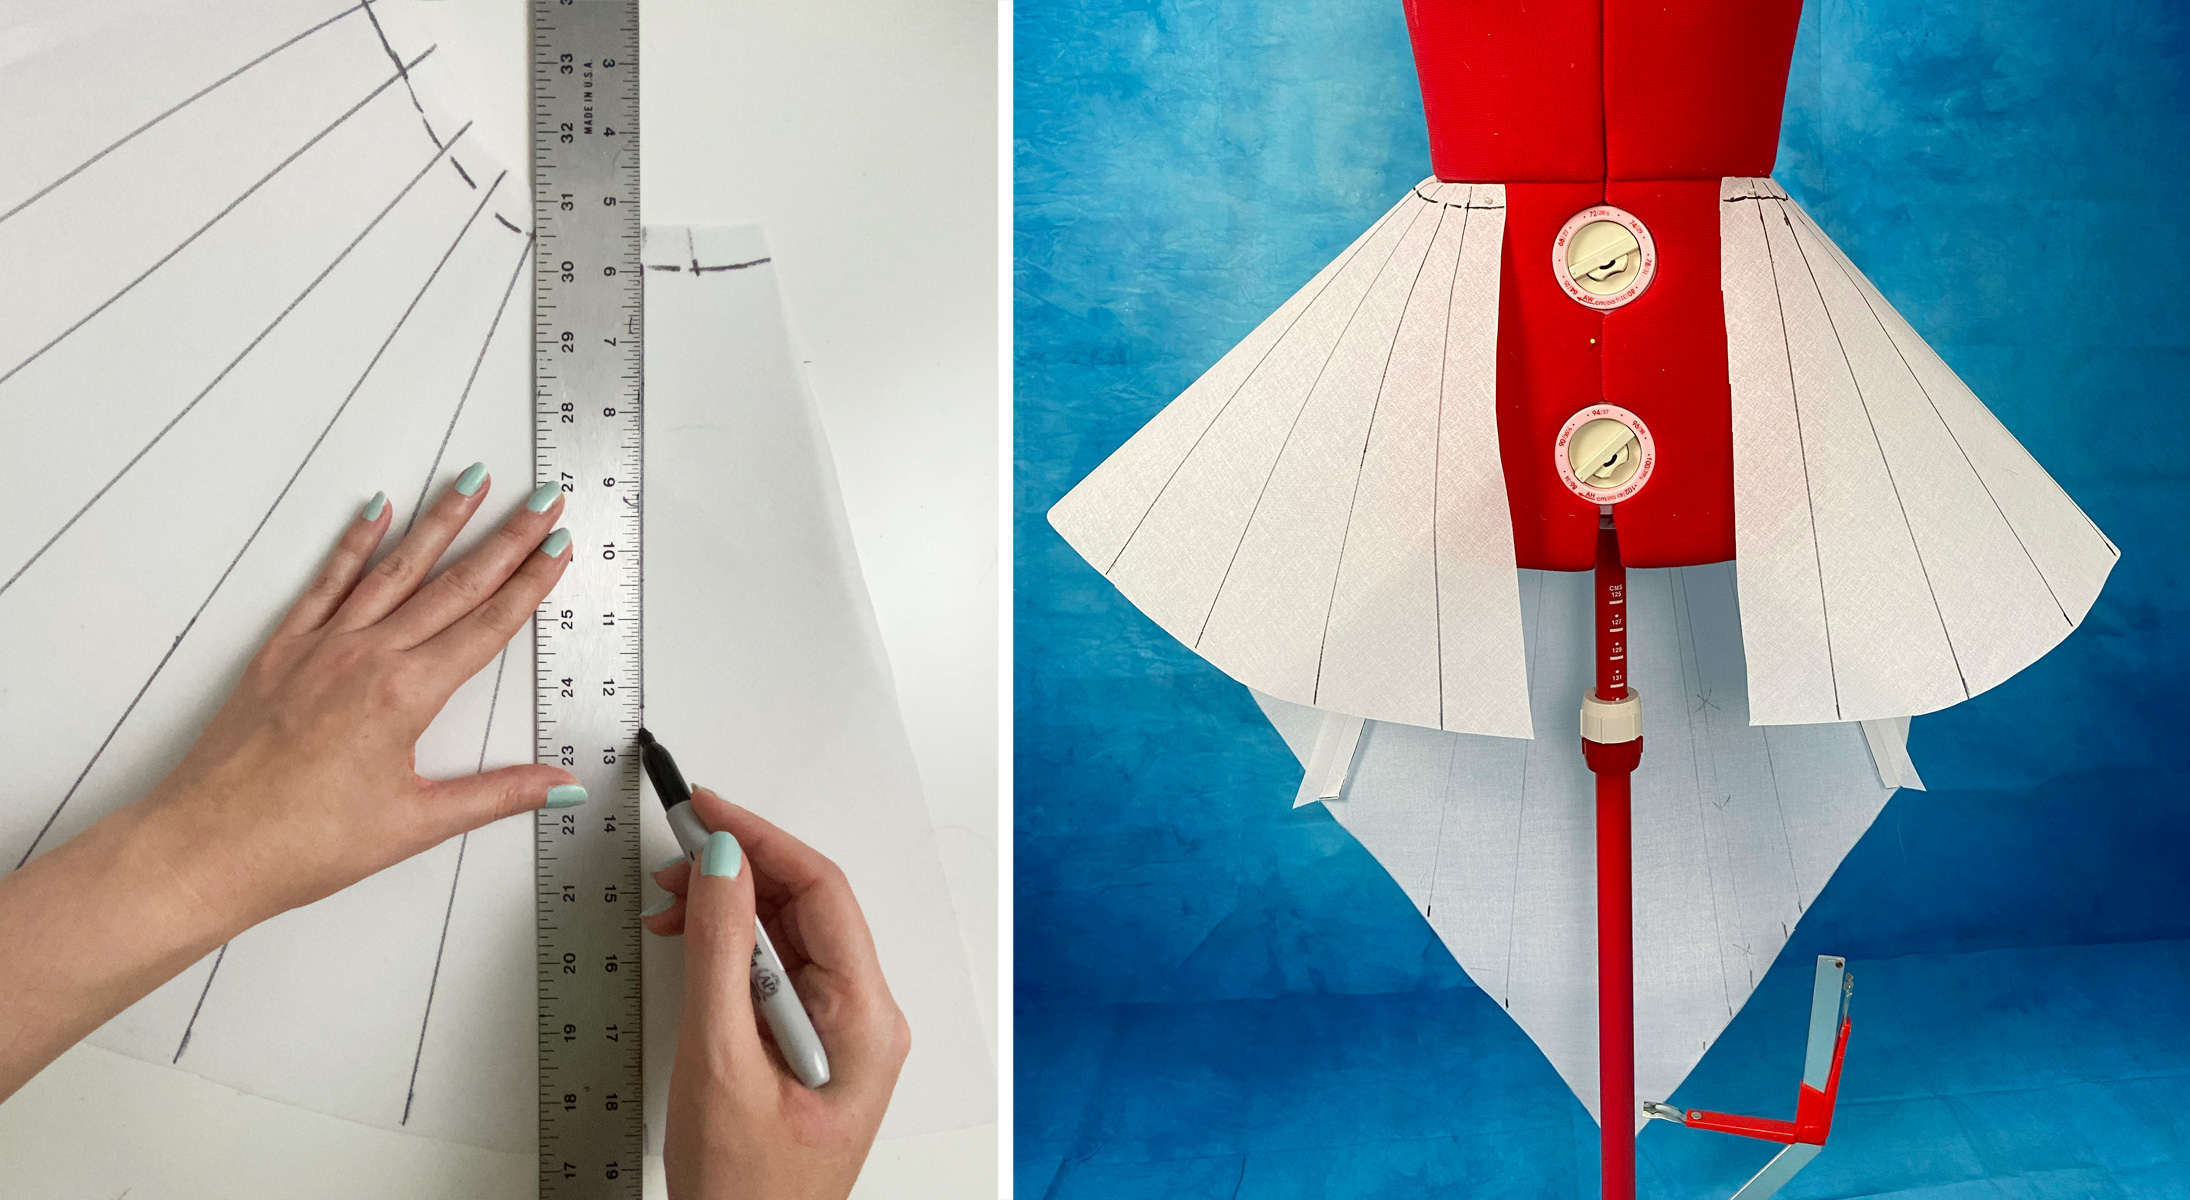
By starting with the waist, I was also able to figure out the amount of stripes that will be on the peplum portion. Both the waist and peplum needed to have the same amount of stripes, so the pieces would match as closely as possible when they were sewn together later in the process. In total, I ended up with 21 stripes with approximately 1″ in between each. I also planned to have stripes cover the seams to mimic the clean seamless look on the doll. I used chalk and a ruler to mark where I would sew each iridescent ribbon later on.
Creating the Peplum Mock Up
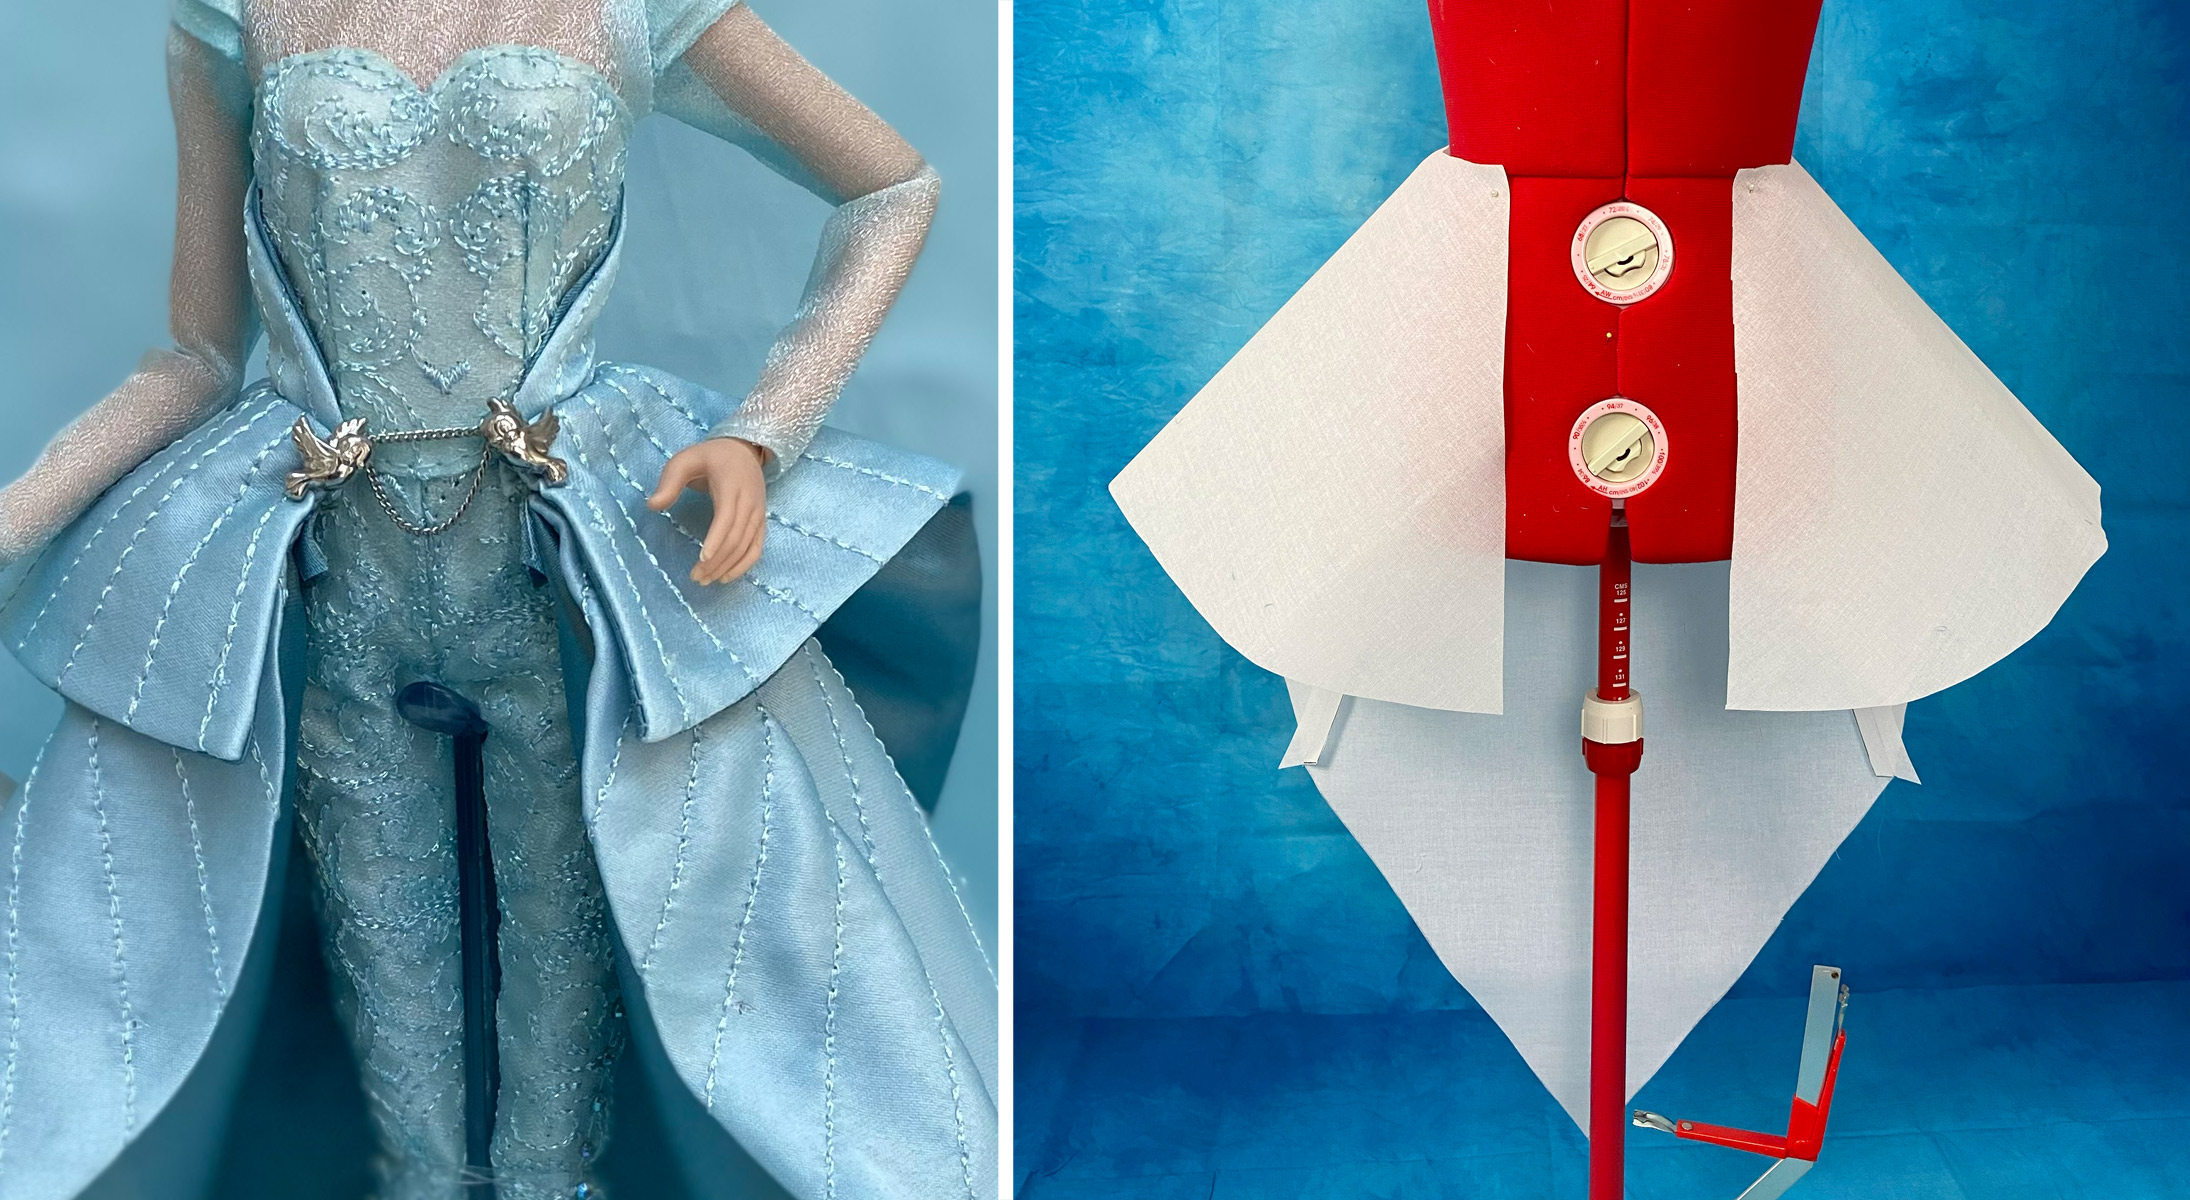
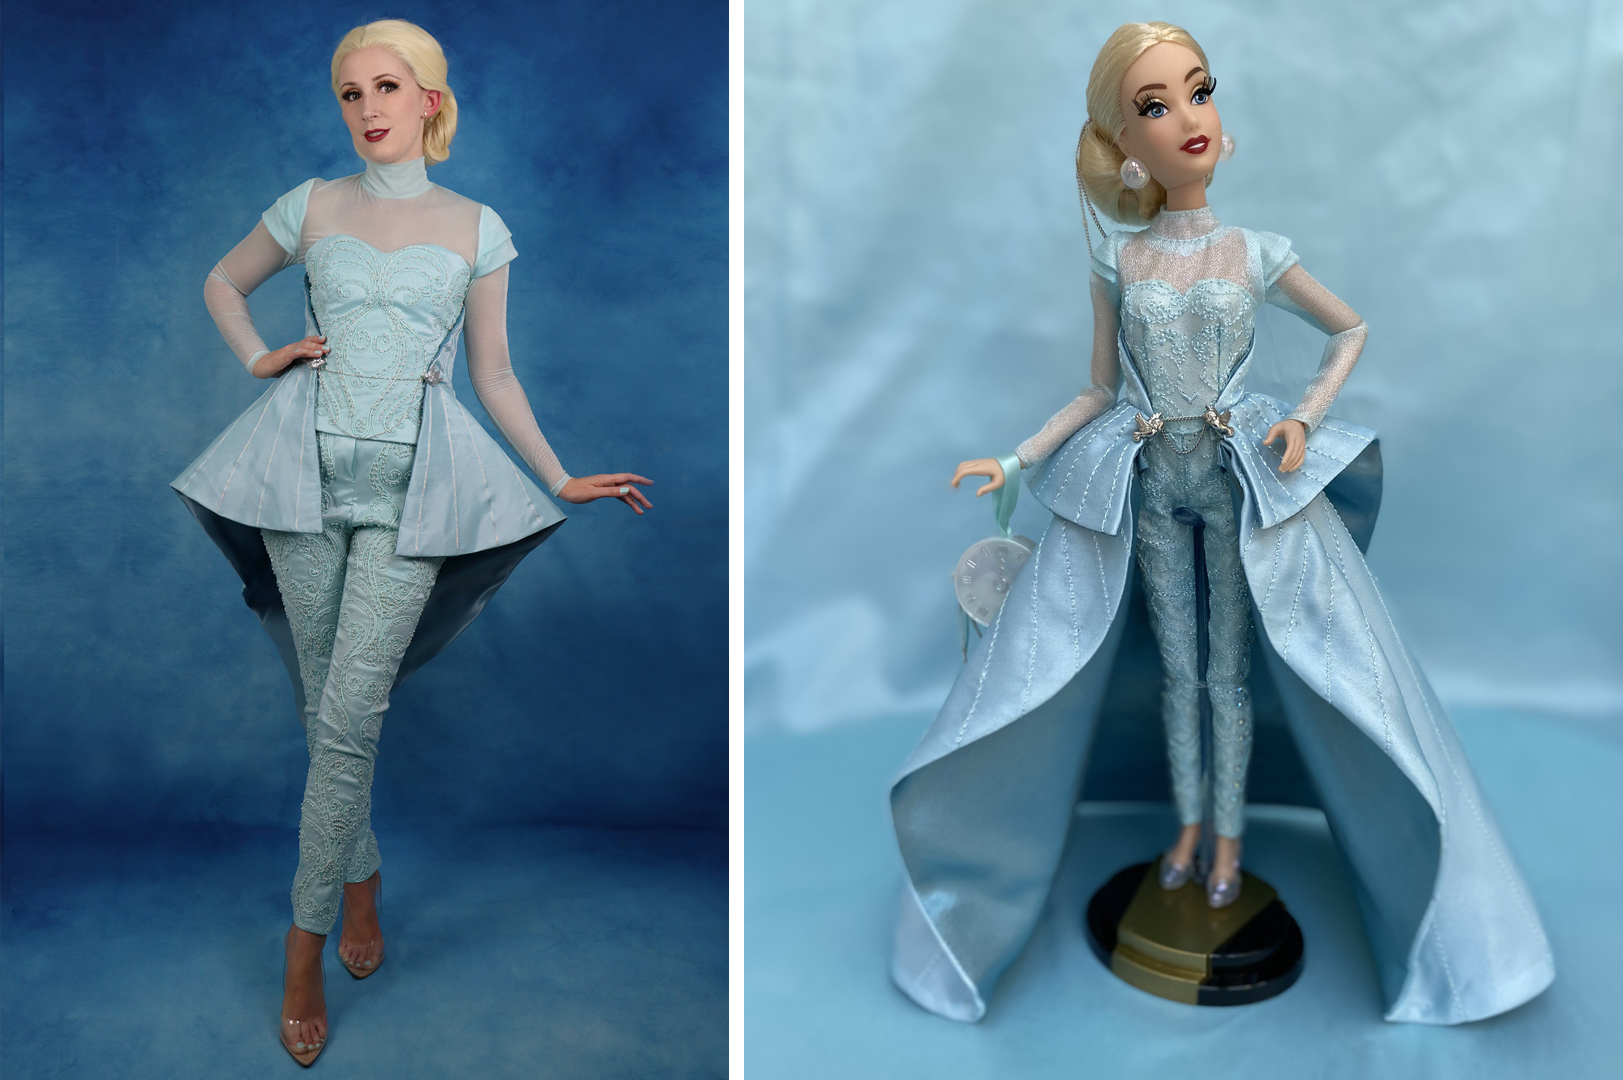
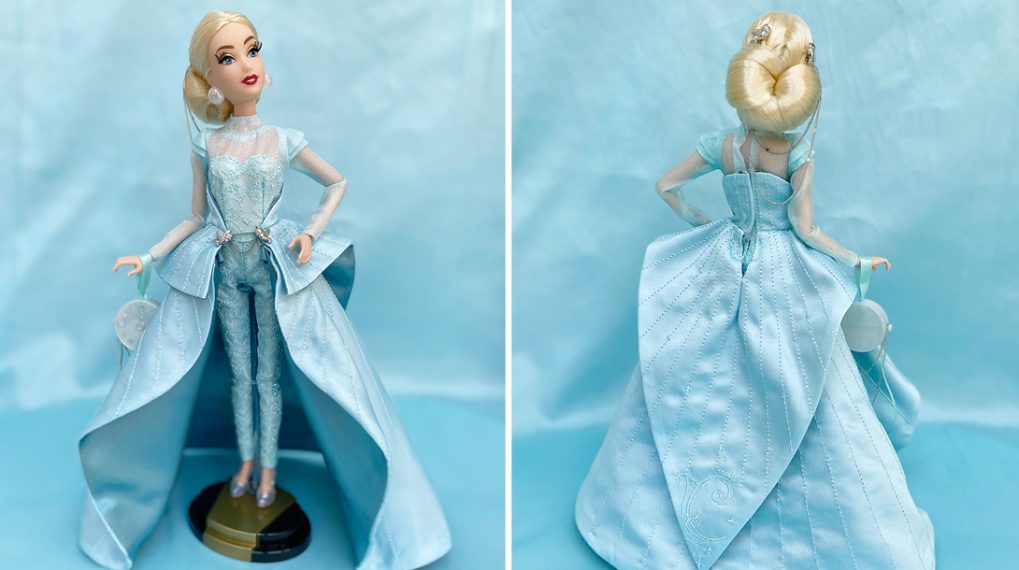
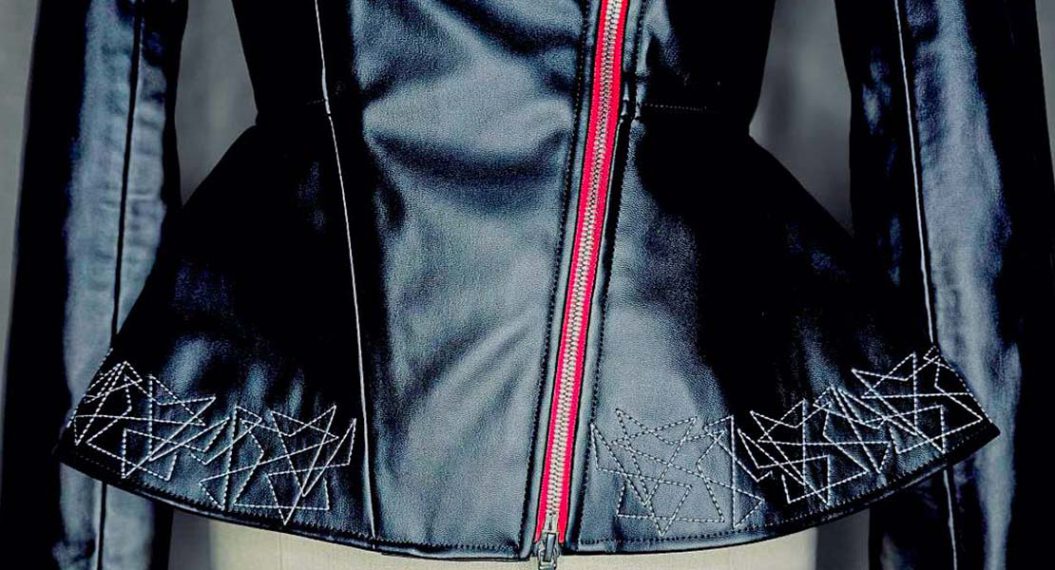
Before creating the actual peplum, I created a mock-up from a stiff material called buckram. Buckram is typically used on hat and purse projects. However, I will be using it later as an interlining for my final peplum. Cinderella’s peplum is designed to have an exaggerated silhouette with no overlapping fabric to highlight the iridescent stripe details. Starting with a buckram mock-up ensured that I achieved the exact shape that I needed. Due to the stripe details, adjustments could not be made later in the process, so the mock-up was a crucial step. I figured out the peplum shape by referencing the shape on the doll version and adjusted as needed.
Planning the Peplum Stripe Placement
Once I was happy with my buckram mock-up shape, I started the process of mapping out the stripes. This would give me a diagram to follow later on for the final peplum. To map out the stripes, I used a combination of calculations and what I felt looked visually balanced. The peplum pattern is not a circle, so I could not evenly distribute the stripes from a center point. I also had to account for matching the stripes in the back with the embroidered “C” detail, and where they fall on the doll’s design. The front stripes also needed to run parallel with the peplum opening.
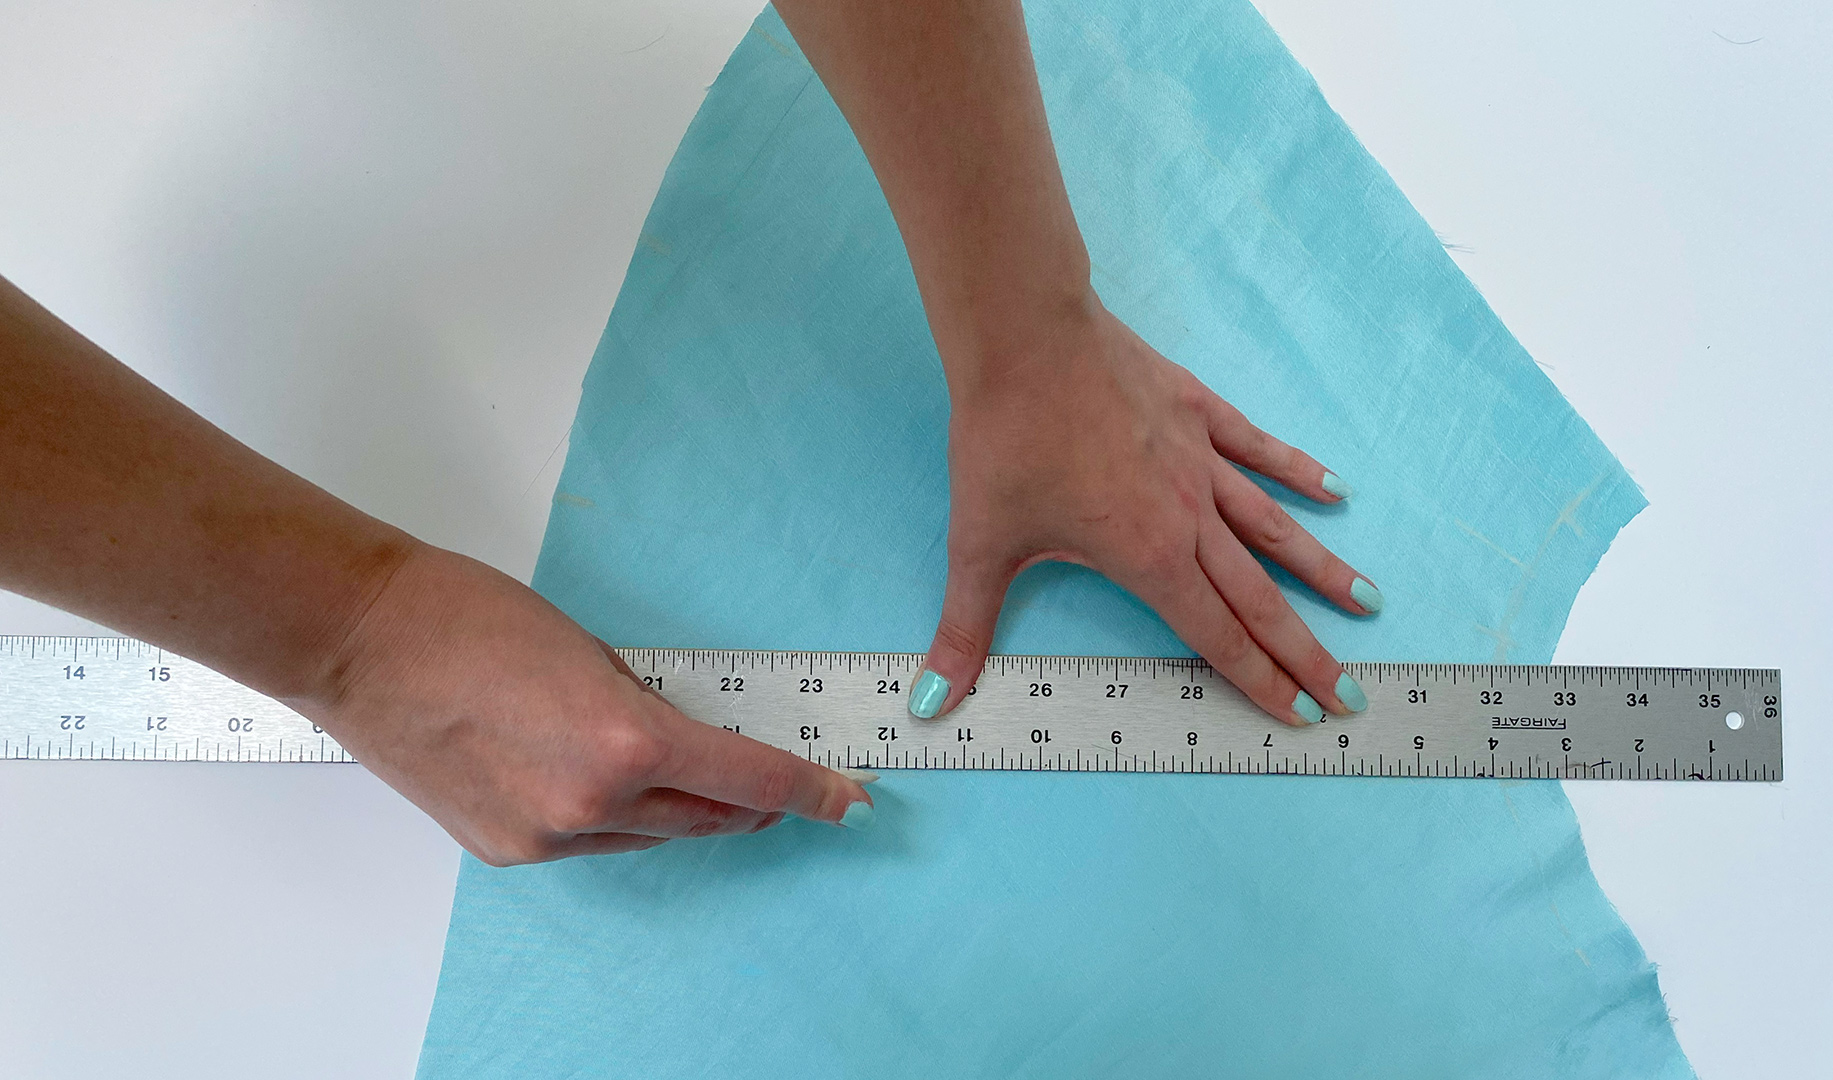
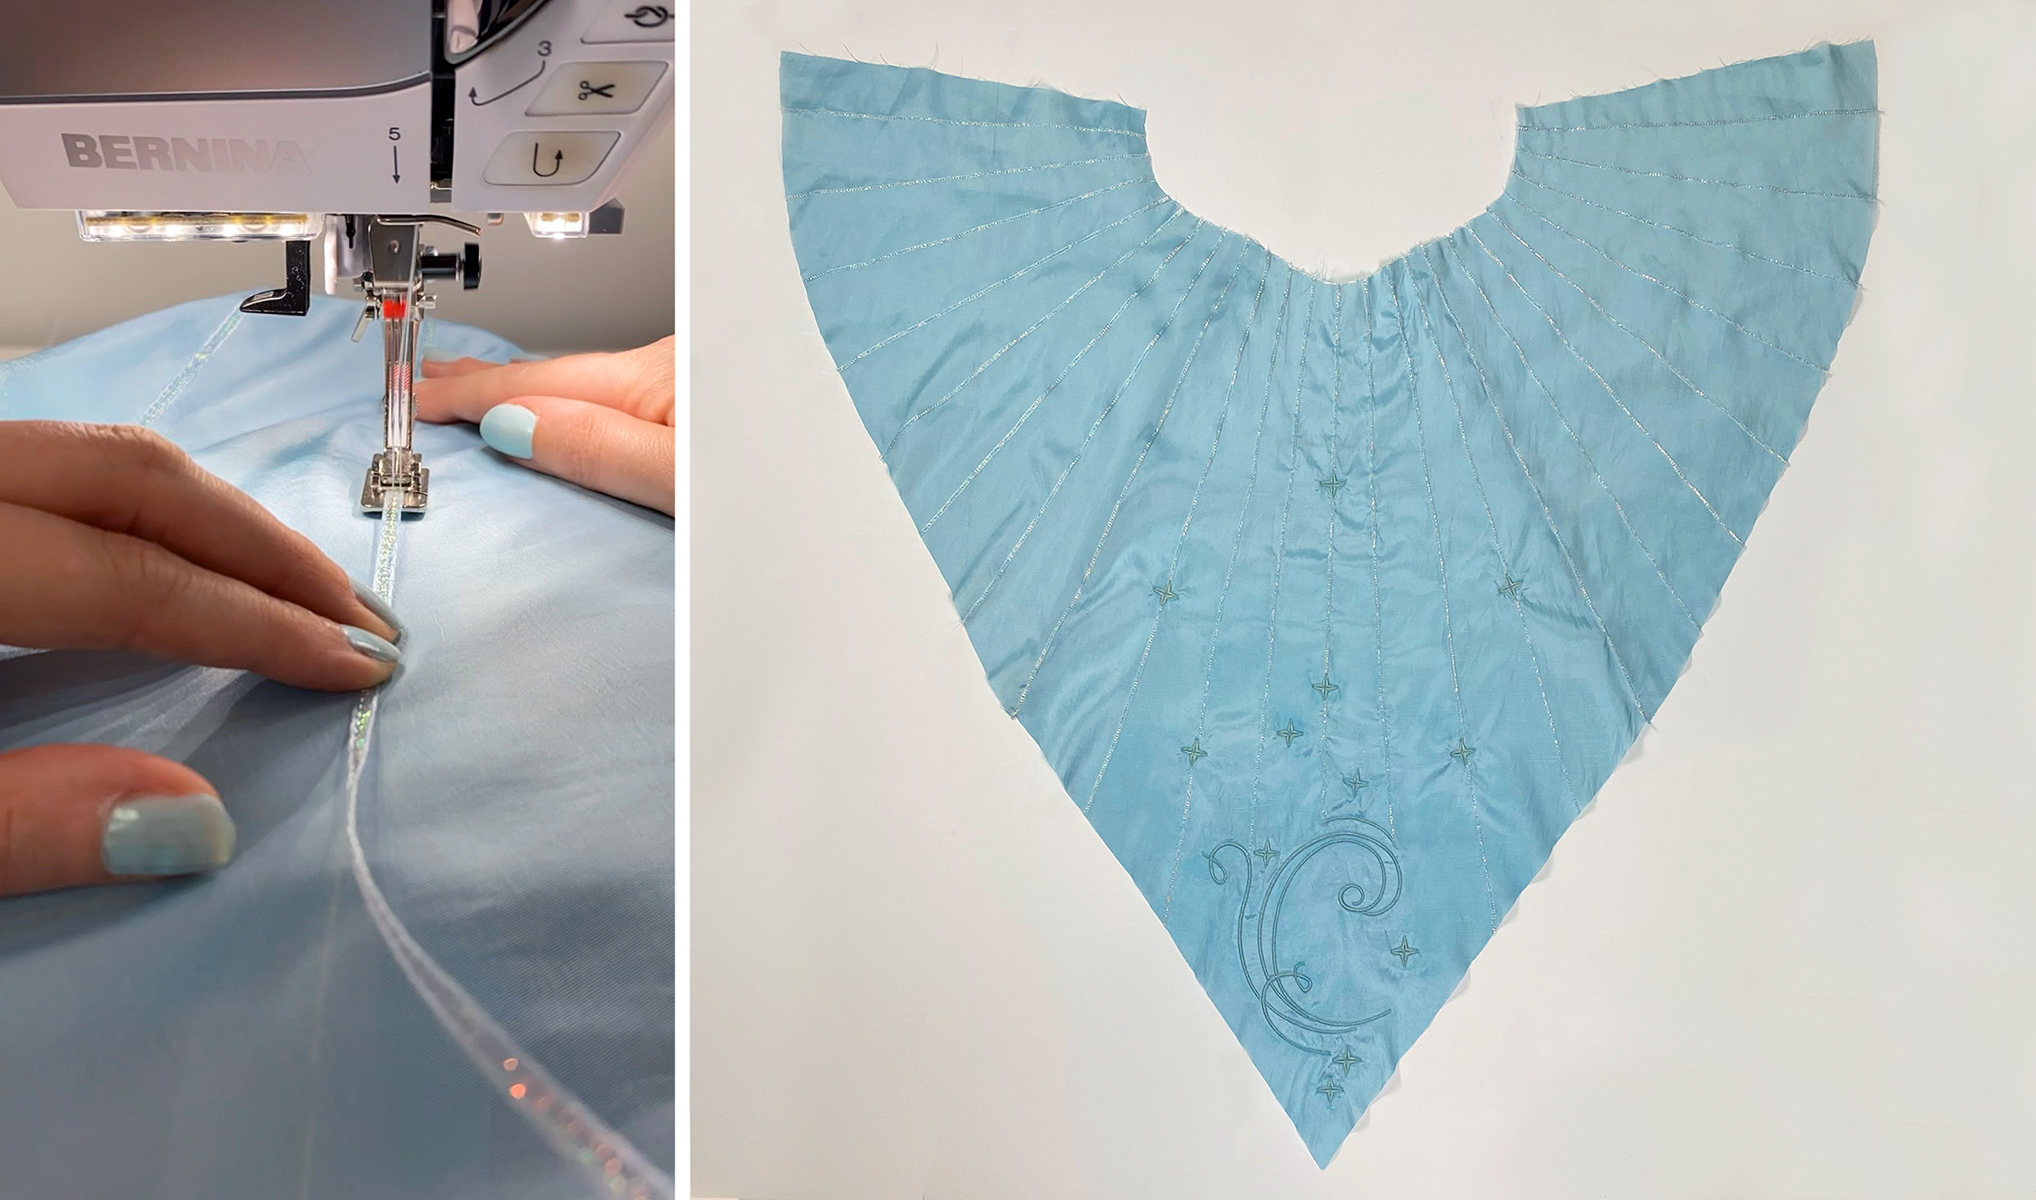
Preparing the Final Fabrics
Remember the “C” embroidery I created in my first blog post for this cosplay project? It made its return with creating the peplum portion of Cinderella! To cut my final peplum fabric, I laid out the pattern and made sure it was centered with the embroidered “C” detail on my taffeta. Afterward, I cut the satin lining and final buckram interlining pieces. The fashion layer and lining were cut as a single piece. For my buckram, I divided it into three pieces that were sewn together, due to the material not being wide enough.

After my final fabric pieces were cut, I was able to start applying the stripe details to my taffeta. To start, I mapped out chalk lines as a guide for sewing, using the lines on my mock-up as a reference.
Stitching the Ribbons
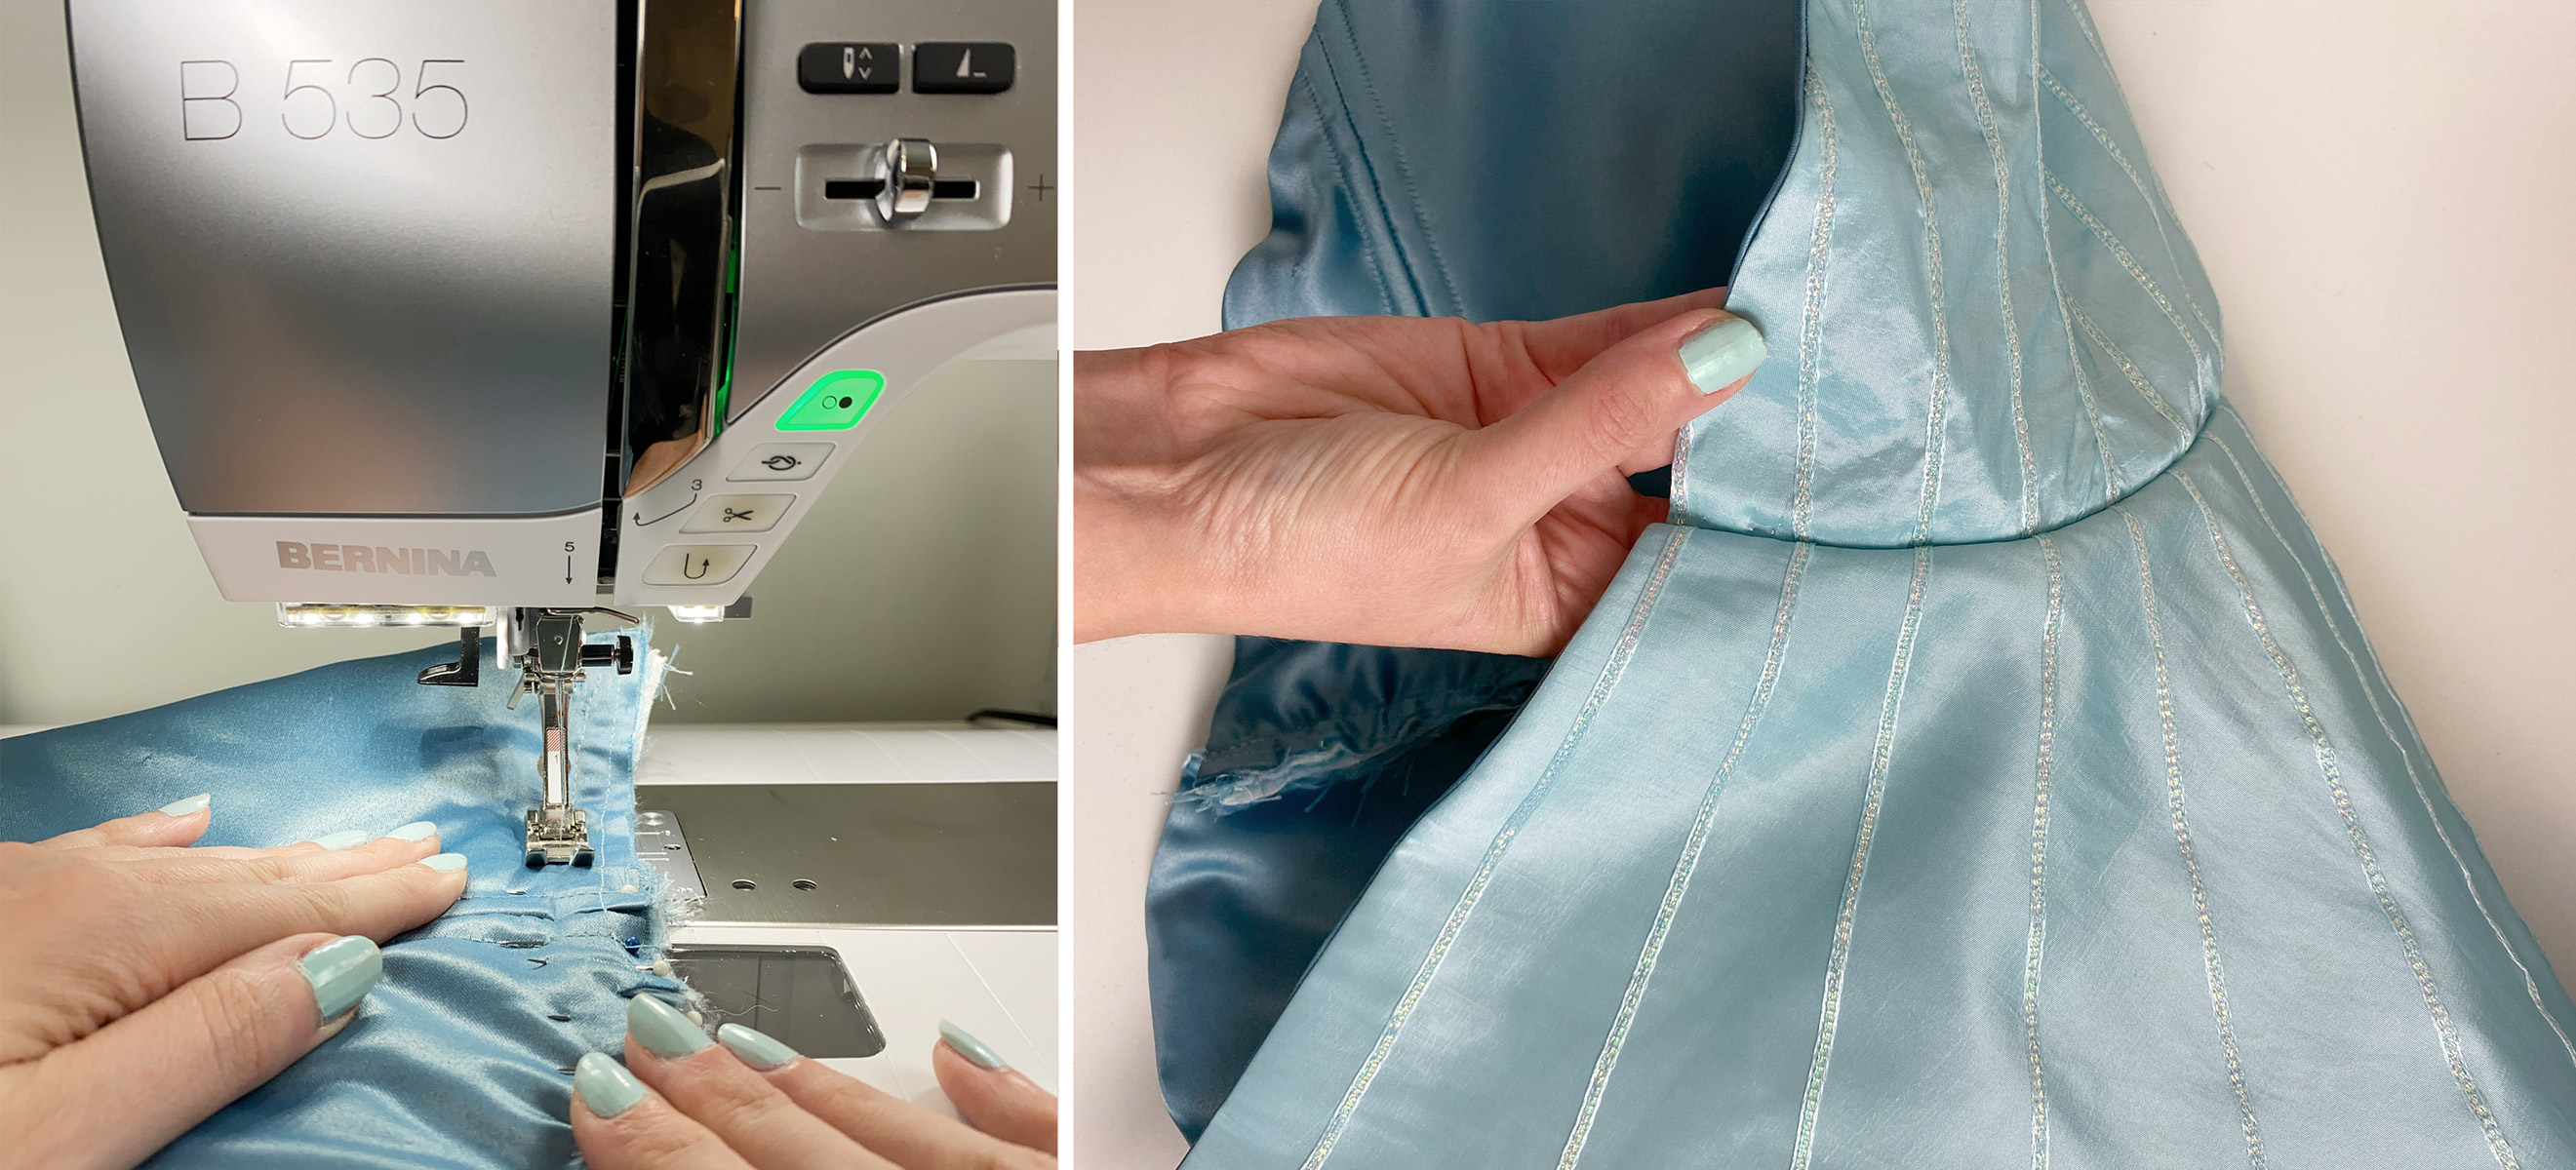
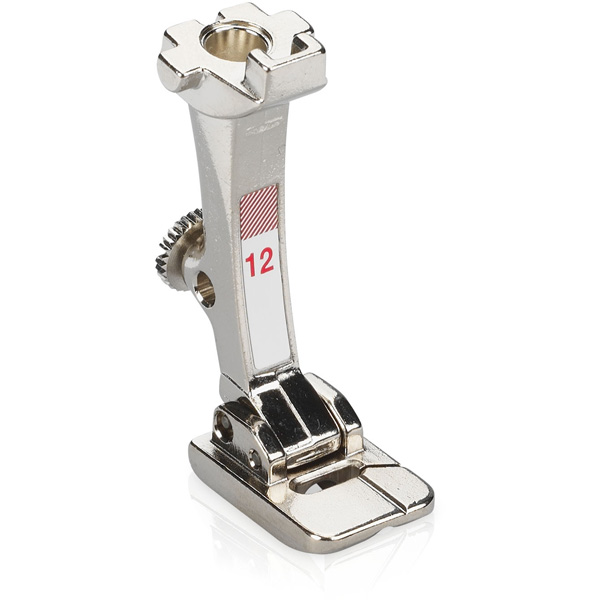
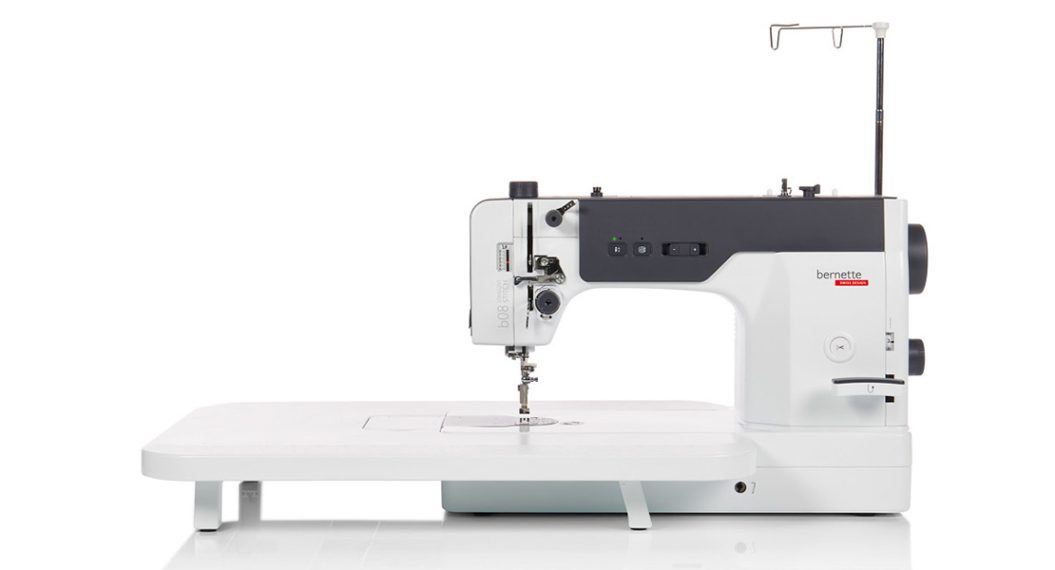
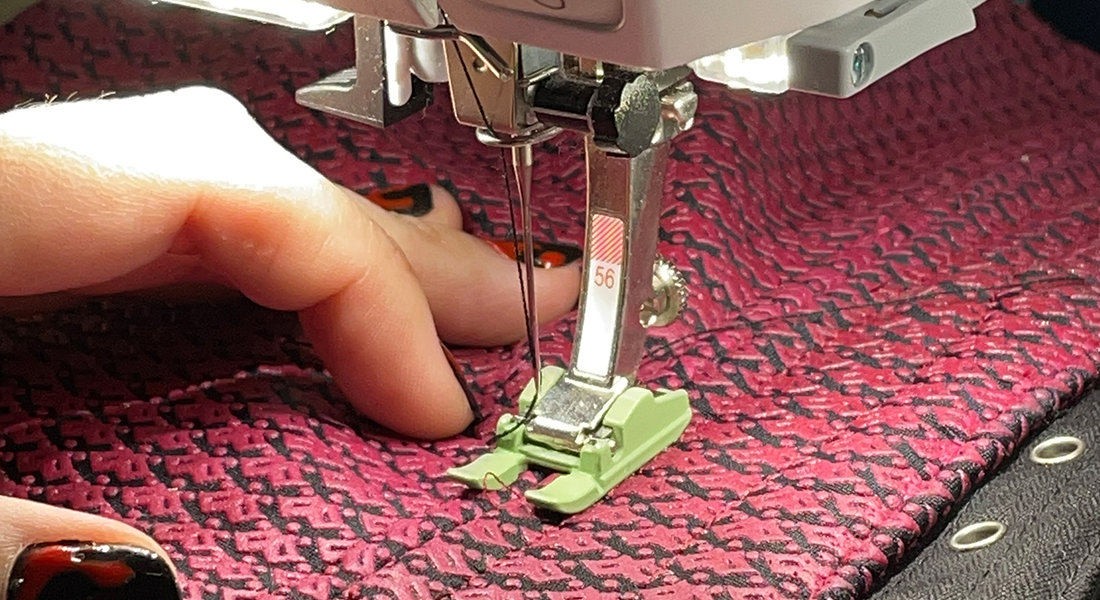
To apply the ribbon stripe details to the peplum I used Bulky Overlock Foot #12 on my BERNINA B 535 E. This presser foot is a wonderful addition to a cosplayer’s toolkit and greatly helped with time efficiency on this project. On past projects with similar ribbon stripes, I went through the time-consuming process of pinning ribbons and stitching them. Not only did this take up a significant amount of time, but the results were not as clean as I would have liked and the ribbons would shift. Thankfully, the Bulky Overlock Foot #12 made this process far easier. I also used a twin needle to stitch down the ribbon stripes.
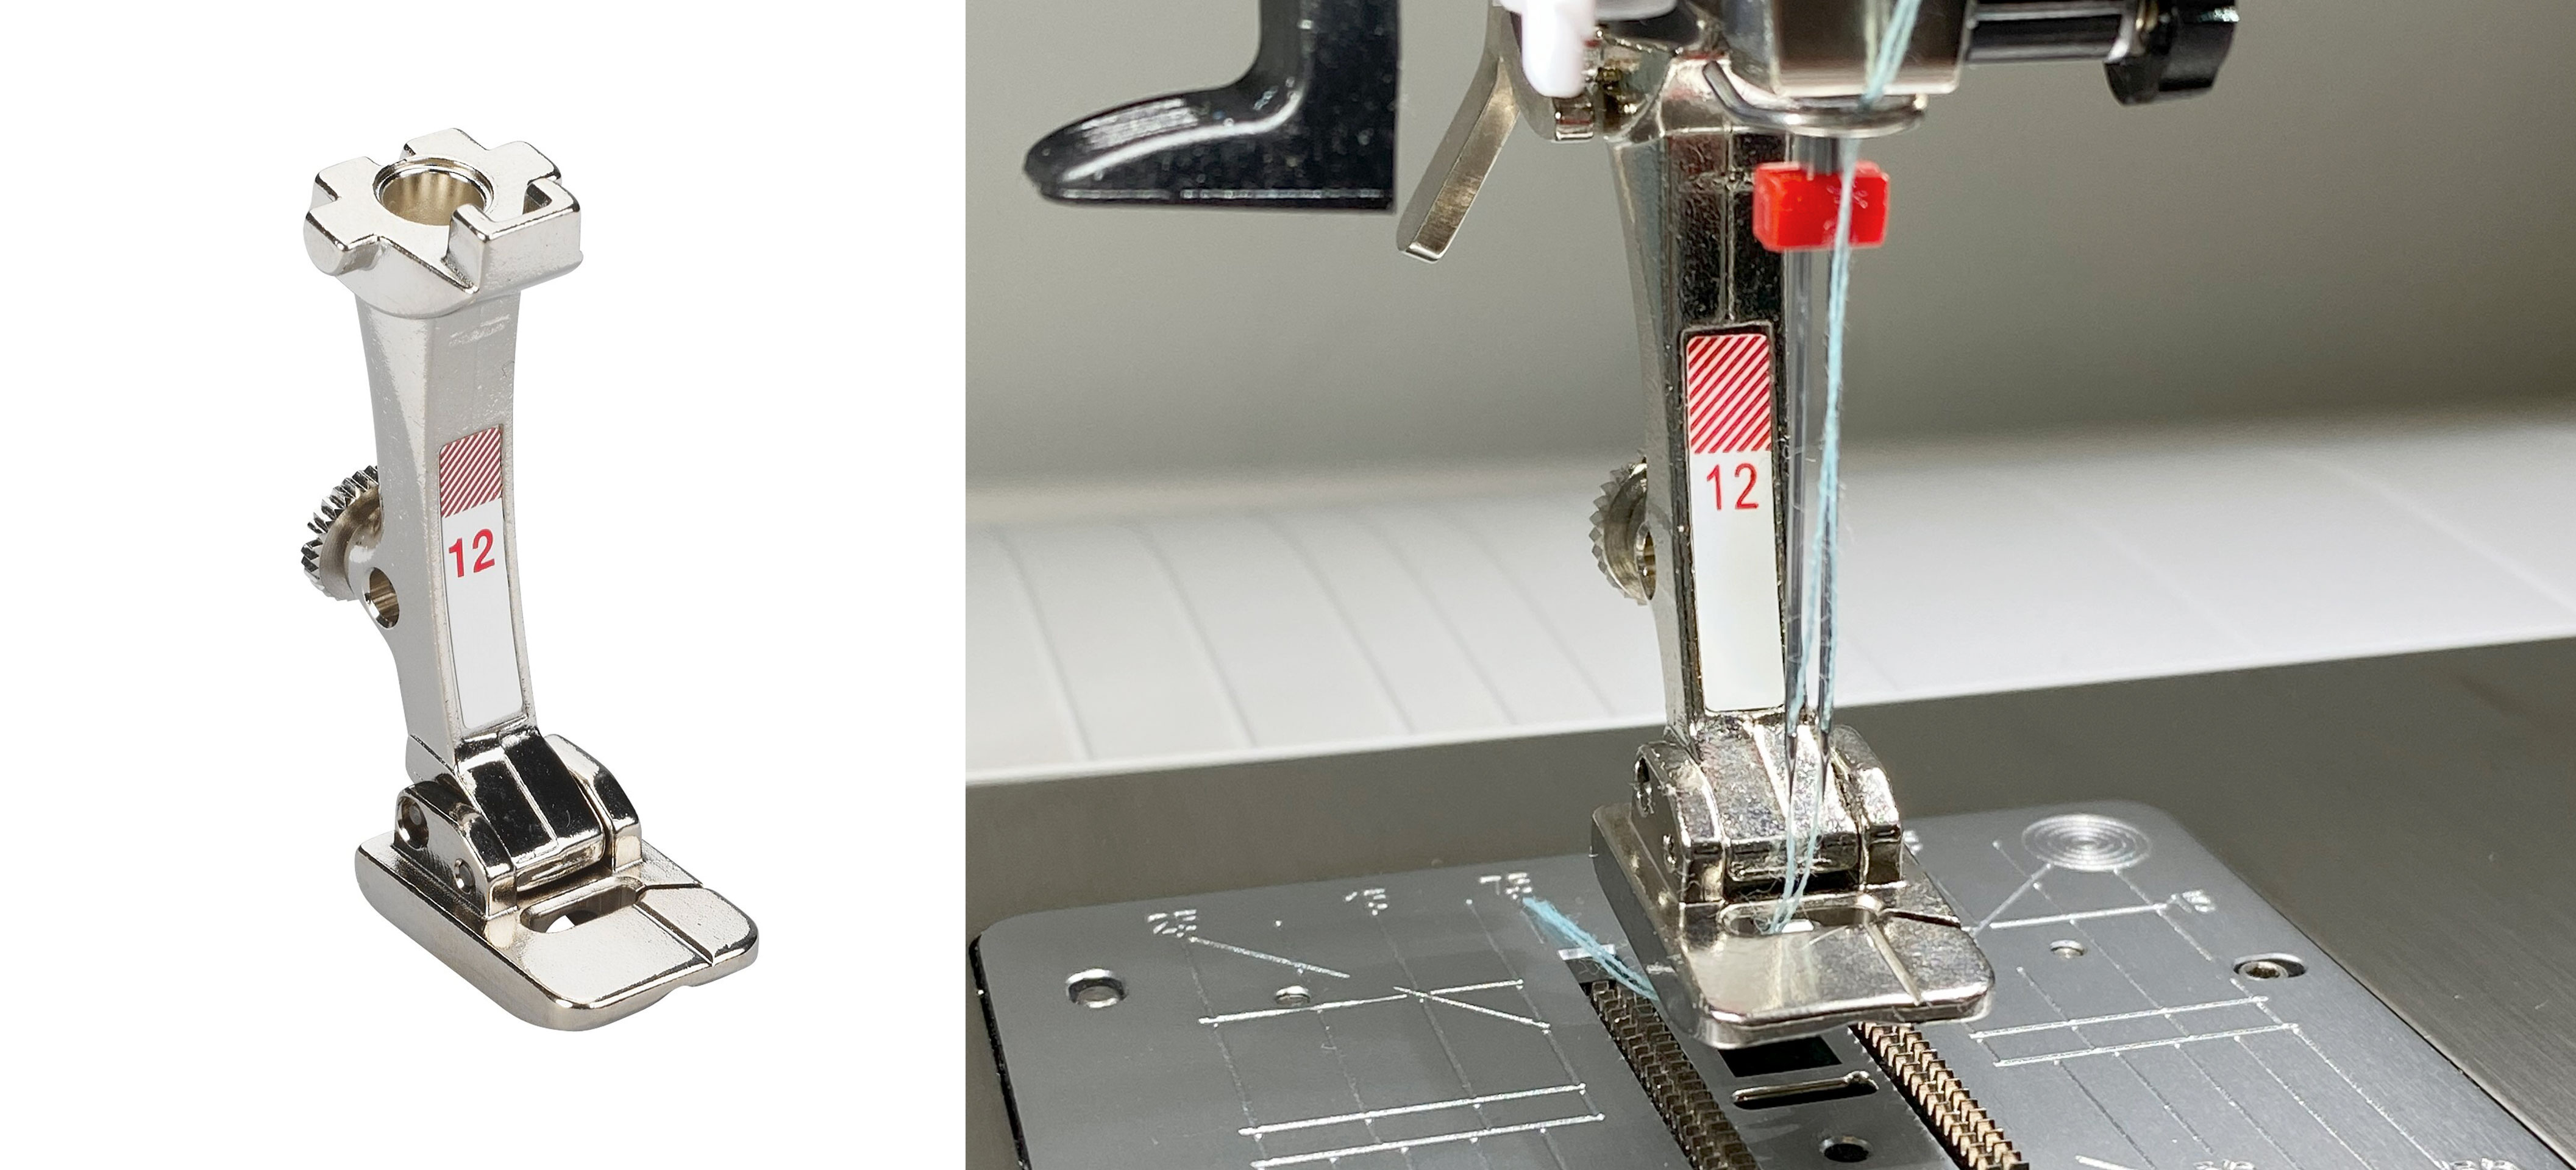
To prepare my B 535 E for stitching with a twin needle, I selected the correct twin needle size in my needle menu. For this project, I used a 2.5 twin needle. I also increased the tension to be sure the bobbin would properly catch. The backside of a straight stitch with a twin needle should be a zigzag, so I did some test stitches before sewing my actual fabric. If the tension is too low it will result in the bobbin thread not catching properly, as shown below in my tests.
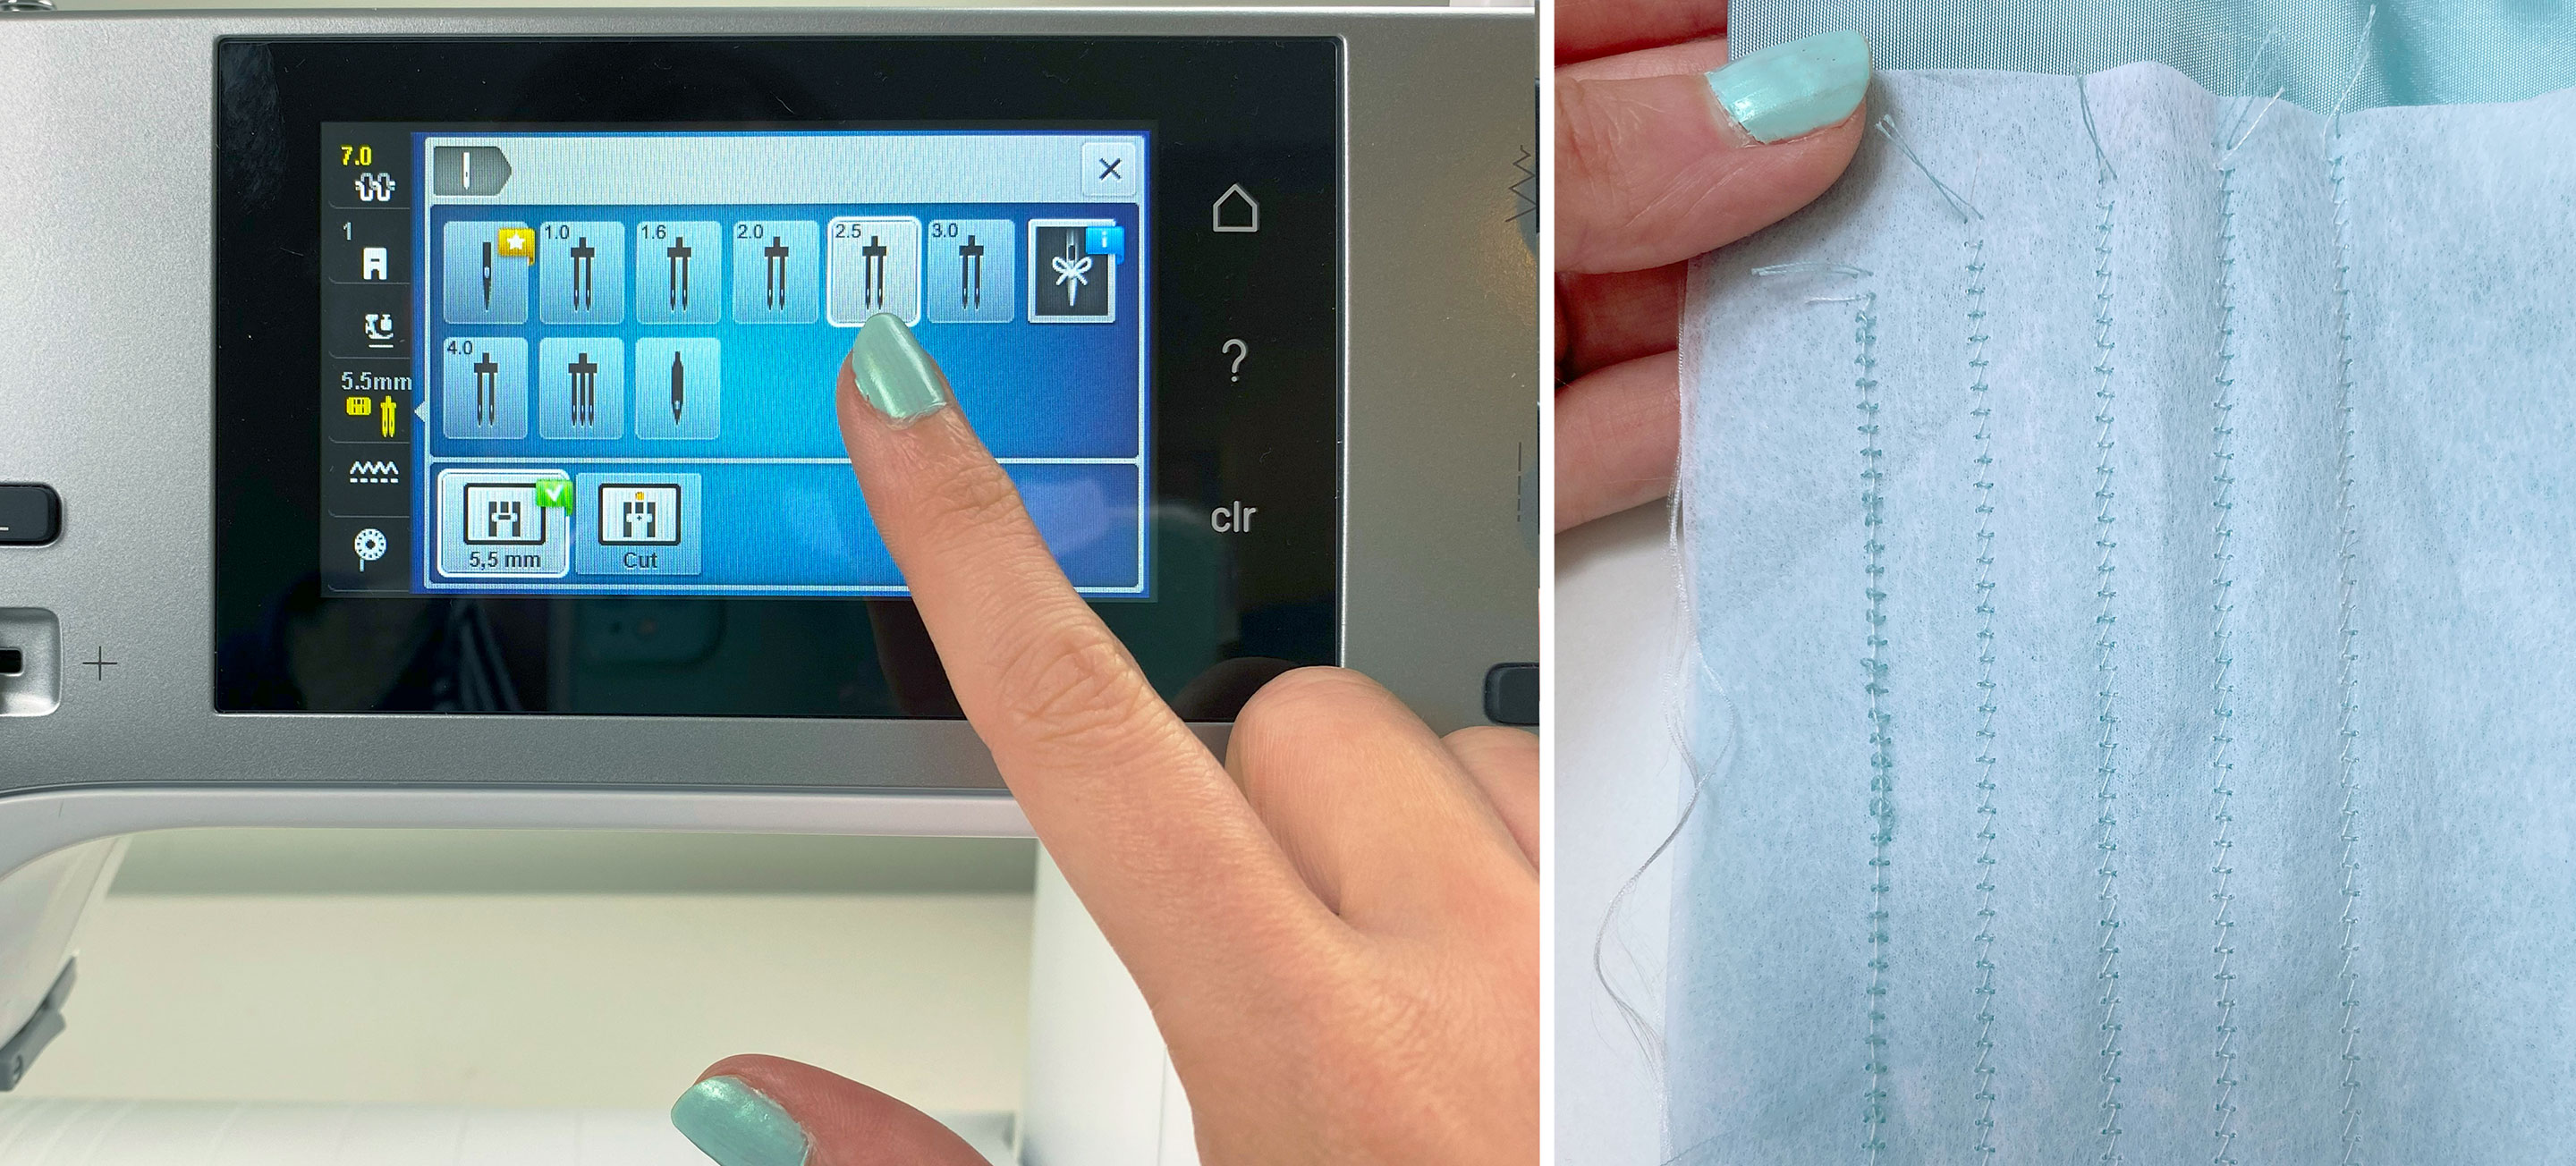
Once my machine was prepared for sewing, I fed my ribbon through the guide hole of Bulky Overlock Foot #12. I then aligned the start of my chalk guidelines with the center of the presser foot. Beneath my taffeta was also a tear-away stabilizer to prevent the fabric from puckering, as it was sewn. Carefully, I sewed each ribbon down, checking the placement of the ribbon with my chalk guides as they were stitched. After the ribbons were sewn down, I removed my tear away stabilizer.
This same process was repeated on the stripes for the waist portion, as well.
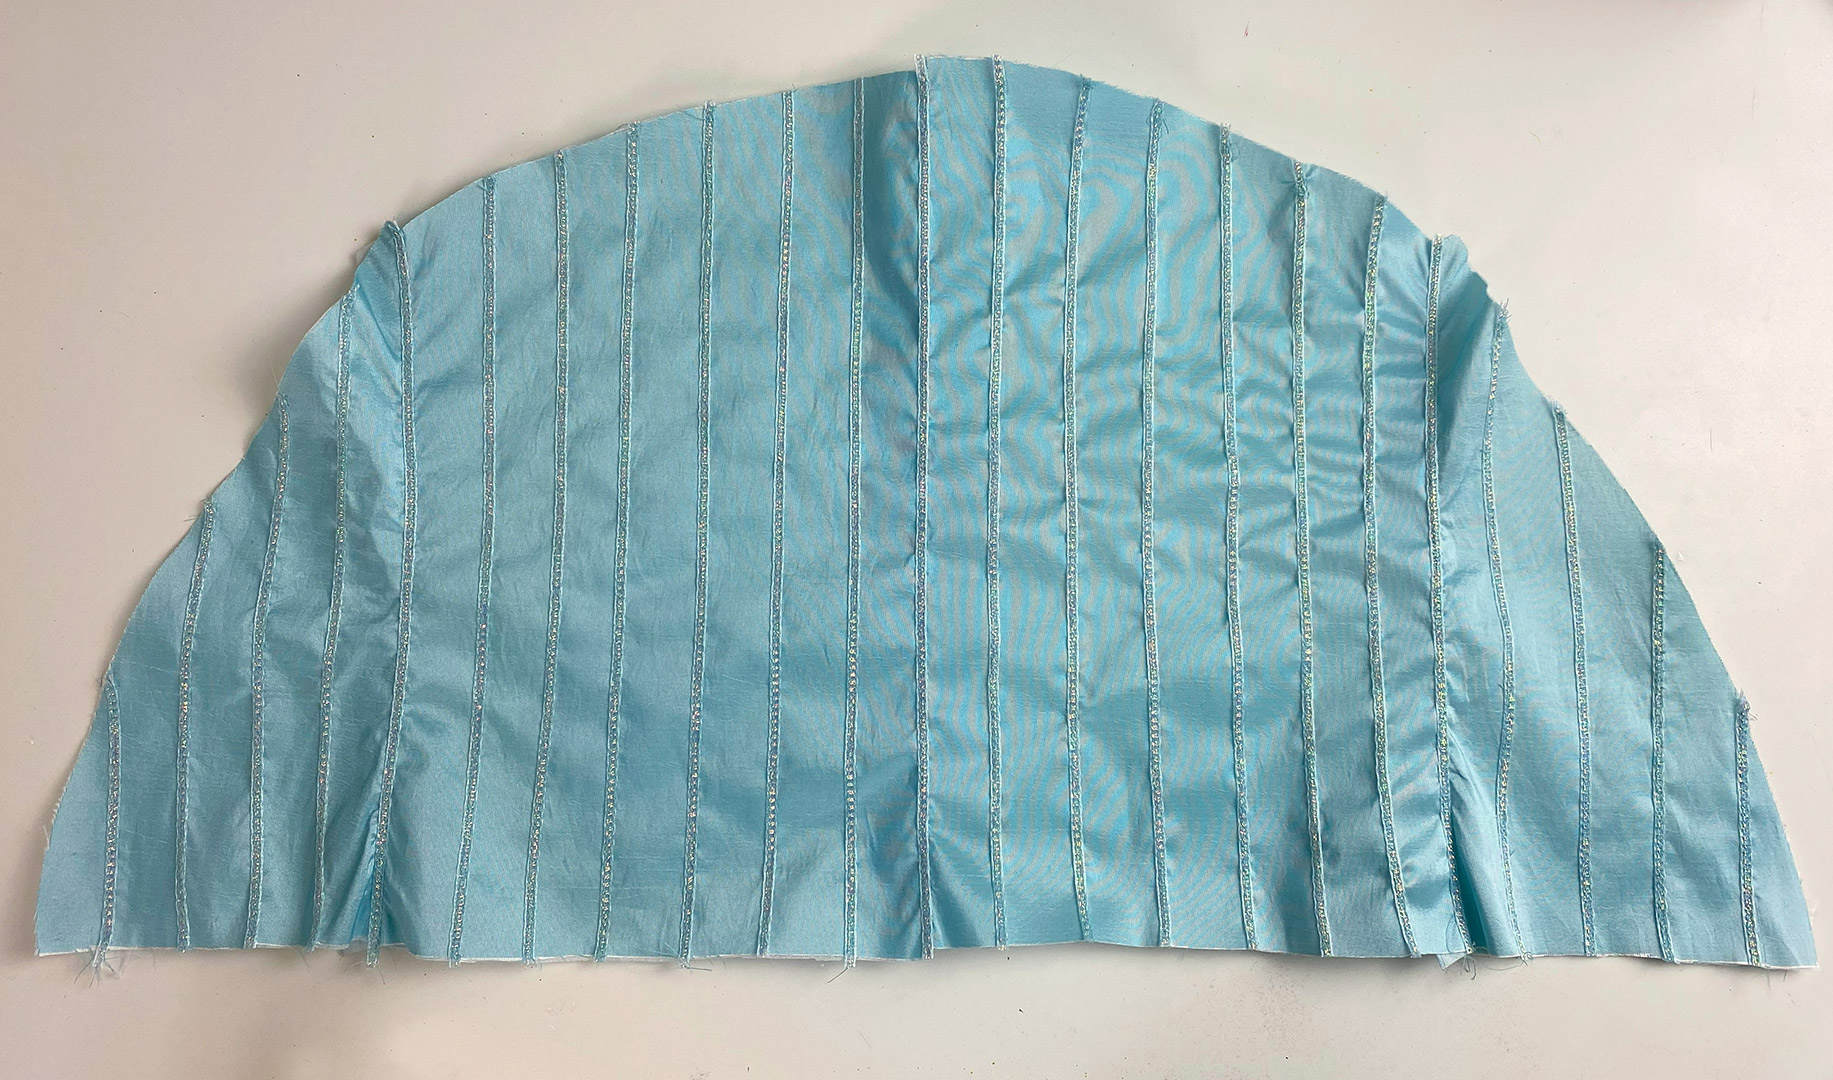
Assembling the Pieces Together
After all the peplum stripes were sewn down, I was then able to sew the taffeta and satin lining together. The buckram layer was then sewn with its seam allowances facing my satin lining and the right side facing the taffeta layer. I then clipped the corners and turned the peplum right side out. Once the peplum was turned right side out, I then pressed the hem.
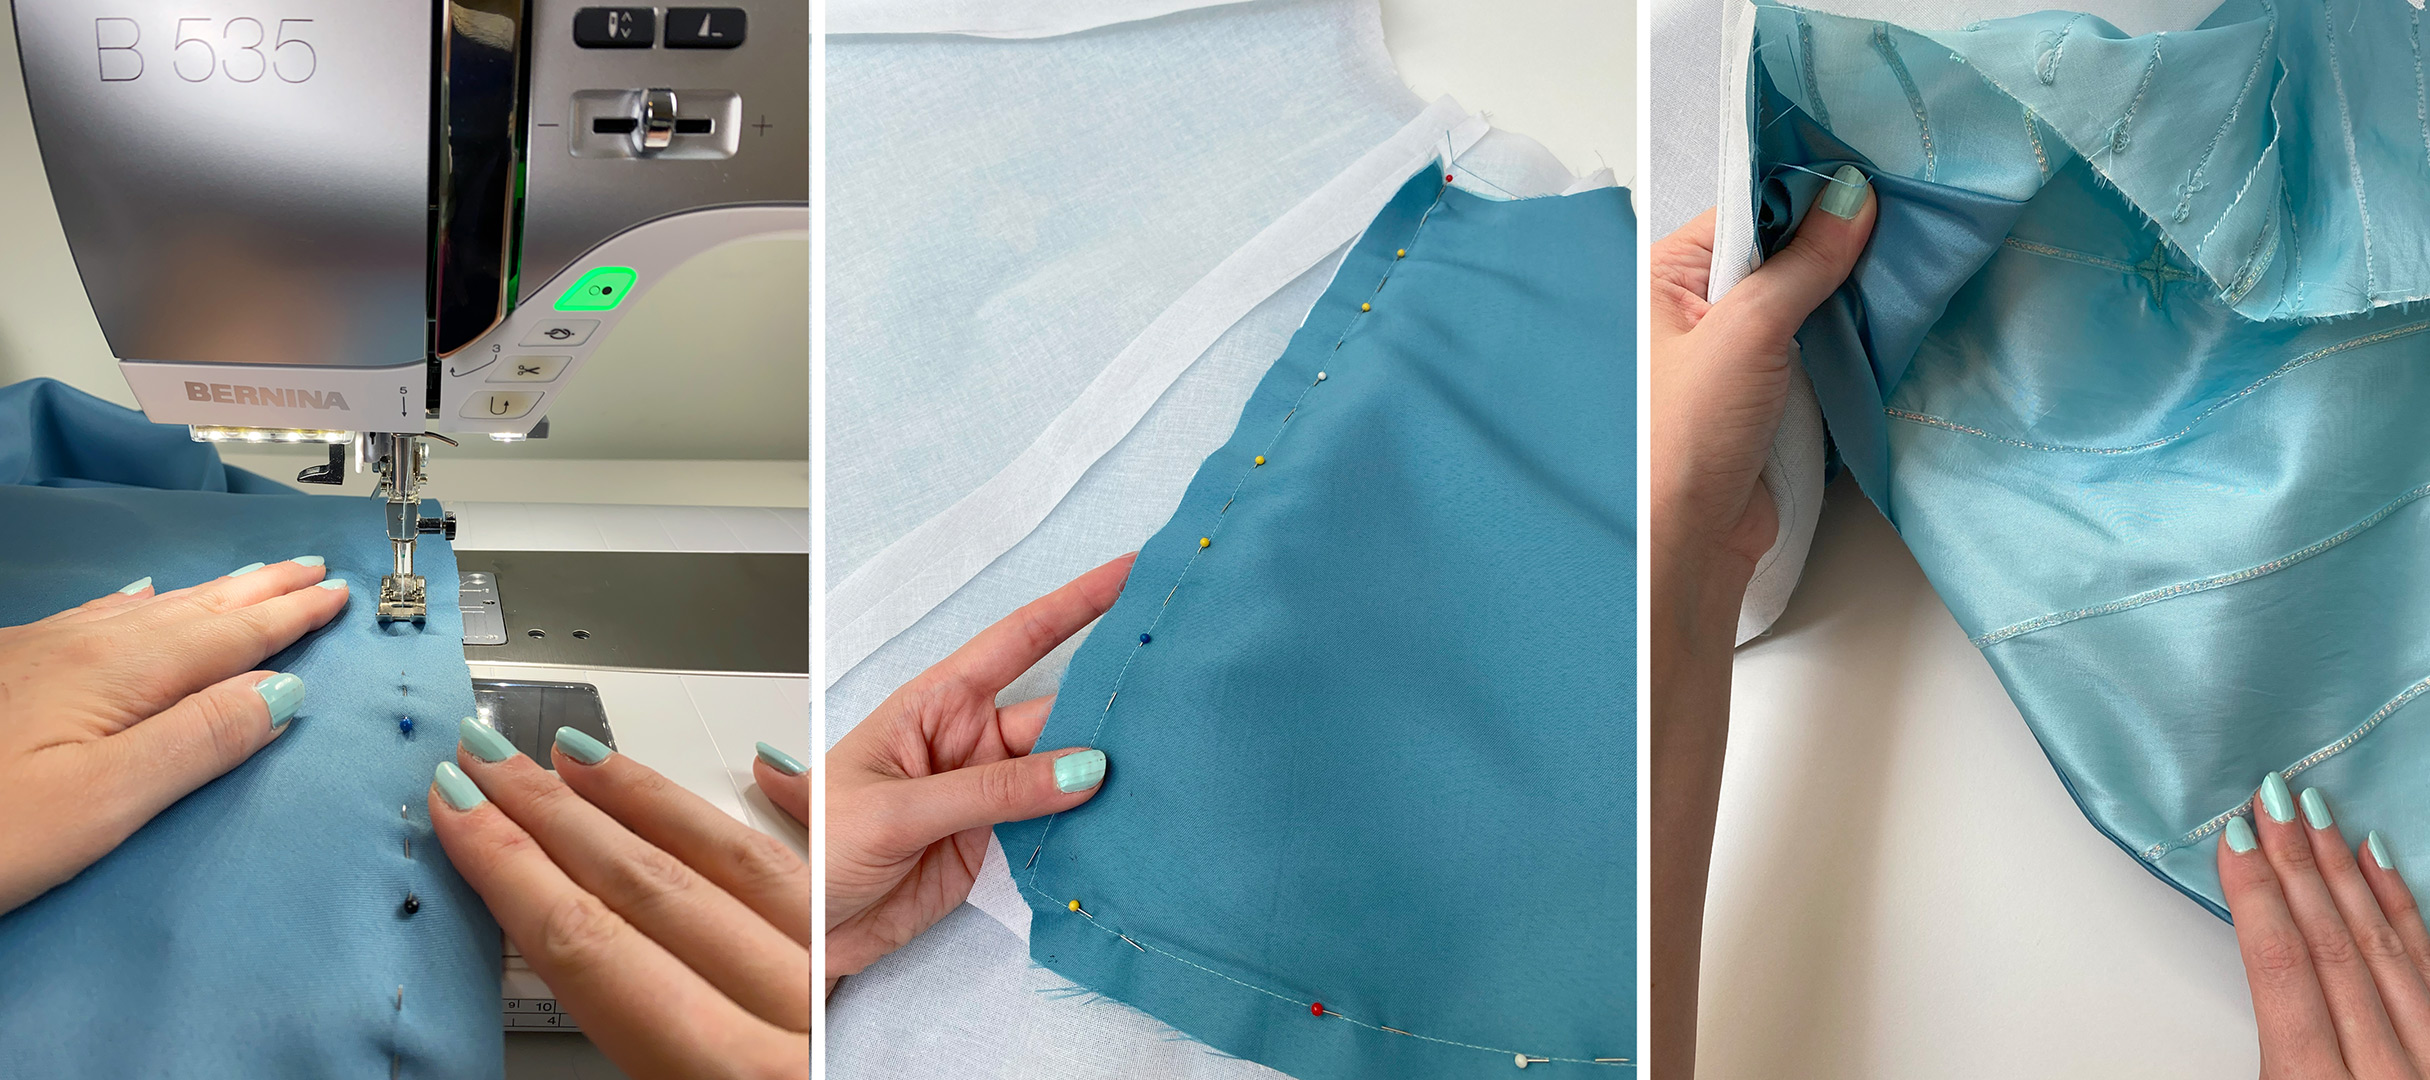
For the waist portion, I sewed my satin lining to the taffeta layer. The waist was then turned right side out and pressed. Before stitching the waist closed, I added 1/4″ plastic boning inside the satin lining’s boning channels.
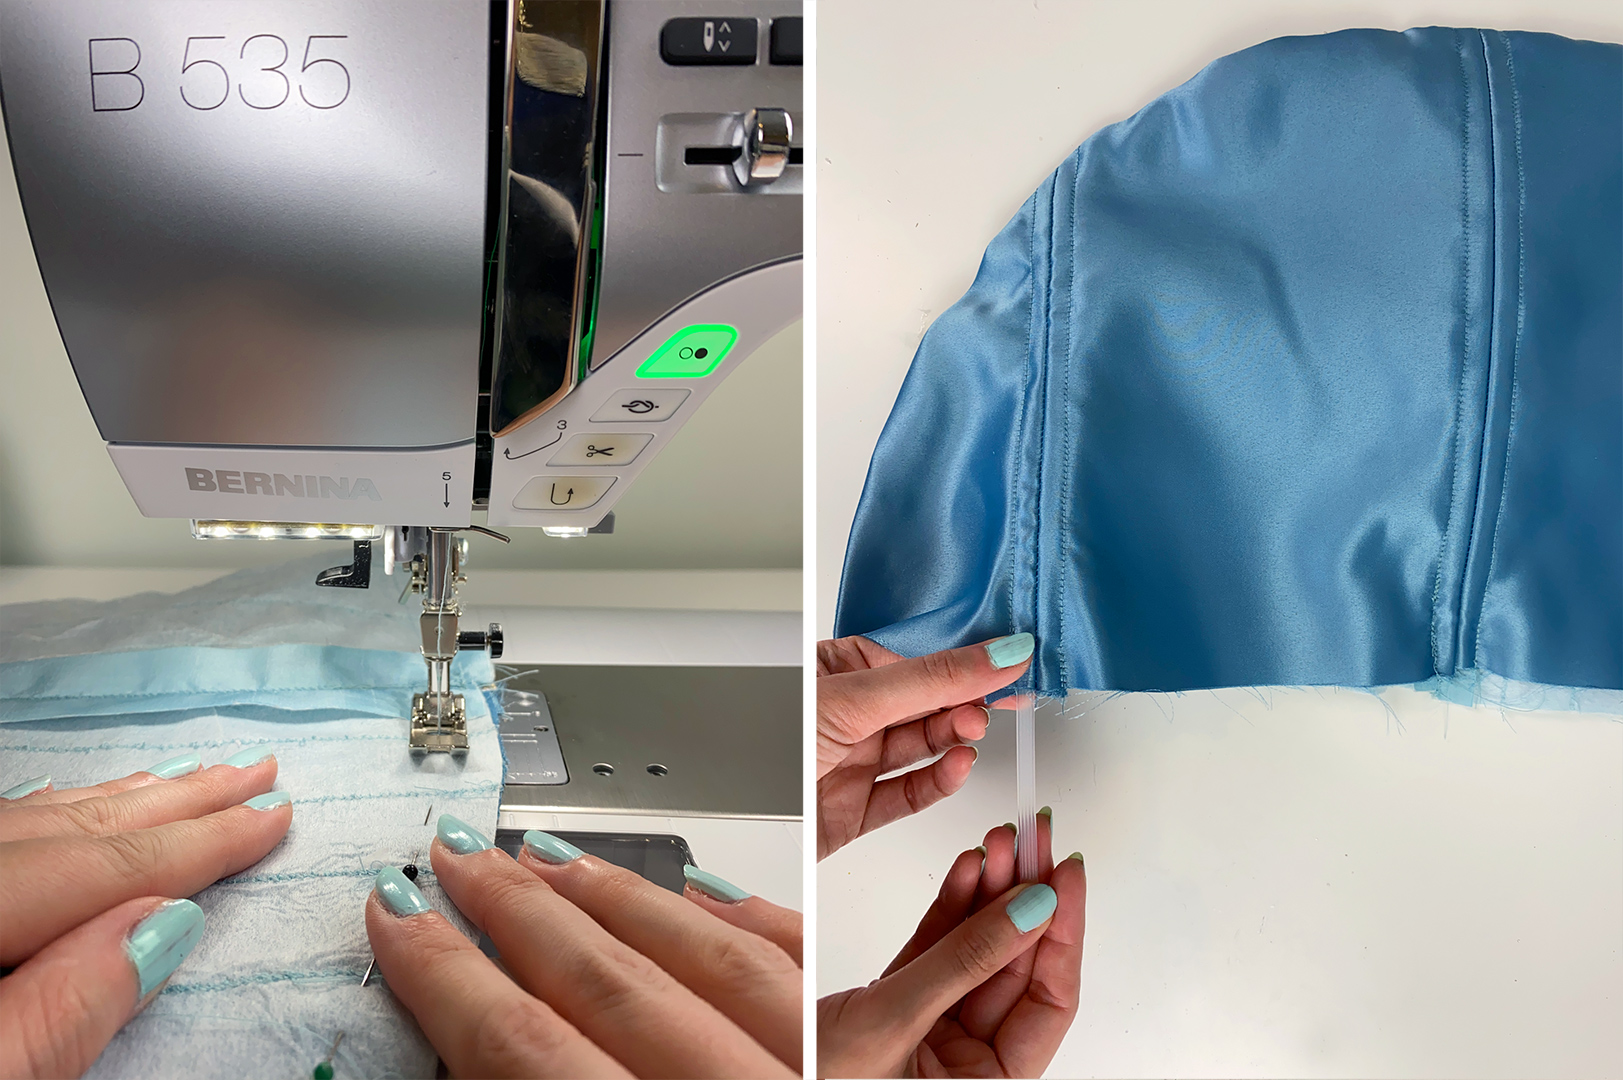
To assemble the waist and peplum together, I began by pinning the pieces together. While pinning, I tried to also get the stripes to align as closely as possible. Once the pieces were pinned, I then carefully and slowly sewed the pieces together. I left the lining as is with the raw edge. The raw edge will be covered when the floor-length skirt lining is hand stitched to the peplum in my next blog entry.
For the bird accessories, I purchased a pair of furniture appliques. They were spray-painted silver and I glued pin backs to the back of each. When they are worn on the peplum, a chain is draped in the front between the birds.

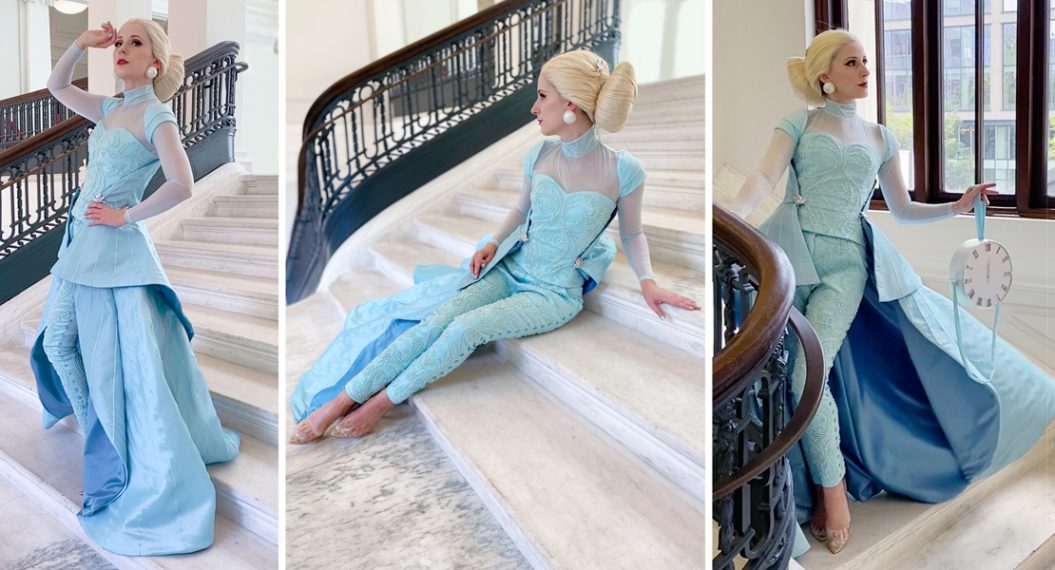
Peplum complete! I will be showing how to create the floor-length skirting in my next and final blog post for this project. I will also be sharing photos of my complete Cinderella cosplay project at her convention debut. I’m so excited to share the final look!
To see what else I am up to, you can follow me on Instagram, TikTok, and Facebook.
Used Products

What you might also like


2 comments on “Creating the Peplum for a High Fashion Cinderella Cosplay”
-
-
And how is the front rise fit corrected?
-
Leave a Reply
You must be logged in to post a comment.

The sewing and embellishment of this project was exquisite. I am sure it took many hours, even considering you used your machine rather than hand sewing. Your attention to detail was also extrodinary. I am really impressed.
However, the one flaw was that the pant front rise did not fit you well. I noticed because I struggle with that, especially in ready to wear, or purchased patterns. Still it is a beautiful garment that you should be proud to wear.