Gathering with an Overlocker
A great advantage to using an overlocker is differential feed. Learn the basics of this machine function and how to use it to create a gathering or stretching effect in your projects. Further enhance your ruffles by using the gathering presser foot. This lesson will show you how!
Supplies for Overlocker Gathering:
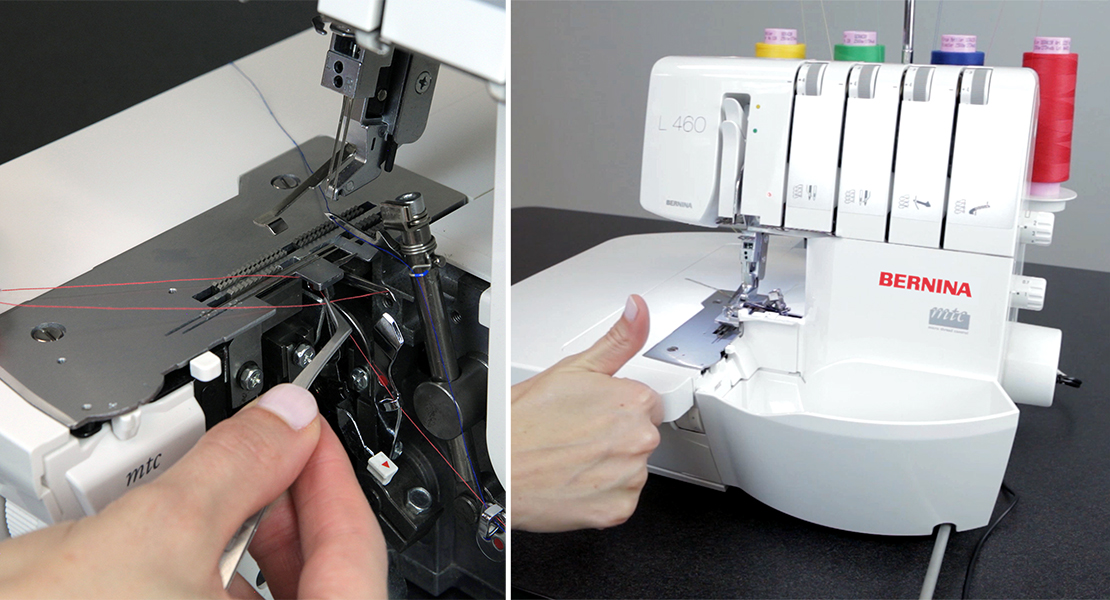
- BERNINA L 460
- Gathering Foot
- BERNINA L 460 Machine Manual (page 22)
- Seracor thread (color order for threading: blue, red, green, and yellow)
- 80/12 Universal needle
- Fabric
- (4) Gathered Fabric: 4” x 18”
- (3) Flat Fabric: 4” x 10”
Understanding Differential Feed Function
Differential feed is a feature found on most overlockers today, but it takes some understanding to fully comprehend the benefits for your sewing.
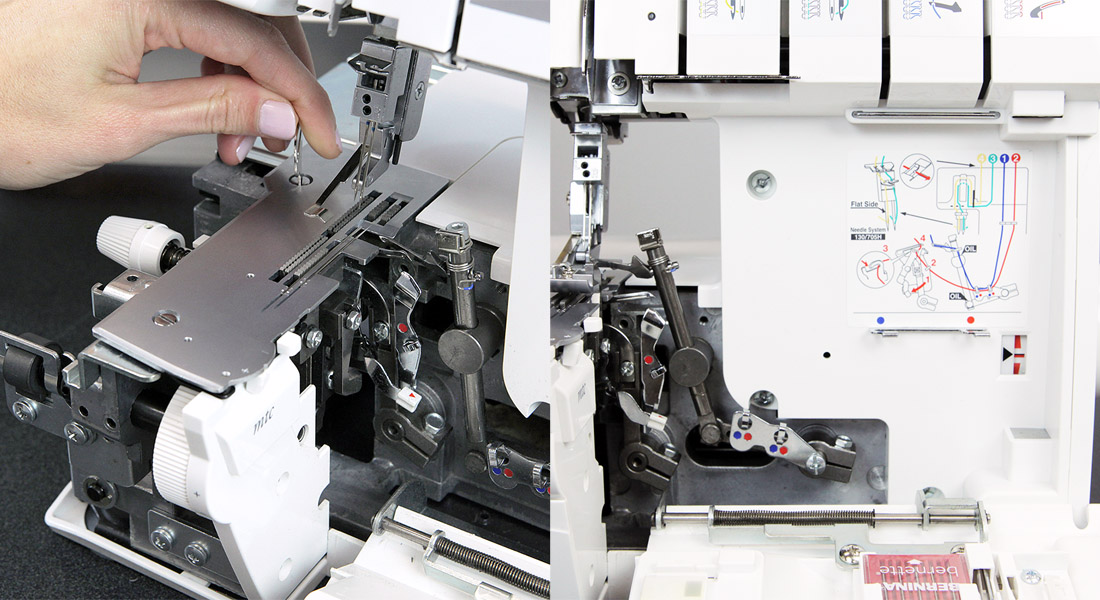
Did you realize that your overlocker has two sets of feed dogs that move the fabric through the machine? This gives you a mechanical advantage for controlling the fabric and when you adjust differential feed, you are in fact adjusting the rate at which the front feed dog moves.
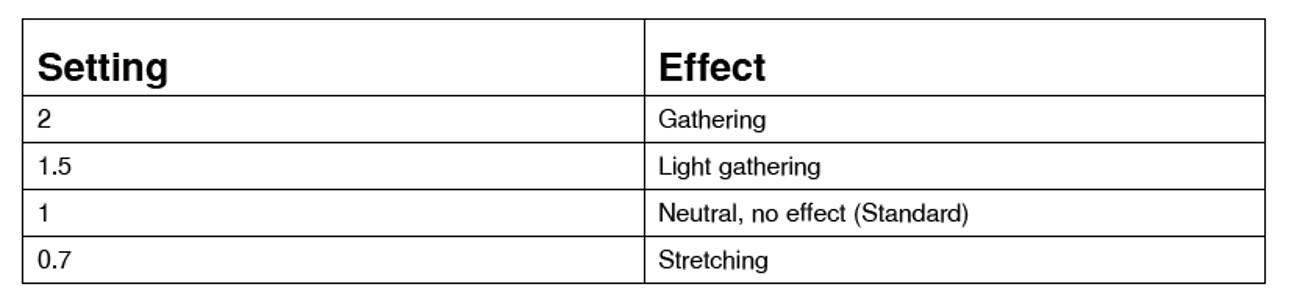
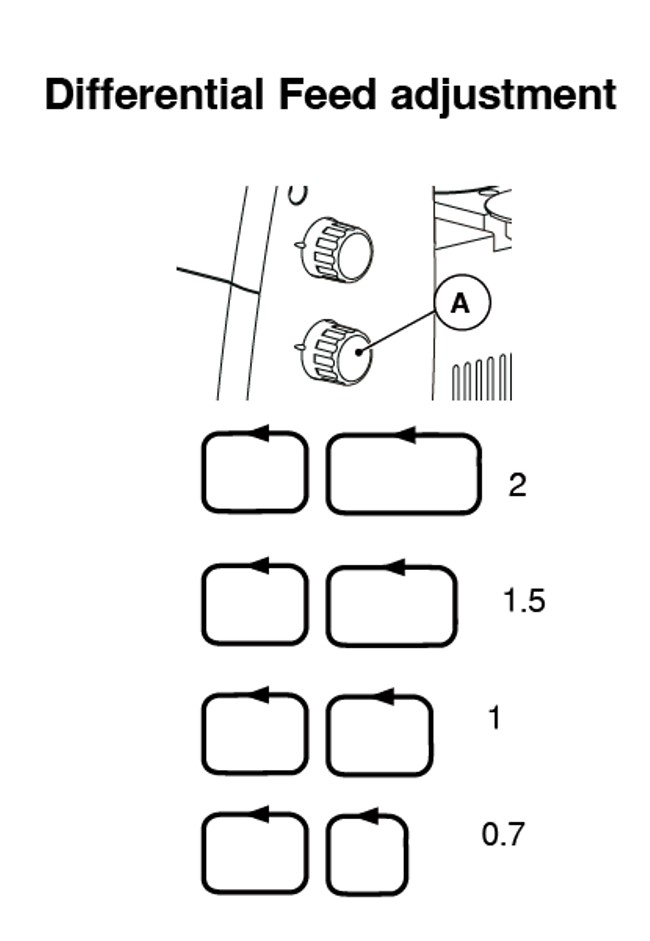
Tip: Look at the diagram in the manual and the differential feed knob and settings together.
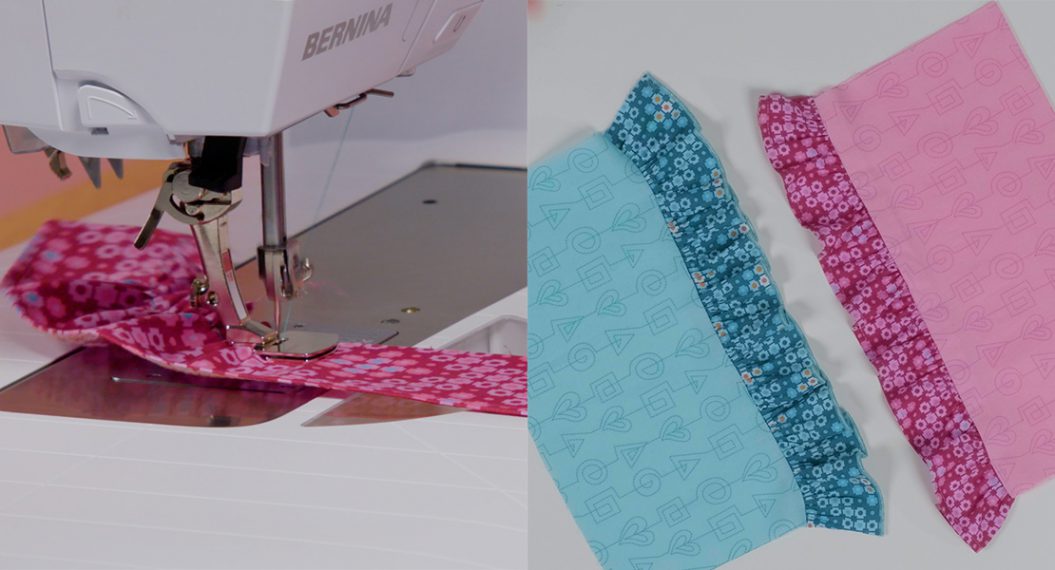
Sample 1. Sew with Differential Feed set at 1
Begin with the machine set to the standard 4-thread overlock and sew along one long edge (18”) with the differential feed setting at 1 to see that the setting typically achieves a nice flat seam.
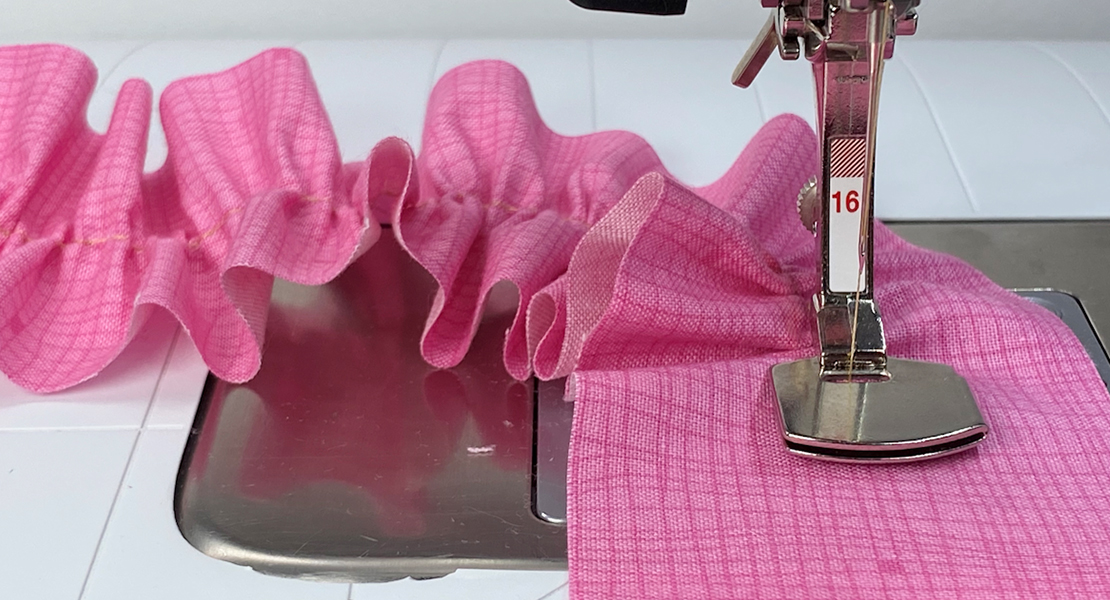
Sample 2. Change Differential Feed to 2
Along the opposite edge of the fabric you just sewed, now sew the edge with the differential feed setting at 2. Notice how the fabric gathers up when using this setting. This is because that front feed dog is moving about twice the amount of fabric at the back feed dog.
Sample 3. Adjust Needle Tension and Stitch Length Settings
Furthermore, if you tighten the needle tensions and adjust the stitch length to a longer setting, you can increase the amount that your fabric is gathering.
Tip: To achieve even more gathering, run the already gathered fabric through the machine more than once, each time gathering it up a little bit more (remember to cut your fabric wide enough to accommodate multiple trimming passes).
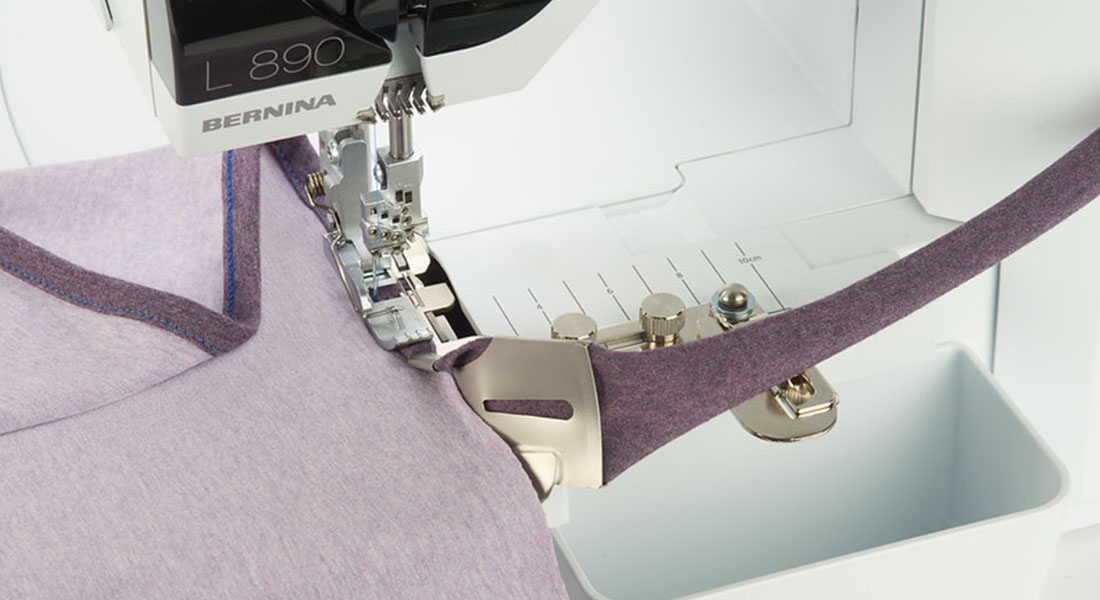
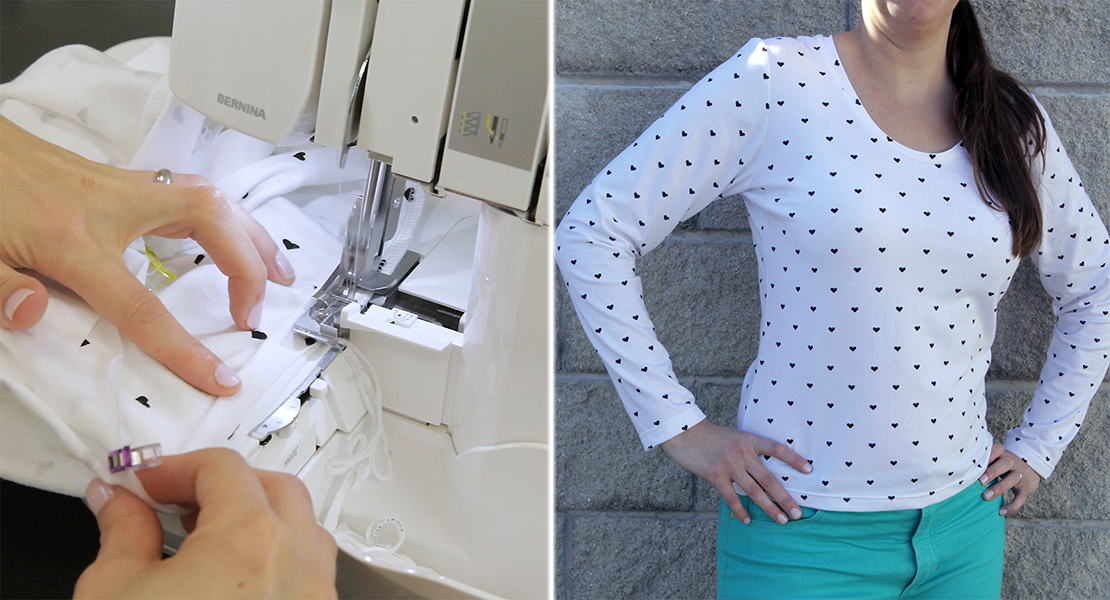
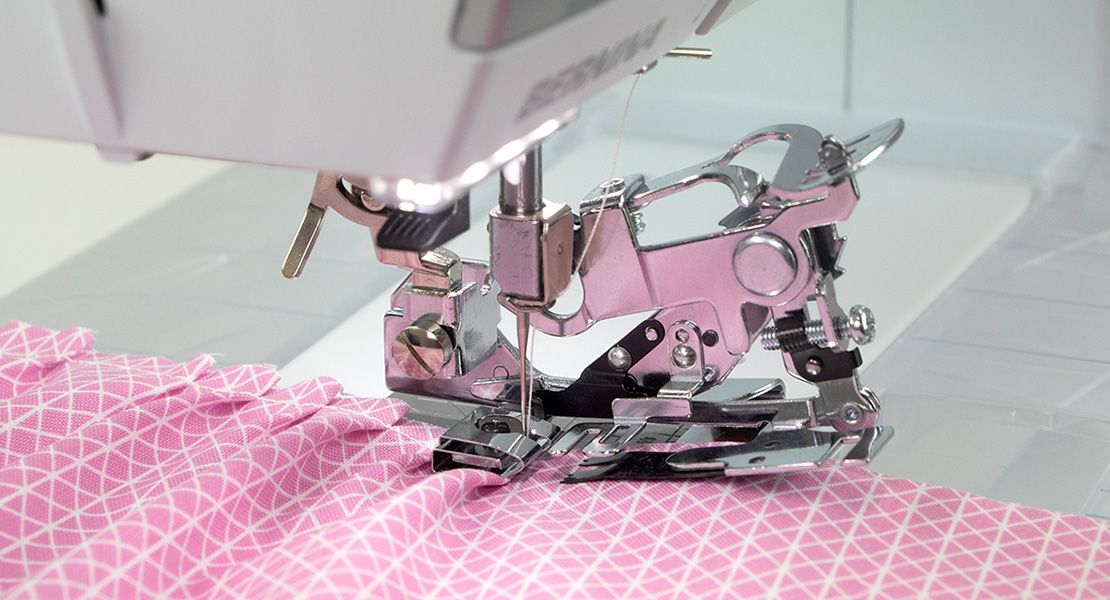
Sample 4. Gathering Foot
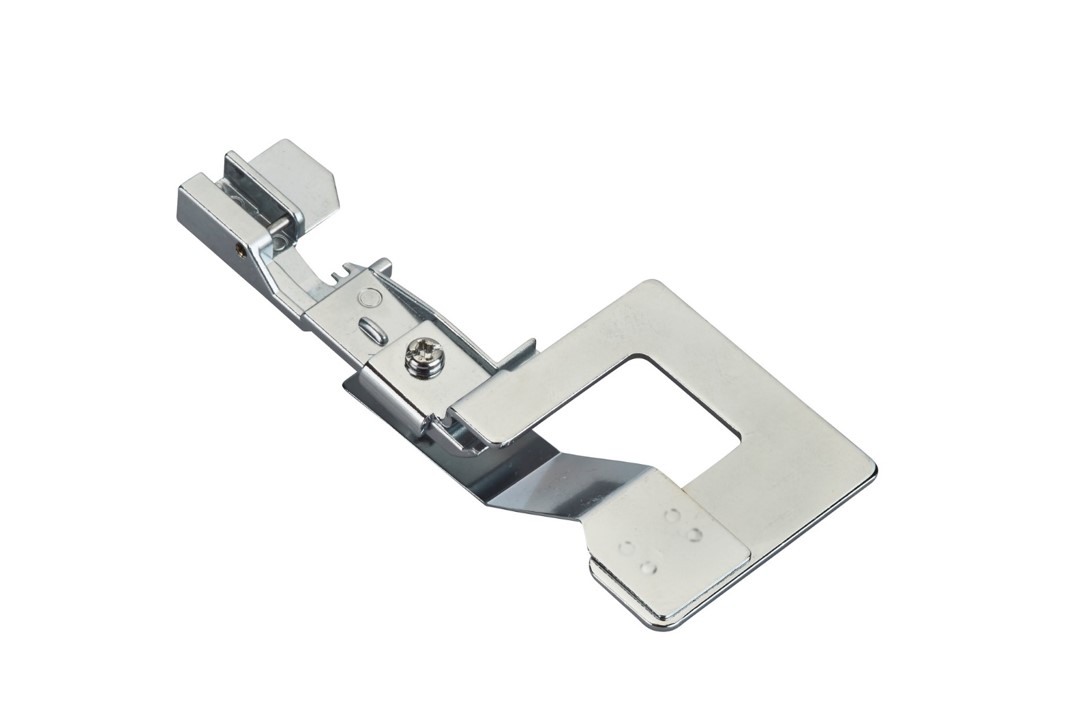
Another option for the overlocker is to use a gathering foot. The shape of this foot assists in holding the fabric to be gathered while also allowing for it to be sewn to a flat fabric. The fabric that is to be gathered should be underneath the foot against the feed dogs, while the flat fabric will slide between the opening on the foot and the bottom metal edge of the foot.
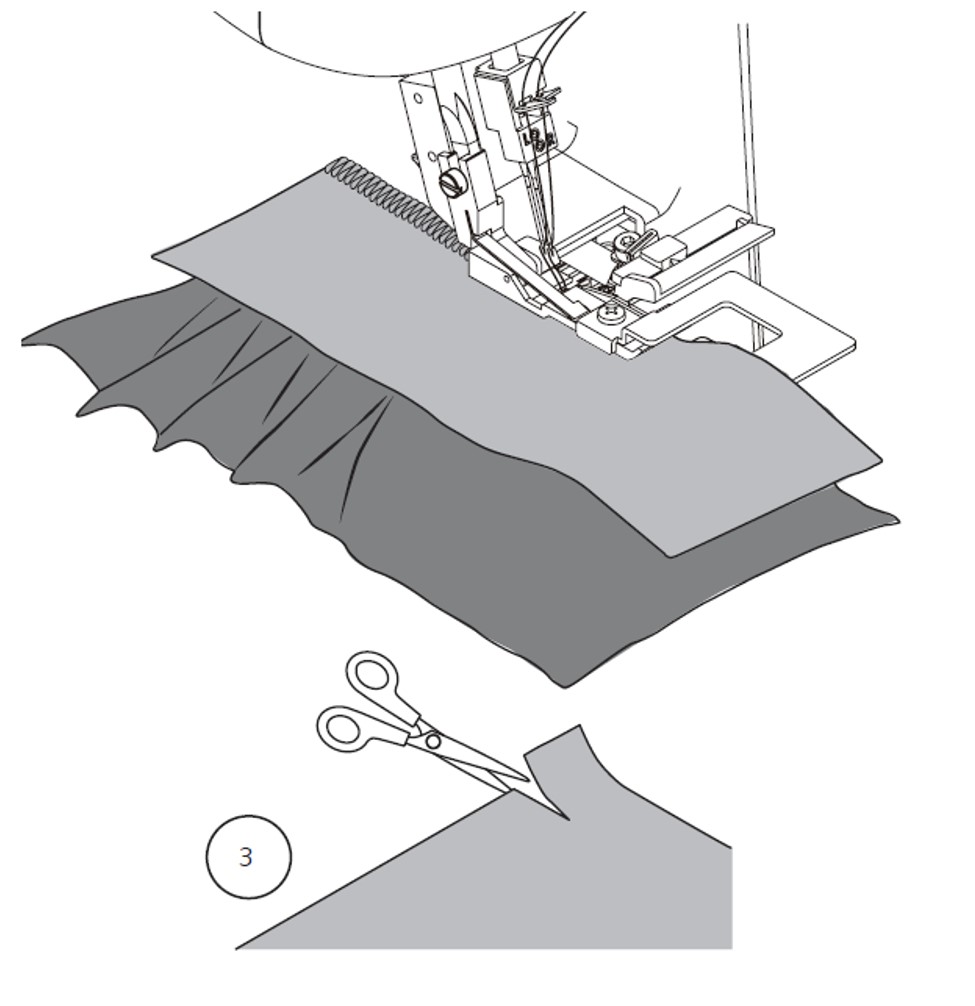
To begin, trim the edge of the fabric that will be gathered in order for it to be able to move past the cutting knife and underneath the needles. Slide that piece of fabric underneath the entire foot just below the needles with fabric right side up. Then place the flat fabric between the flat metal plate and under the presser foot, making sure right sides are together and the fabrics align at the beginning.
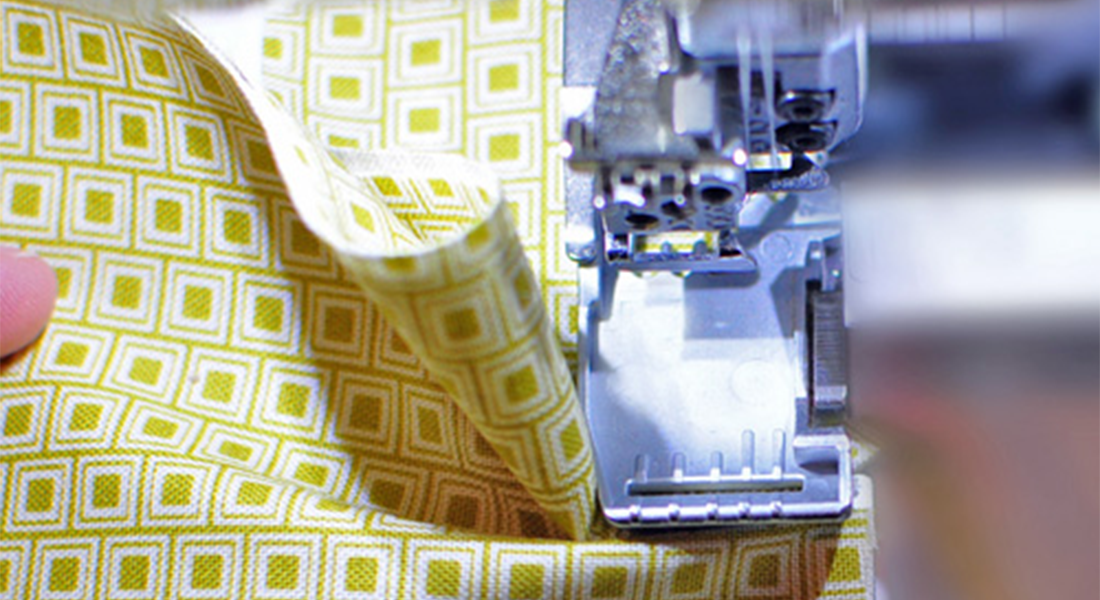
Use the handwheel to advance through the first 3-4 stitches, then carefully hold both pieces of fabric in place allowing the machine to move the fabric through while joining the gathered edge.
Tip: Keep in mind that the lower fabric will move faster than the top fabric. It takes some practice in learning how to hold the fabrics comfortably.
Sample 5. Determine Percentage of Gather
With your favorite method and settings for gathering, you can roughly determine a percentage of gathering to calculate lengths for your project. Sew a 10” length of fabric with the desired settings. Measure the final length once gathered.
For example, if the length is 7”, the percentage would be 7/10 or 70%. This means that for your final project you would need to add approximately 30% more length to the final measurement. If your finished perimeter was around an 18” square pillow, the overall finished length would be 72” and the amount of ruffle would need to be (perimeter X 1.3) 94” long.
Tip: This calculation provides a rough estimate, so it is always recommended to add in a few extra inches to ensure that you don’t end up short.
BERNINA Made to Create Studio Online Lessons
Equilateral Triangle Table Runner
Free-motion Quilting with Rulers
How to Quilt Feathers with Free-motion and Rulers